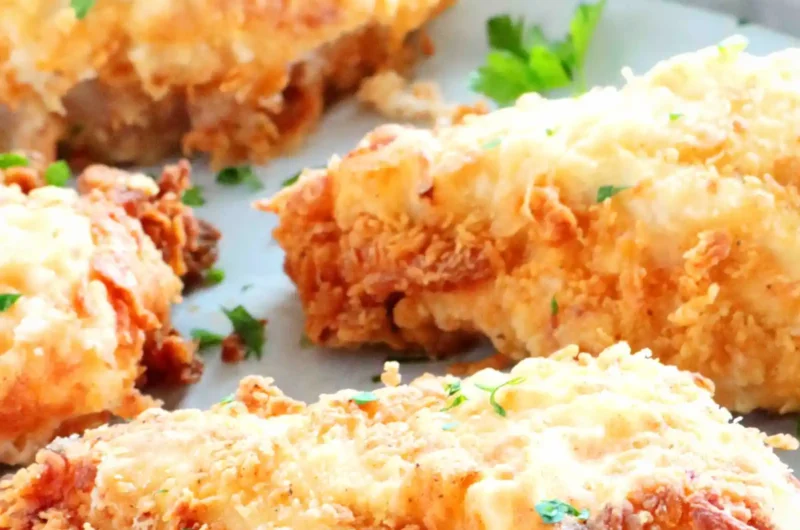
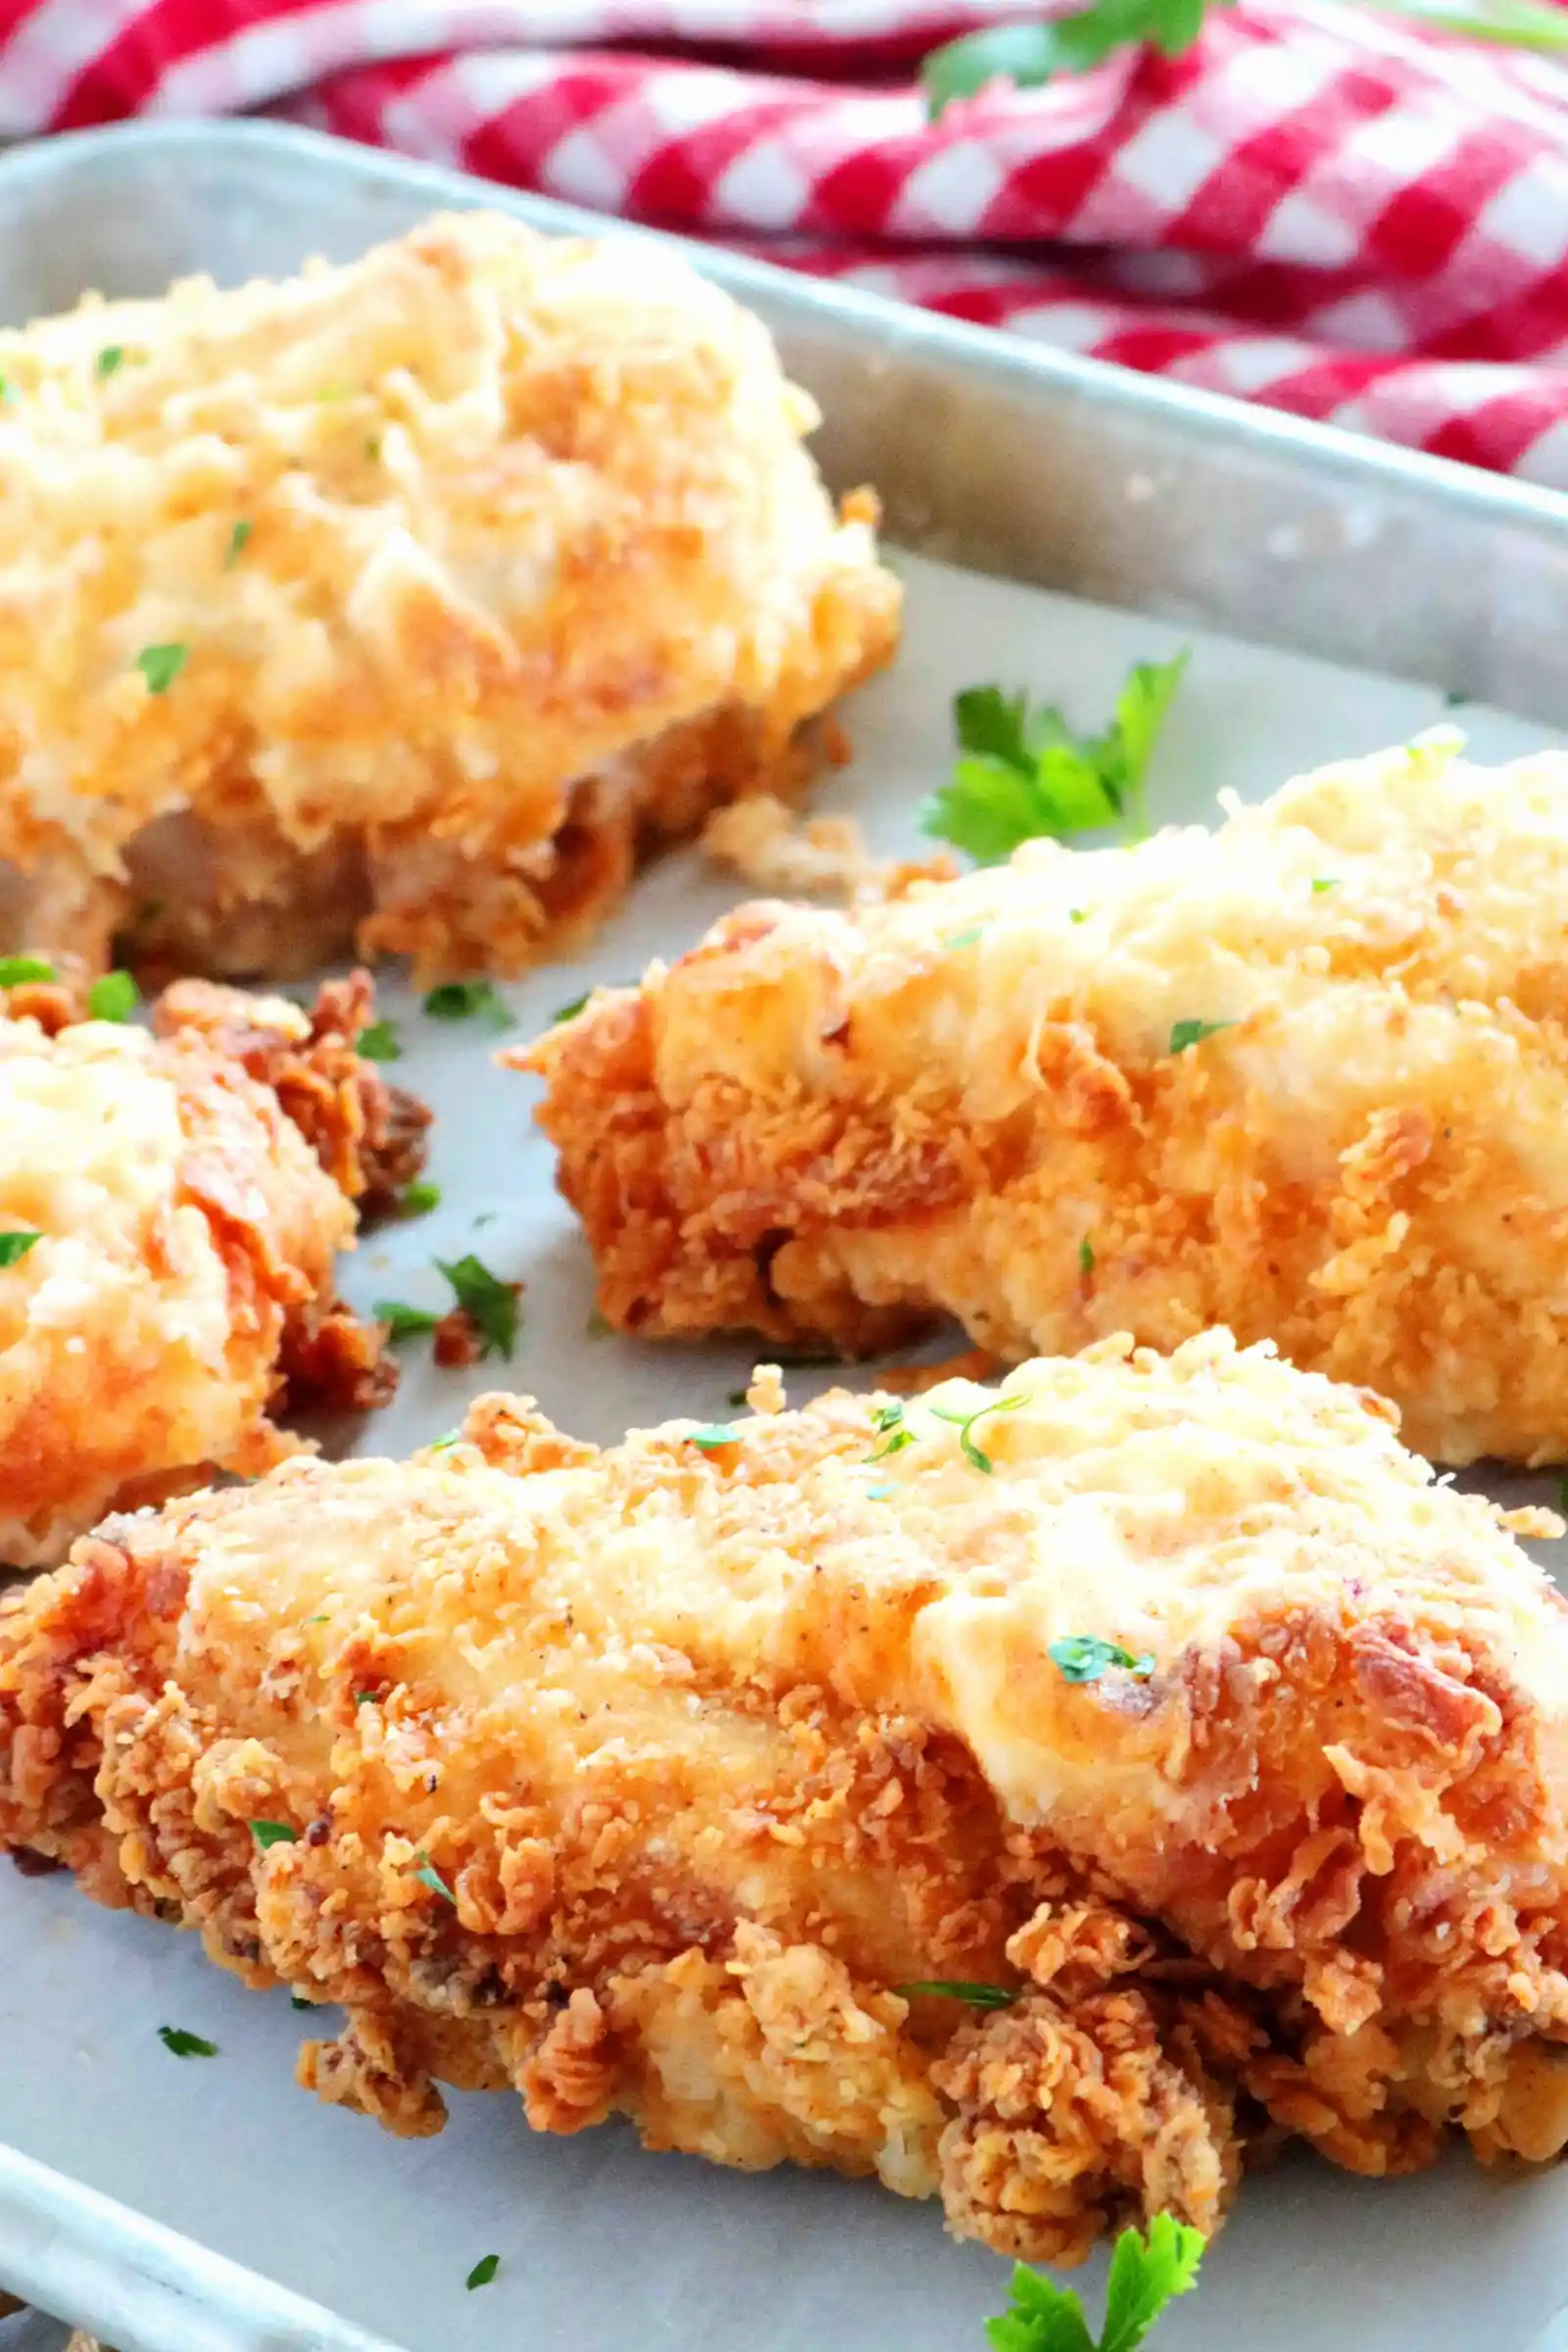
This method produces an irresistibly crunchy golden exterior and juicy white meat. By combining a shallow fry with a brief oven finish, you ensure the chicken is cooked perfectly through without burning the breading.
List of ingredients
- 2 cups buttermilk – used to tenderize the meat and help flour adhere.
- 2 teaspoons hot sauce – adds a subtle tang and depth of flavor.
- 4 boneless, skinless chicken breasts – the primary protein for the dish.
- 2 1/2 cups all-purpose flour – creates the base for the crispy crust.
- 1 tablespoon Kosher salt – essential for seasoning the coating.
- 1 teaspoon black pepper – provides a classic savory spice.
- 1 1/4 teaspoon paprika – adds color and a mild earthy flavor.
- 3/4 teaspoon garlic powder – contributes aromatic savory notes.
- 1/2 teaspoon onion powder – adds a subtle sweetness and depth.
- 2 cups canola oil – high smoke point oil for frying.
step-by-step instructions
- Marinate: In a large bowl, stir together the buttermilk and hot sauce. Add the chicken breasts, cover tightly with plastic wrap, and refrigerate for at least 2 hours or up to 24 hours.
- Temper: Set out the chicken (still in the buttermilk) at room temperature for 30 minutes prior to cooking to remove the chill.
- Prepare Oven: Preheat the oven to 350° and have ready a rimmed baking sheet lined with aluminum foil.
- Bread: Add the flour and spices to a large gallon-sized Ziplock bag and mix to combine. Transfer the chicken directly from the buttermilk to the Ziplock bag, seal, and shake until the chicken is evenly coated with the flour mixture. Set aside.
- Fry: Add the oil to a large frypan and allow it to come to temperature, between 350-375°. Add the chicken to the pan, two breasts at a time, and fry for 2 – 2 1/2 minutes on the first side, then turn and fry for 1 1/2 – 2 minutes on the second side.
- Bake: Transfer the chicken to the prepared baking sheet and bake for 15-17 minutes (until the chicken registers an internal temperature of 165°). Remove from the oven, serve and enjoy!
Essential Kitchen Tools
Cast Iron Skillets for Heat Retention
A cast iron skillet is the ideal choice for this recipe because it distributes heat evenly. This prevents cold spots in the oil and ensures a consistent golden brown color across the entire chicken breast.
Digital Meat Thermometers for Accuracy
Using a digital thermometer is critical to avoid undercooking or drying out the meat. It allows you to verify that the oil is between 350-375° and that the chicken reaches a safe internal temperature of 165°.
Gallon-Sized Ziplock Bags for Coating
Using a large plastic bag for the dredging process keeps your workspace clean. It allows you to shake the flour and spices into every crevice of the chicken without creating a mess on your counters.
Rimmed Baking Sheets for Finishing
A rimmed baking sheet prevents oil from dripping onto your oven racks. Lining the sheet with aluminum foil makes cleanup fast and prevents the chicken from sticking to the metal surface.
Ingredient Deep Dive
The Role of Buttermilk in Tenderizing
Buttermilk contains lactic acid and enzymes that break down the proteins in the chicken breast. This process results in a more tender texture and helps the flour coating stick more effectively to the meat.
Selecting the Best Frying Oil
Canola oil is recommended due to its high smoke point and neutral flavor profile. You can also use vegetable oil or peanut oil, as both can withstand the high temperatures required for frying without smoking.
Choosing Quality Chicken Breasts
Opt for boneless, skinless breasts that are similar in size for even cooking. If the breasts are very thick, you may need to slightly increase the oven time to reach the safe internal temperature.
Using Hot Sauce for Flavor Balance
The hot sauce in the marinade is intended to add acidity and depth rather than intense heat. If you prefer a milder taste, you can reduce the amount or omit it without affecting the texture of the chicken.
Pro Cooking Techniques
Maintaining Consistent Oil Temperature
If the oil is too cold, the breading will absorb too much fat and become greasy. If it is too hot, the crust will burn before the meat is cooked; use a thermometer to keep it between 350-375°.
Avoiding Pan Overcrowding
Fry only two breasts at a time to avoid dropping the oil temperature too significantly. Overcrowding the pan leads to steaming rather than frying, which results in a soggy crust.
Bringing Meat to Room Temperature
Removing the chill from the chicken for 30 minutes before frying ensures more even cooking. Cold meat can cause the oil temperature to plummet, which affects the crispiness of the batter.
Ensuring a Thorough Flour Coat
Shake the Ziplock bag vigorously to ensure there are no bare spots on the chicken. A complete coating protects the meat from the direct heat of the oil and creates a uniform crunch.
Customizations and Alternatives
Substituting for Gluten-Free Needs
You can replace the all-purpose flour with a high-quality 1:1 gluten-free flour blend. Ensure the blend contains a binder like xanthan gum to help the coating adhere to the buttermilk-soaked chicken.
Adding Extra Spice Profiles
For a spicier crust, add a teaspoon of cayenne pepper or smoked paprika to the flour mixture. You can also add dried oregano or thyme for a more herbal, aromatic profile.
Adapting for Bone-In Chicken Breasts
This method works for bone-in, skin-on breasts, but they require more cooking time. You will need to increase the duration in the oven to ensure the meat near the bone reaches 165°.
Alternative Flour-Based Binders
Replacing a small portion of the flour with cornstarch can result in an even crispier texture. This modification creates a thinner, glass-like crunch that stays crispy longer after cooking.
Serving and Pairing Ideas
Classic Southern Side Dishes
Serve these chicken breasts with creamy mashed potatoes and homemade country gravy. These rich sides complement the salty, crunchy nature of the fried chicken perfectly.
Fresh Vegetable Accompaniments
Steam some fresh green beans or serve a crisp coleslaw on the side. The acidity and freshness of these vegetables cut through the richness of the fried batter.
Complementary Dipping Sauces
While delicious on their own, these breasts pair well with honey mustard or a spicy ranch dip. A drizzle of maple syrup can also provide a sweet contrast to the savory spices.
Storage and Reheating Advice
Safe Refrigeration Practices
Place leftover chicken in an airtight container once it has cooled completely. Store it in the refrigerator for up to three to four days to maintain quality and safety.
Reheating with the Oven
To maintain crispiness, reheat the chicken in a 350° oven for 10-15 minutes. Avoid using a microwave, as it will make the breading soft and rubbery.
Using an Air Fryer for Leftovers
An air fryer is an excellent tool for reheating fried chicken. Heat at 375° for 3-5 minutes until the exterior is hot and crunchy again.
Freezing for Long-Term Storage
Flash-freeze the chicken on a tray before transferring it to a freezer bag. This prevents the pieces from sticking together and allows them to be reheated individually.
Troubleshooting Common Issues
Preventing the Coating from Peeling
Ensure the chicken is well-coated in flour and let it rest for a few minutes before frying. This allows the flour to hydrate and bond more securely to the buttermilk marinade.
Fixing Underdone Meat
If the breading is golden but the meat is under 165°, simply leave it in the oven longer. The oven-finishing step is specifically designed to handle this without burning the crust.
Managing Oil Splatter
Carefully lower the chicken into the oil using tongs to avoid splashing. Patting off excess buttermilk before dredging can also reduce the amount of moisture that causes popping.
Avoiding Burnt Breading
If the flour is browning too quickly, lower the heat of your skillet slightly. If you notice dark spots, check that your oil temperature hasn’t exceeded 375°.
Frequently Asked Questions
Can I skip the buttermilk soak?
You can use plain yogurt or a mixture of milk and lemon juice, but skipping the soak entirely will result in less tender meat and a coating that doesn’t stick as well.
How do I know when the oil is ready?
The most accurate way is using a thermometer. Alternatively, drop a small pinch of flour into the oil; if it sizzles immediately, the oil is hot enough for frying.
Can I use a different temperature for the oven?
350° is the optimal temperature to finish the cooking without over-browning the crust. Higher temperatures may burn the exterior before the center is fully cooked.
Is the hot sauce mandatory?
No, the hot sauce is optional and mainly used for flavor enhancement. If you omit it, the chicken will still be crispy and delicious, just slightly less tangy.
Print
Crispy Buttermilk Fried Chicken Breast
- Total Time: 2 hours 30 minutes
- Yield: 4 servings 1x
- Diet: General
Description
Southern Fried Chicken Breast are irresistibly crunchy and golden on the outside with flavorful, tender white meat on the inside!
Ingredients
- 2 cups buttermilk
- 2 teaspoons hot sauce
- 4 boneless, skinless chicken breasts
- 2 1/2 cups all-purpose flour
- 1 tablespoon Kosher salt
- 1 teaspoon black pepper
- 1 1/4 teaspoon paprika
- 3/4 teaspoon garlic powder
- 1/2 teaspoon onion powder
- 2 cups canola oil
Instructions
- Marinate: In a large bowl, stir together the buttermilk and hot sauce. Add the chicken breasts, cover tightly with plastic wrap, and refrigerate for at least 2 hours or up to 24 hours.
- Temper: Set out the chicken (still in the buttermilk) at room temperature for 30 minutes prior to cooking to remove the chill.
- Prepare: Preheat the oven to 350° and have ready a rimmed baking sheet lined with aluminum foil.
- Bread: Add the flour and spices to a large gallon-sized Ziplock bag and mix to combine. Transfer the chicken directly from the buttermilk to the Ziplock bag, seal, and shake until the chicken is evenly coated with the flour mixture. Set aside.
- Fry: Add the oil to a large frypan and allow it to come to temperature, between 350-375°. Add the chicken to the pan, two breasts at a time, and fry for 2 – 2 1/2 minutes on the first side, then turn and fry for 1 1/2 – 2 minutes on the second side.
- Bake: Transfer the chicken to the prepared baking sheet and bake for 15-17 minutes (until the chicken registers an internal temperature of 165°). Remove from the oven, serve and enjoy!
Notes
For bone-in, skin-on chicken breasts, use the same method but increase the oven baking time to ensure an internal temperature of 165°.
- Prep Time: 10 minutes
- Cook Time: 20 minutes
- Category: Dinner
- Method: Pan-frying and Baking
- Cuisine: American
Nutrition
- Serving Size: 1 chicken breast
- Calories: 580 kcal
- Sugar: 1 g
- Sodium: 1791 mg
- Fat: 25 g
- Saturated Fat: 3 g
- Unsaturated Fat: 22 g
- Trans Fat: 0 g
- Carbohydrates: 32 g
- Fiber: 1 g
- Protein: 53 g
- Cholesterol: 147 mg
Keywords: Pan-Fried Chicken Breasts, Southern Fried Chicken, Crispy Chicken