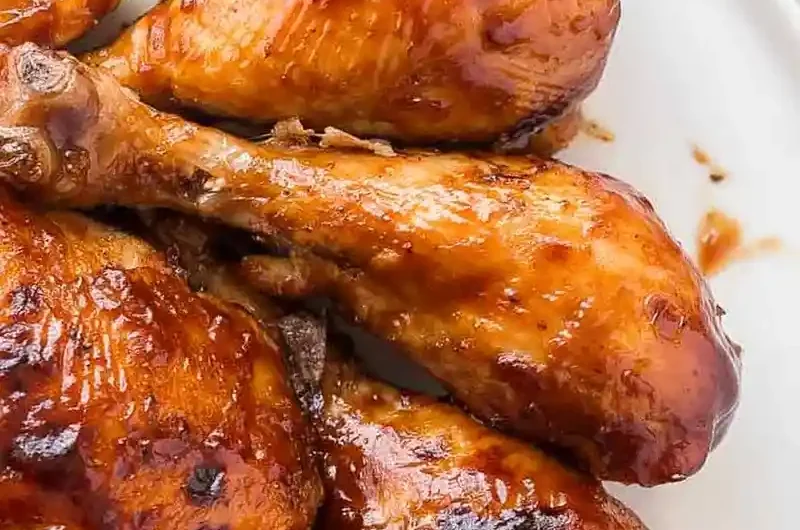
Prepare juicy and tender barbecue chicken quickly using a pressure cooker for a hands-off cooking experience. This method ensures the meat remains moist before finishing it with a high-heat sear for a caramelized crust.
List of ingredients
- 6 bone-in, skin-on chicken drumsticks – can be swapped for skinless.
- 6 bone-in, skin-on chicken thighs – can be swapped for skinless.
- 1 teaspoon salt – enhances overall flavor.
- 3/4 teaspoon garlic powder – adds savory depth.
- 1/2 teaspoon paprika – provides color and mild warmth.
- 1/4 teaspoon dried onion – adds a concentrated onion flavor.
- 1/4 teaspoon black pepper – provides a subtle spicy bite.
- 1 1/2 cups water – chicken broth, juice, or soda can also be used as the cooking liquid.
- 1 teaspoon liquid smoke – adds a traditional grilled aroma.
- 1/2 cup barbecue sauce – used for the final glazing step.
step-by-step instructions
- Arrange Chicken: Place the chicken drumsticks and thighs into a 6 or 8 quart Instant Pot or compatible pressure cooker.
- Apply Seasoning: Mix the salt, garlic powder, paprika, dried onion, and black pepper together, then sprinkle the mixture over the chicken, turning the pieces to ensure all sides are evenly coated.
- Add Liquids: Pour the water (or your preferred clear liquid alternative) and the liquid smoke into the pot, ensuring the liquid stays clear to avoid burning.
- Pressure Cook: Secure the lid, set the valve to the sealing position, and select Manual or Pressure Cook on high pressure for 10 minutes. If the chicken is frozen or partially frozen, increase the time to 12-15 minutes.
- Release Pressure: Once the timer ends, allow the pressure to release naturally for 10-15 minutes before manually opening the valve and removing the lid.
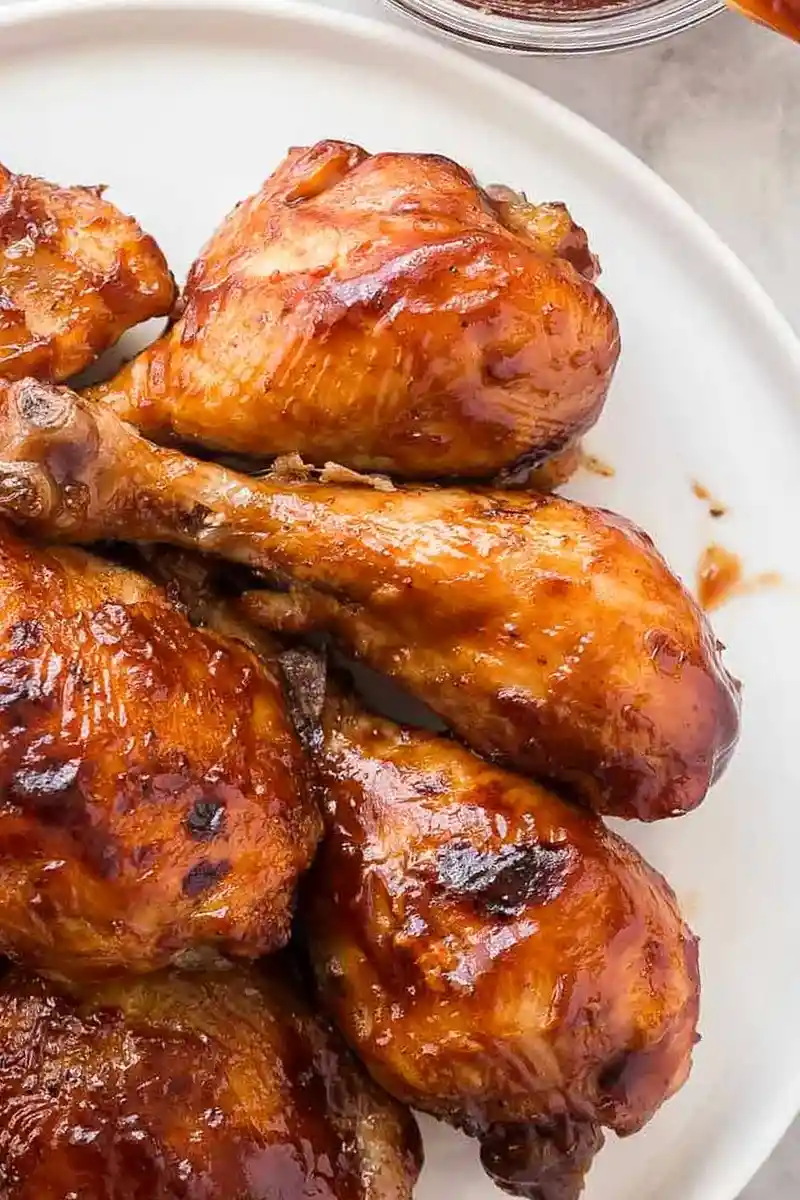
- Sear and Glaze: Remove the chicken from the pot and brush it generously with barbecue sauce. Broil in the oven for 3-4 minutes or place on a hot grill for 4-5 minutes until the skin is crisp and caramelized.
Optimizing Pressure Cooker Performance
Preventing the Burn Notice
Avoid adding the barbecue sauce directly into the pot during the pressure cooking cycle. The high sugar content in most BBQ sauces can caramelize and stick to the bottom, triggering the burn sensor. Use water or broth for the cooking phase and apply the sauce only during the final searing step.
Managing Natural Pressure Release
Allowing the pressure to release naturally for 10 to 15 minutes prevents the muscle fibers from tightening too quickly. This gradual drop in pressure keeps the chicken thighs and drumsticks tender. A quick release can sometimes cause the juices to spray out, leaving the meat drier.
Selecting the Appropriate Pot Size
Using a 6 or 8 quart Instant Pot provides enough space for the chicken to be arranged without overcrowding. If the pot is too full, the steam cannot circulate efficiently, which may lead to unevenly cooked pieces. Ensure there is a small gap between the chicken pieces for the best results.
Ingredient Substitutions and Adjustments
Using Chicken Breasts Instead of Thighs
If you prefer lean meat, you can use chicken breasts instead of bone-in thighs and drumsticks. Reduce the high-pressure cooking time to 8-10 minutes depending on the thickness of the breasts. Overcooking breast meat in a pressure cooker can quickly lead to a rubbery texture.
Alternative Cooking Liquids for Depth
While water is the standard, using chicken broth adds a more savory foundation to the meat. Apple juice or a clear soda can provide a subtle sweetness that complements the barbecue glaze. Ensure whatever liquid you choose is thin and clear to avoid the burn warning.
Customizing the Barbecue Sauce
The recipe is versatile and works with any store-bought or homemade barbecue sauce. For a tropical twist, use a pineapple-infused BBQ sauce. If you prefer a bolder flavor, choose a spicy chipotle or honey-habanero sauce to contrast the tender meat.
Techniques for a Crispy Exterior
Using the Oven Broiler
The broiler is the fastest way to caramelize the sauce if you do not have a grill. Place the sauced chicken on a baking sheet and position the rack close to the heat element. Watch the chicken closely for 3-4 minutes to prevent the sugar in the sauce from burning.
Grilling for Traditional Flavor
For the most authentic BBQ taste, place the pre-cooked chicken on a medium-high heat grill. Place the pieces skin-side down first to render any remaining fat and create a charred crust. Grill for 4-5 minutes, flipping once to glaze the other side.
Air Fryer Finishing Method
An air fryer can be used to achieve a crispy skin without using a grill or oven. Place the sauced chicken in the air fryer basket at 400 degrees Fahrenheit. Cook for 3-5 minutes, which allows the circulating hot air to crisp the skin and thicken the glaze quickly.
Recommended Side Dish Pairings
Classic Creamy Potato Salads
A cold potato salad provides a refreshing temperature contrast to the hot, savory chicken. The acidity from vinegar or lemon juice in the salad helps cut through the richness of the barbecue sauce. Use red potatoes for color and texture in your side dish.
Cheesy Macaroni and Cheese
Hearty sides like baked macaroni and cheese pair well with the smoky profile of BBQ chicken. The creaminess of the cheese balances the tanginess of the sauce. For the best results, use a blend of sharp cheddar and gruyere for a complex flavor.
Fresh and Crunchy Broccoli Salads
Adding a vegetable-based side like a layered broccoli salad provides necessary nutrients and crunch. A dressing made with a small amount of mayonnaise and apple cider vinegar complements the chicken. Include dried cranberries or sunflower seeds for additional texture.
Storage and Preservation Guidelines
Refrigerating Cooked Chicken
Store leftover chicken in an airtight container in the refrigerator for up to 3 to 4 days. Ensure the chicken has cooled slightly before sealing the container to prevent excess moisture buildup. This moisture can make the skin soggy during storage.
Freezing for Future Meals
Cooked BBQ chicken can be frozen for up to two months if wrapped tightly. Use aluminum foil or vacuum-seal bags to prevent freezer burn. Thaw the chicken in the refrigerator overnight before reheating to maintain the best meat quality.
Best Reheating Methods
Avoid using a microwave to reheat the chicken, as this often makes the skin rubbery. Instead, use an oven or air fryer at 350 degrees Fahrenheit until heated through. This helps restore some of the crispness to the exterior glaze.
Strategic Make-Ahead Planning
Pre-Cooking and Chilling
You can complete the pressure cooking stage up to 24 hours before you intend to serve the meal. Once the natural release is finished, store the chicken in the fridge. This removes the stress of timing the cooking and searing during a busy gathering.
Pre-Mixing the Dry Rub
To save time on the day of preparation, mix the salt, garlic powder, paprika, onion powder, and pepper in a small jar. Store the rub in a cool, dry place until ready to use. This allows you to simply sprinkle the seasoning over the meat without measuring individual spices.
Troubleshooting Common Issues
Addressing Undercooked Centers
If the chicken is not fully cooked in the center, it may be due to using very large pieces or frozen meat. Always check the internal temperature with a meat thermometer to ensure it reaches 165 degrees Fahrenheit. If underdone, return the chicken to the pot for another 2-3 minutes of high pressure.
Managing Sauce That Burns Quickly
If your barbecue sauce burns before the skin crisps, it likely has a very high sugar content. Lower the broiler temperature or move the grill to indirect heat. Applying a second, thinner layer of sauce halfway through the searing process can also help.
Reducing Excess Liquid in the Pot
If there is too much liquid left in the pot after cooking, do not try to reduce it under pressure. Instead, remove the chicken and simmer the remaining liquid on the saute function. This creates a concentrated jus that can be used as a base for a dipping sauce.
Frequently Asked Questions
Can I use frozen chicken in this recipe?
Yes, you can use frozen chicken, but you must increase the pressure cooking time to 12-15 minutes. Ensure the pieces are not frozen together in one solid block to allow the steam to reach all surfaces.
Do I have to use skin-on chicken for this method?
Skin-on chicken is recommended for the best texture and flavor, but skinless chicken works as well. If using skinless meat, reduce the searing time slightly, as there is no skin to crisp up.
Can I add the barbecue sauce during the pressure cooking phase?
It is not recommended to add the sauce during the pressure cooking phase because the sugars can burn on the bottom of the pot. Applying the sauce at the end ensures a perfect glaze and prevents the burn error.
Print
Instant Pot BBQ Chicken
- Total Time: 24 minutes
- Yield: 6 servings 1x
- Diet: General
Description
This Instant Pot BBQ Chicken is the easiest way to cook your chicken for any summer barbecue! It’s juicy and tender every time, make ahead friendly and can be tossed on the grill to crisp it up!
Ingredients
- 6 skin on, bone in chicken drumsticks (or skinless)
- 6 skin on, bone in chicken thighs (or skinless)
- 1 teaspoon salt
- ¾ teaspoon garlic powder
- ½ teaspoon paprika
- ¼ teaspoon dried onion
- ¼ teaspoon black pepper
- 1½ cups water (chicken broth, juice, or soda works, too)
- 1 teaspoon liquid smoke
- ½ cup barbecue sauce
Instructions
- Step: Place chicken in 6 or 8 quart Instant Pot or pressure cooker.
- Step: Combine salt, garlic powder, paprika, dried onion, black pepper and sprinkle over chicken, turning to coat all sides.
- Step: Pour water (or other liquid) and liquid smoke into Instant Pot.
- Step: Put the lid on, turn the valve to sealing, and select Manual or Pressure Cook, high pressure, for 10 minutes (12-15 minutes for frozen or partially frozen).
- Step: When the cook time is over, allow the pressure to release naturally for 10-15 minutes, then open the valve and remove the lid.
- Step: Remove chicken, brush with barbecue sauce, and either broil for 3-4 minutes until the skin begins to crisp up, or place on the grill for 4-5 minutes.
Notes
One serving equals one drumstick and one thigh. This chicken can be made ahead of time, cooked and stored in the refrigerator up to 24 hours before grilling or broiling.
- Prep Time: 10 minutes
- Cook Time: 14 minutes
- Category: Main Course
- Method: Pressure Cooking
- Cuisine: American
Nutrition
- Serving Size: 1 drumstick and 1 thigh
- Calories: 480 kcal
- Sugar: 8 g
- Sodium: 827 mg
- Fat: 31 g
- Saturated Fat: 8 g
- Unsaturated Fat: 23 g
- Trans Fat: 0 g
- Carbohydrates: 10 g
- Fiber: 1 g
- Protein: 37 g
- Cholesterol: 211 mg
Keywords: Instant Pot, BBQ Chicken, pressure cooker, summer barbecue, bone-in chicken