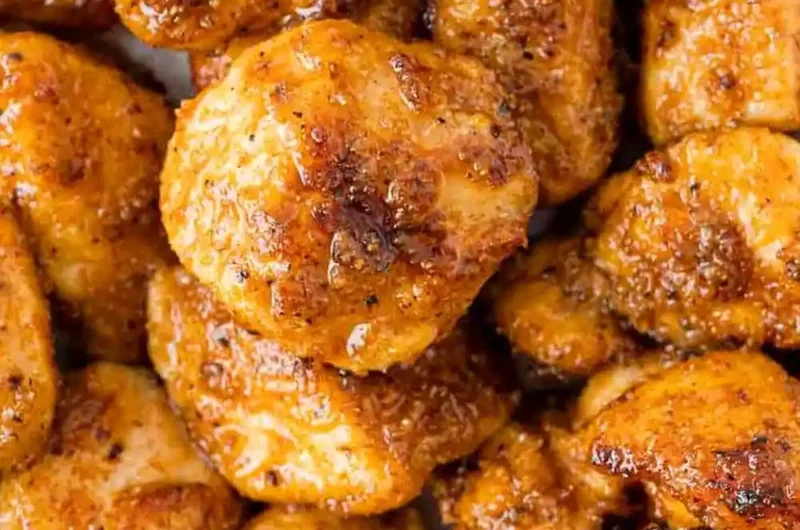
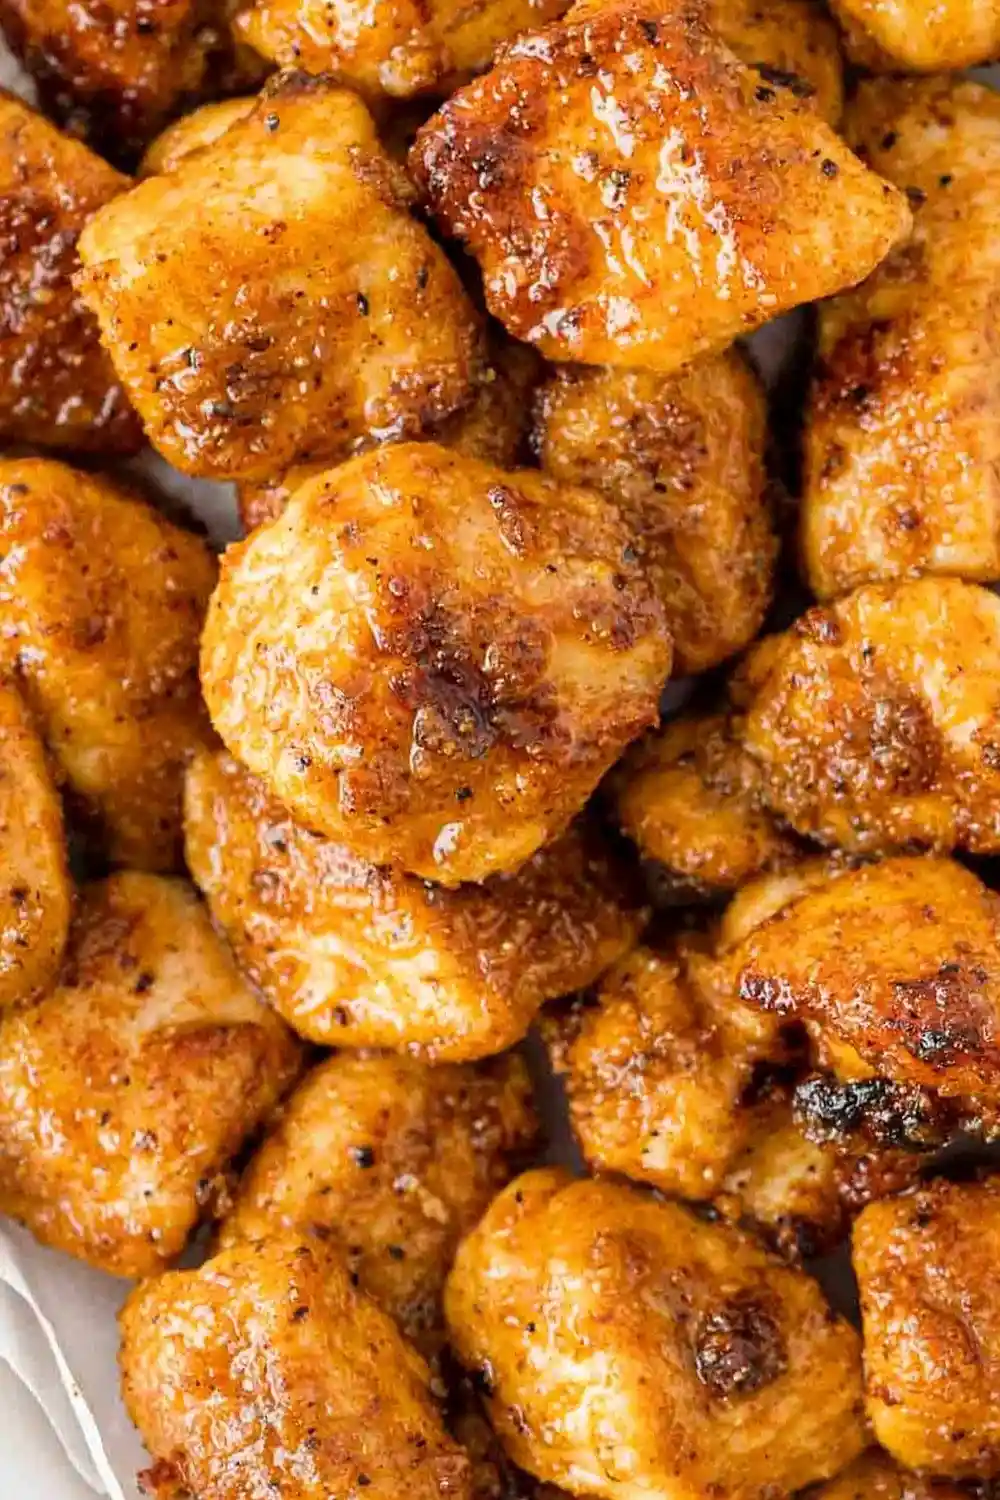
These crispy, tender chicken bites are a fast and versatile protein option for any meal. They are seasoned with a simple blend of pantry spices and coated in cornstarch for a perfect crunch without deep frying.
List of ingredients
- 2 tablespoons cornstarch – creates a thin, crispy outer layer.
- 2 teaspoons paprika – adds color and a mild, sweet flavor.
- 2 teaspoons garlic powder – provides a savory, aromatic base.
- 1 teaspoon onion powder – adds a subtle sweetness and depth.
- ½ teaspoon kosher salt – enhances all the other seasonings.
- ½ teaspoons coarse ground black pepper – adds a light spicy kick.
- 1 pound boneless skinless chicken breasts – main protein; boneless skinless thighs can be used for more moisture.
- 2 tablespoons olive oil – used for frying; avocado, canola, sunflower, or peanut oil are suitable alternatives.
step-by-step instructions
- Mix the Coating: In a small mixing bowl, stir together the cornstarch, paprika, garlic powder, onion powder, salt, and pepper until well combined.
- Dice the Chicken: Cut the chicken into even pieces, approximately ½ inch in size. For the best results, slice into long strips first, then make horizontal cuts every ½ inch.
- Season the Meat: Place the diced chicken into the bowl with the cornstarch mixture. Toss thoroughly until every piece is evenly coated in the seasoning.
- Heat the Pan: Set a large frying pan over medium-high heat and add the oil. Wait until the oil begins to shimmer, indicating it is hot enough for frying.
- Sear the Chicken: Add the chicken pieces in a single layer, including any leftover spice mixture from the bowl. Let the chicken cook undisturbed for 4 minutes to develop a golden crust.
- Brown and Finish: Stir the chicken occasionally and continue cooking for another 5 to 10 minutes. Remove from the pan once the pieces are browned and fully cooked through.
Protein Selection and Preparation
Using Boneless Skinless Chicken Breasts
Chicken breasts are an excellent choice for those seeking a lean, high-protein meal. They cook quickly and take on the flavors of the cornstarch coating very well. Because they are low in fat, they can dry out if overcooked, so monitor the cooking time closely.
Substituting with Chicken Thighs
If you prefer a juicier result, boneless skinless chicken thighs are a great alternative. The higher fat content in dark meat makes the bites more forgiving and harder to overcook. Thighs provide a richer flavor and a more tender texture compared to breast meat.
Utilizing Turkey Breast for Variety
For a different lean protein, you can substitute the chicken with boneless skinless turkey breast or turkey cutlets. Follow the same dicing and coating process as the chicken. Turkey has a slightly different flavor profile but responds similarly to the pan-frying method.
Cutting Techniques for Uniformity
Consistent sizing is crucial so that all pieces finish cooking at the same time. Cut the meat into long strips first, then slice across those strips to create half-inch cubes. This prevents smaller pieces from burning while larger pieces remain raw in the center.
Chilling Meat for Easier Slicing
Cutting raw poultry can be difficult because the meat is soft and slides. Place the chicken in the freezer for 30 minutes before dicing to firm up the texture. This allows for cleaner, more precise cuts and ensures the pieces stay uniform.
Understanding the Crispy Coating
The Role of Cornstarch in Texturing
Cornstarch acts as a light breading that seals in the natural juices of the meat. Unlike flour, it creates a thinner, crispier shell that doesn’t absorb as much oil. This results in a texture that mimics deep-frying while using only a small amount of fat.
Adjusting Spice Levels for Heat
The base seasoning is mild, but you can easily increase the heat by adding a pinch of cayenne pepper. Smoked paprika can be used instead of regular paprika to add a woody, charred flavor. Always taste a small bit of the dry mix to balance the salt and pepper.
Managing Excess Coating
It is normal to have a small amount of leftover seasoning in the bowl after tossing the chicken. Do not discard this mixture; add it to the pan with the meat. This ensures all the flavor is used and helps create additional browned bits in the pan.
Preventing Coating Clumps
To avoid clumps of cornstarch on the meat, ensure the chicken is patted dry with paper towels before coating. Excess moisture on the surface of the meat can cause the starch to paste together. Tossing in a wide bowl provides more room for an even distribution.
Pan-Frying Mastery and Oil Science
Choosing the Right Cooking Oil
Using an oil with a high smoke point prevents the fat from burning and tasting bitter. Avocado oil and peanut oil are excellent for higher heat. Olive oil is suitable for medium-high heat, but ensure you do not let it smoke excessively.
The Shimmer Test for Oil Temperature
Adding chicken to cold oil leads to soggy meat and an oily coating. Wait until the oil shimmers or ripples across the surface of the pan. You can also test the heat by dropping in one piece of chicken; it should sizzle immediately upon contact.
The Importance of the Initial Sear
Cooking the chicken undisturbed for the first 4 minutes is critical for developing a crust. Moving the meat too early prevents the Maillard reaction, which is responsible for the brown color and savory flavor. Let the heat work on the bottom surface first.
Avoiding Pan Crowding
Filling the pan too full lowers the oil temperature and causes the chicken to release moisture. This moisture turns into steam, which prevents the coating from getting crispy. If you have a large amount of chicken, cook them in two separate batches.
Serving and Pairing Ideas
Creating Protein-Packed Bowls
These chicken bites are perfect for grain bowls. Pair them with a base of cooked quinoa or brown rice and add steamed broccoli, shredded carrots, and avocado. Drizzle with a tahini or peanut sauce for a complete meal.
Enhancing Fresh Salads
Transform a simple garden salad into a main course by topping it with warm chicken bites. They pair exceptionally well with a honey mustard vinaigrette or a creamy Caesar dressing. The contrast between the cold greens and warm chicken adds a professional touch.
Making Chicken Wraps and Tacos
Place the bites inside a warm tortilla with shredded lettuce, pico de gallo, and a dollop of guacamole. For a fusion twist, use a flour tortilla and add a slaw made with lime juice and cilantro. These make excellent portable lunches.
Adding to Pasta and Grains
Stir the cooked bites into mac and cheese or a creamy alfredo pasta for added protein. They also work well mixed into Mexican rice or a vegetable pilaf. The crispy exterior holds up well even when mixed with sauces.
Storage and Long-term Preservation
Refrigeration Guidelines
Store leftover chicken bites in an airtight glass or plastic container. Keep them in the main part of the refrigerator, where they will stay fresh for up to four days. Ensure the chicken is completely cooled before sealing the lid to prevent condensation.
Freezing for Future Meals
You can freeze these bites for up to three months. For the best results, flash-freeze them on a baking sheet for one hour before transferring them to a freezer bag. This prevents the pieces from sticking together in one large clump.
Preventing Freezer Burn
Remove as much air as possible from the freezer bag using a straw or a vacuum sealer. This protects the cornstarch coating from ice crystals and maintains the flavor. Label the bag with the date for easy tracking.
Effective Reheating Methods
The Skillet Method for Maximum Crunch
To restore the original crispiness, reheat the bites in a hot skillet over medium heat. Add a teaspoon of oil to the pan and toss the chicken for 2 to 3 minutes. This dries out any moisture absorbed during refrigeration.
Using an Air Fryer for Speed
An air fryer is a highly efficient tool for reheating small pieces of meat. Heat them at 350 degrees Fahrenheit for 3 to 5 minutes. This circulates hot air around the cornstarch coating, making it crunchy again without adding more oil.
Why to Avoid the Microwave
Microwaving chicken bites often results in a rubbery texture and a soggy coating. The microwave heats the water molecules inside the meat, which then migrate to the surface. This destroys the crispiness and can make the meat tough.
Make-Ahead Preparation Strategies
Pre-Mixing the Dry Seasoning
You can prepare the cornstarch and spice blend in large batches. Store the mixture in a small, airtight jar in a cool, dry pantry. This saves time during the actual cooking process and ensures consistent flavor across different meals.
Pre-Cutting the Poultry
Cut the chicken breasts into half-inch pieces a day in advance. Store the diced meat in a covered container in the refrigerator. This reduces the prep time on the day of cooking to just a few minutes.
Avoiding Early Coating
Do not toss the chicken in the cornstarch mixture until you are ready to cook. The salt and moisture from the meat will break down the starch if left too long. This can result in a gummy coating rather than a crispy one.
Troubleshooting Common Issues
Solving the Soggy Coating Problem
If the coating is not crisp, it is likely due to too much moisture or low pan temperature. Ensure the chicken is patted dry before coating. Also, check that the oil is shimmering before adding the meat to the pan.
Preventing the Coating from Falling Off
If the cornstarch mixture slides off the meat, you may have used too much oil in the pan or the meat was too wet. Use just enough oil to coat the bottom of the skillet. Pat the meat dry and ensure the coating is pressed firmly onto the pieces.
Fixing Dry or Overcooked Meat
Dry chicken is usually the result of cooking for too long or using heat that is too high. Use a meat thermometer to ensure the internal temperature reaches 165 degrees Fahrenheit. Remove the chicken from the pan immediately once it hits this temperature.
Frequently Asked Questions
Can I use flour instead of cornstarch?
Yes, you can use all-purpose flour, but the result will be different. Flour produces a heavier, more bread-like crust that is less crispy than the cornstarch version. Cornstarch provides a lighter, shatter-crisp texture.
Can I make these in an air fryer from start to finish?
While possible, the result is generally less crispy than pan-frying. The lack of direct contact with hot oil prevents the cornstarch from sealing as effectively. For the best texture, stick to the skillet method for the initial cook.
Which dipping sauces pair best with these bites?
Barbecue sauce, honey mustard, and ranch dressing are the most popular choices. For a spicier option, try a sriracha mayo or a sweet chili sauce. The neutral savoriness of the seasoning allows them to pair with almost any flavor profile.
Is this recipe suitable for gluten-free diets?
Yes, this recipe is naturally gluten-free because it uses cornstarch instead of wheat flour. Always double-check your specific brands of garlic and onion powder to ensure they are processed in gluten-free facilities.
Print
Crispy Seasoned Chicken Bites
- Total Time: 25 minutes
- Yield: 4 servings 1x
- Diet: Gluten-free
Description
Crispy, tender, and perfectly seasoned, chicken bites will be an instant hit. My family loves them and the bonus? They are easy to make.
Ingredients
- 2 tablespoons cornstarch
- 2 teaspoons paprika
- 2 teaspoons garlic powder
- 1 teaspoon onion powder
- ½ teaspoon kosher salt
- ½ teaspoons coarse ground black pepper
- 1 pound boneless skinless chicken breasts
- 2 tablespoons olive oil
Instructions
- Step 1: In a small bowl, combine cornstarch, paprika, garlic powder, onion powder, salt, and pepper.
- Step 2: Dice chicken evenly into small pieces, about ½ inch.
- Step 3: Toss the diced chicken with cornstarch mixture until it’s coated.
- Step 4: Heat a large frying pan over medium high heat. Add oil. When oil is shimmering, add chicken in a single layer (and any leftover spice mixture). Cook without stirring for 4 minutes.
- Step 5: Stir and continue to cook, stirring occasionally, for 5 to 10 minutes or until browned, crispy, and cooked through.
Notes
Serving suggestions: Rice bowl, salad, veggie hash, wrap, taco, rice and beans, etc. Storage: Leftover chicken will keep for 4 days in the refrigerator or up to 3 months in the freezer.
- Prep Time: 10 minutes
- Cook Time: 15 minutes
- Category: Main Course
- Method: Pan-frying
- Cuisine: American
Nutrition
- Serving Size: 4 oz
- Calories: 214 kcal
- Sugar: 0.2 g
- Sodium: 424 mg
- Fat: 10 g
- Saturated Fat: 2 g
- Unsaturated Fat: 7 g
- Trans Fat: 0.01 g
- Carbohydrates: 5 g
- Fiber: 0.4 g
- Protein: 24 g
- Cholesterol: 73 mg
Keywords: chicken bites, crispy chicken, easy chicken, gluten-free