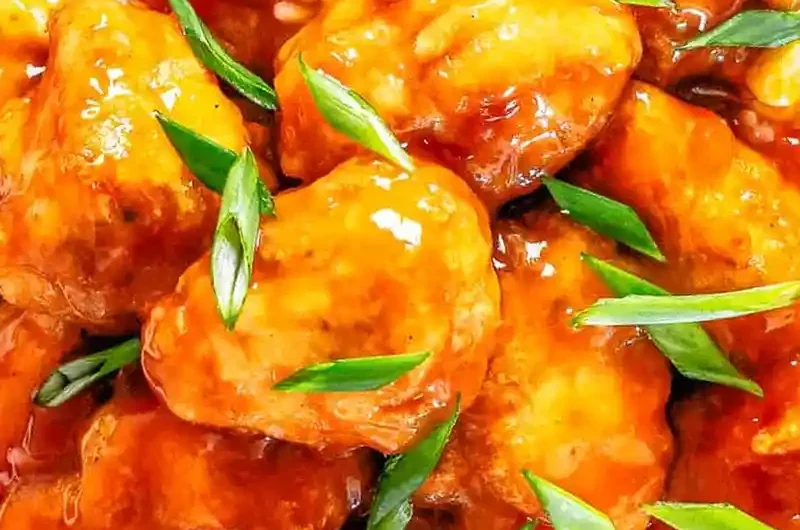
This recipe delivers restaurant-quality crispy chicken coated in a vibrant, tangy glaze. It is a fast and efficient meal that brings the favorite takeout experience directly into your home kitchen.
List of ingredients
- 2 large boneless skinless chicken breasts, cut into bite sized pieces – ensures quick and even cooking.
- 1 teaspoon onion powder – adds a subtle savory base.
- 1 teaspoon garlic powder – provides a classic aromatic punch.
- 2 tablespoons cornstarch – helps the marinade adhere to the meat.
- black pepper to taste – adds a slight heat.
- 1 tablespoon soy sauce – brings depth and saltiness to the chicken.
- 3/4 cup cornstarch – the primary ingredient for the crispy shell.
- 1/4 cup all-purpose flour – provides structure to the batter.
- 1 teaspoon baking powder – adds lift for a lighter texture.
- 1 teaspoon baking soda – enhances browning and crispiness.
- 1 teaspoon granulated sugar – balances the savory notes in the crust.
- 1/2 teaspoon kosher salt – essential for seasoning the batter.
- 2/3 cup ice-cold water – creates a temperature shock for maximum crunch.
- 1 large egg – acts as a binder for the coating.
- Oil for frying – use a high-smoke point oil like canola or peanut oil.
- 1 recipe sweet and sour sauce – for the final glossy glaze.
step-by-step instructions
- Marinate the chicken: Place the diced chicken in a medium bowl. Stir in the onion powder, garlic powder, 2 tablespoons of cornstarch, black pepper, and soy sauce until fully combined, then set aside.
- Prepare dry batter: In a separate large bowl, whisk together the 3/4 cup cornstarch, flour, baking soda, baking powder, sugar, and salt until well blended.
- Mix wet ingredients: Whisk the ice-cold water and egg together in a small bowl until the mixture is smooth.
- Combine batter: Pour the wet mixture into the dry ingredients and stir until just combined. A few lumps are acceptable; do not overmix. Stir the marinated chicken into this batter until every piece is well coated.
- Fry the chicken: Fill a heavy-bottomed skillet with 2-3 inches of oil and heat to 350°F over medium heat. Fry the chicken in batches to avoid crowding the pan, ensuring pieces do not touch. Flip halfway through until the chicken is golden brown and the internal temperature reaches 165°F.
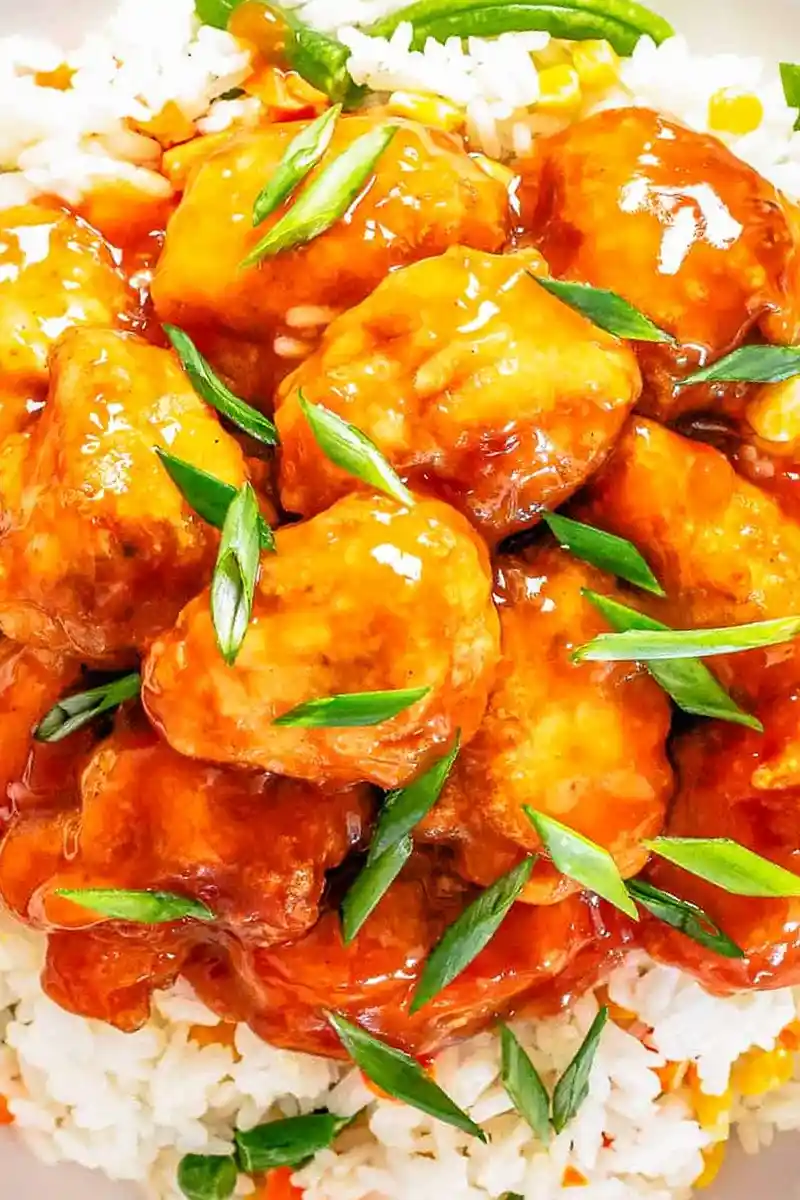
- Drain and serve: Place the fried chicken on a wire rack over a cookie sheet to allow excess oil to drip off. Serve immediately with the sweet and sour sauce on the side for dipping or toss the chicken in the sauce and serve over steamed rice.
Mastering the Frying Process
Using a Thermometer for Precise Oil Temperature
Maintaining a consistent oil temperature of 350°F is critical for the perfect crust. If the oil is too cold, the batter will absorb excess fat and become greasy. If the oil is too hot, the outside will burn before the chicken reaches a safe internal temperature of 165°F.
Preventing Pan Overcrowding
Frying in small batches is necessary to keep the oil temperature stable. When too many pieces are added at once, the temperature drops rapidly, leading to soggy coatings. Give each piece of chicken enough space to float freely without touching others.
Selecting the Right Frying Oil
Use oils with a high smoke point, such as peanut, canola, or vegetable oil. These oils can withstand high heat without breaking down or imparting an off-flavor to the chicken. Avoid extra virgin olive oil or butter, as they burn too quickly at 350°F.
The Benefit of Using a Wire Cooling Rack
Draining chicken on a wire rack instead of paper towels prevents the bottoms from steaming. Paper towels trap moisture against the fried surface, which can make the crust soften. A rack allows air to circulate around the entire piece, preserving the crunch.
Optimizing the Batter Texture
The Role of Ice-Cold Water
Using ice-cold water creates a temperature differential that shocks the batter when it hits the hot oil. This reaction helps the coating set instantly and prevents the oil from penetrating the crust. This technique is the secret to achieving a light, shatteringly crisp texture.
Cornstarch versus Flour
Cornstarch is used as the primary ingredient because it lacks the gluten found in wheat flour. This results in a crispier, more translucent coating that doesn’t become chewy. The small amount of flour added provides just enough structure to hold the batter to the chicken.
Using Leavening Agents for Lift
The combination of baking powder and baking soda creates tiny air bubbles during the frying process. These bubbles expand rapidly in the heat, puffing up the batter slightly. This creates an airy, light crust rather than a dense, hard shell.
Avoiding Overmixing the Batter
Stir the wet and dry ingredients only until they are just combined. Overmixing can lead to the development of gluten in the flour, which makes the coating tough. Leaving a few small lumps in the batter actually contributes to a more textured and crispy finish.
Ingredient Substitutions and Adjustments
Using Chicken Thighs for Extra Juiciness
While chicken breasts are lean and cook quickly, boneless skinless chicken thighs are a great alternative. Thighs have a higher fat content, which keeps the meat moist even after deep frying. If using thighs, ensure they are cut into uniform sizes for even cooking.
Adapting the Recipe for Gluten-Free Needs
To make this recipe gluten-free, replace the 1/4 cup of all-purpose flour with a gluten-free flour blend or more cornstarch. Since cornstarch is already the dominant ingredient, the texture remains very similar. Always check that your soy sauce is substituted with tamari for a truly gluten-free version.
Adjusting the Savory Base
You can enhance the flavor profile by adding a pinch of ground ginger or white pepper to the chicken marinade. These additions provide a more traditional Asian flavor profile without altering the texture. Keep the proportions small to avoid overpowering the sweet and sour sauce.
Managing Sodium Levels
To reduce the salt content, use a low-sodium soy sauce in the marinade. You can also slightly reduce the amount of kosher salt in the batter. The sweet and sour sauce typically contains enough seasoning to balance the dish.
Adding Vegetables and Fruits
Incorporating Fresh Pineapple Chunks
Fresh pineapple adds a burst of acidity and sweetness that complements the fried chicken. Sauté pineapple chunks in a separate pan until slightly caramelized before adding them to the final dish. This prevents the fruit from releasing too much moisture into the batter.
Adding Colorful Bell Peppers
Red and green bell peppers provide a crunch and visual contrast to the golden chicken. Sauté them quickly over high heat so they remain crisp-tender. Toss them in the sauce with the chicken just before serving to maintain their color.
Including Sautéed Onions
Onions add a savory depth that balances the sweetness of the glaze. Cut onions into bite-sized petals and sauté them until translucent. Like the peppers, these should be added at the very end to prevent the chicken from becoming soggy.
Timing the Mix-ins for Maximum Crunch
Always sauté your vegetables and fruits separately and add them to the sauce last. If you cook the vegetables in the frying oil, they may absorb too much fat. Tossing everything together in the final seconds ensures the chicken stays crispy.
Serving and Presentation
Pairing with Steamed Jasmine Rice
Steamed jasmine rice is the ideal base for this dish because its floral aroma and neutral flavor absorb the excess sauce. The soft texture of the rice contrasts perfectly with the crispy chicken. Serve the chicken on top of a fresh mound of rice for a classic look.
Serving Over Vegetable Fried Rice
For a heartier meal, serve the chicken over a bed of vegetable fried rice. The added bits of carrot, peas, and egg in the rice complement the sweet and sour flavor profile. This turns the meal into a complete one-bowl dinner.
Complementing with Lo Mein Noodles
Swap the rice for stir-fried lo mein noodles for a different textural experience. The chewy noodles pair well with the crunchy chicken coating. This is an excellent option for those who prefer a pasta-style Asian dish.
Adding Fresh Garnishes
Finish the plate with a sprinkle of thinly sliced scallions or toasted sesame seeds. Scallions add a fresh, sharp bite that cuts through the richness of the fried batter. Sesame seeds provide a subtle nuttiness and a professional presentation.
Storage and Preservation
Separating Chicken and Sauce
If you have leftovers, store the fried chicken and the sweet and sour sauce in separate airtight containers. Storing them together causes the sauce to soak into the batter, making the chicken soggy. This separation is the only way to ensure the chicken can be re-crisped later.
Maximum Refrigeration Duration
Store the components in the refrigerator for up to three days. Beyond this point, the chicken may lose its flavor and the sauce may begin to separate. Always ensure the chicken is completely cooled before sealing the container to avoid condensation.
Using Airtight Containers
Use high-quality airtight containers to prevent the chicken from absorbing other smells from the fridge. Glass containers are often preferable as they do not retain odors. Ensure the sauce is tightly sealed to keep its glossy consistency.
Reheating for Maximum Crispiness
Utilizing an Air Fryer
The air fryer is the most effective tool for reheating fried chicken. Place the chicken in the basket at 375°F for 3-5 minutes until the coating sizzles. This removes excess oil and restores the original crunch.
Using a Conventional Oven
If you do not have an air fryer, use an oven preheated to 375°F. Spread the chicken on a wire rack over a baking sheet and heat for about 10 minutes. This allows the hot air to circulate and crisp the batter from all sides.
The Microwave Warning
Avoid using the microwave to reheat the fried chicken. Microwaves heat the water molecules inside the batter, which turns the crispy crust soft and rubbery. Only use the microwave for the sauce, heating it gently until it bubbles.
Re-glazing the Chicken
After reheating the chicken in the oven or air fryer, toss it back into the warmed sauce. Doing this immediately before eating ensures the chicken is hot and glazed without becoming soggy. This preserves the contrast between the crispy shell and the sticky sauce.
Troubleshooting Common Issues
Solving Soggy Batter Problems
If your batter is soggy, the most likely cause is oil that was too cold or a pan that was too crowded. Ensure your oil is exactly 350°F before adding chicken. Next time, try reducing the number of pieces per batch to keep the temperature high.
Fixing Over-browned but Raw Chicken
If the outside is dark brown but the inside is undercooked, your oil temperature was too high. Lower the heat to medium and use a thermometer to verify the temperature. You can finish undercooked pieces in a 350°F oven until they reach 165°F.
Correcting Batter Thickness
If the batter is too thick and clumps heavily on the chicken, stir in a tablespoon of ice-cold water at a time. The batter should be thick enough to coat the meat but thin enough to drip slowly off a spoon. Avoid adding too much water, or the coating will slide off during frying.
Managing Excess Oil
If the chicken feels overly greasy, you may have fried it at too low a temperature. Using a wire rack for draining is essential for removing surface oil. You can also gently pat the pieces with a paper towel before tossing them in the sauce.
Frequently Asked Questions
Can I add pineapple and peppers to this Sweet and Sour Chicken?
Yes, you can sauté chunks of bell pepper, onion, and pineapple in a separate pan and then toss them with the fried chicken and sauce. Add these ingredients right before serving to ensure the chicken stays crispy.
What can I serve with Sweet and Sour Chicken?
The most classic pairings are steamed white rice or fried rice. You can also serve it with lo mein, egg rolls, or a side of stir-fried vegetables to create a full restaurant-style meal.
Should I serve the sauce on the side or over the chicken?
Serving the sauce on the side is best for maintaining maximum crunch. However, if you prefer a glazed, sticky texture, toss the chicken in the warm sauce immediately before serving.
Why is the batter made with cornstarch and ice water?
Cornstarch creates a lighter and crispier shell than flour alone. The ice-cold water prevents the batter from absorbing too much oil and inhibits gluten development, ensuring the crust remains crunchy rather than chewy.
How do I keep Sweet and Sour Chicken crispy?
Fry the chicken in batches to maintain oil heat, drain it on a wire rack to prevent steaming, and apply the sauce only at the last possible moment before eating.
How do I store and reheat leftover Sweet and Sour Chicken?
Store the chicken and sauce in separate airtight containers in the fridge for up to 3 days. Reheat the chicken in an air fryer or oven at 375°F to restore the crispiness before adding the warmed sauce.
Print
Crispy Fried Sweet and Sour Chicken
- Total Time: 30 minutes
- Yield: 4 servings 1x
- Diet: General
Description
Sweet and Sour Chicken is crispy fried chicken in a light cornstarch batter, tossed in a sweet and tangy homemade sauce. Better than takeout and ready in 30 minutes!
Ingredients
- 2 large boneless skinless chicken breasts, cut into bite sized pieces
- 1 teaspoon onion powder
- 1 teaspoon garlic powder
- 2 tablespoons cornstarch
- black pepper to taste
- 1 tablespoon soy sauce
- ¾ cup cornstarch
- ¼ cup all-purpose flour
- 1 teaspoon baking powder
- 1 teaspoon baking soda
- 1 teaspoon granulated sugar
- ½ teaspoon kosher salt
- ⅔ cup ice-cold water
- 1 large egg
- Oil for frying
- 1 recipe sweet and sour sauce
Instructions
- Step: Add the diced chicken to a medium-sized bowl, add the onion powder, garlic powder, cornstarch, pepper, and soy sauce. Stir to combine, set aside.
- Step: In a large bowl, whisk together the cornstarch, flour, baking soda, baking powder, sugar, and salt. Set aside.
- Step: Add the water and egg to a small bowl and whisk to combine.
- Step: Pour the wet into the dry and mix until just combined, some lumps are okay. Add the chicken to the batter and stir to combine.
- Step: In a heavy bottom skillet with deep sides, fill it up 2-3 inches with the frying oil. Heat the oil to 350°F over medium heat. Fry the chicken pieces, not touching in the oil. You will need to fry in batches, do not crowd the pan. Flip the chicken halfway through until golden brown and the internal temperature reaches 165°F.
- Step: Drain on a rack over a cookie sheet to let the excess oil drip off. Serve with sweet and sour sauce for dipping or toss the chicken in the sauce and serve over rice.
Notes
Use ice-cold water and mix the batter right before frying for the crispiest results. Drain on a wire rack rather than paper towels to prevent the bottom from getting soggy. Store chicken and sauce separately to maintain texture.
- Prep Time: 15 minutes
- Cook Time: 15 minutes
- Category: Main Course
- Method: Frying
- Cuisine: Asian
Nutrition
- Serving Size: 1 serving
- Calories: 291 kcal
- Sugar: 1 g
- Sodium: 969 mg
- Fat: 4 g
- Saturated Fat: 1 g
- Unsaturated Fat: 2 g
- Trans Fat: 1 g
- Carbohydrates: 34 g
- Fiber: 1 g
- Protein: 27 g
- Cholesterol: 113 mg
Keywords: sweet and sour chicken, crispy chicken, cornstarch batter, Asian takeout, fried chicken