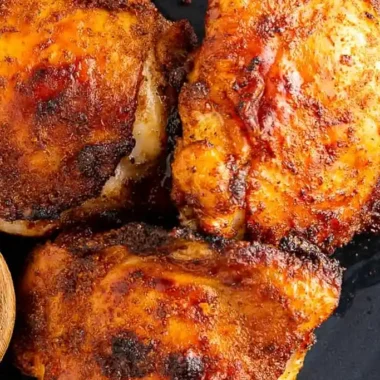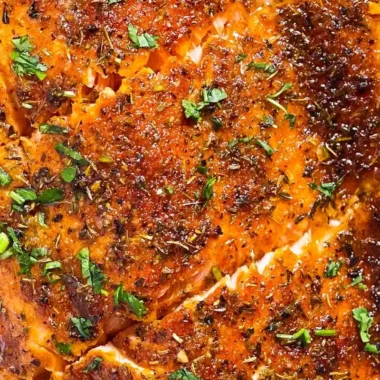
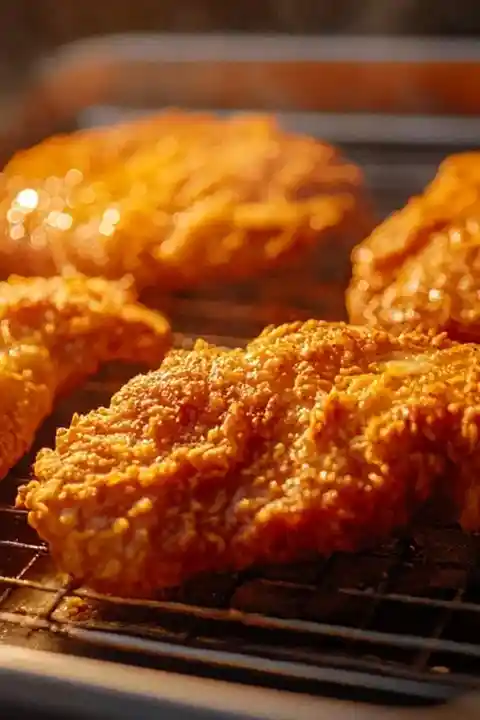
This recipe provides a healthier alternative to traditional deep-frying by using a high-heat baking method. You will get a golden, crispy crust while significantly reducing the amount of oil used.
List of ingredients
- 6 boneless skinless chicken breasts – cut into thirds for even cooking.
- 1 cup all-purpose flour – serves as the base for the crispy coating.
- 1/2 teaspoon salt – enhances the overall flavor.
- 1 tablespoon seasoned salt – adds a complex savory profile.
- 3/4 teaspoon pepper – provides a mild spicy kick.
- 2 teaspoons paprika – gives the chicken a golden-red color.
- 1/2 stick butter (or 1/4 cup) – used to grease the pan and crisp the bottom.
- Buttermilk – used for tenderizing and helping flour adhere.
- 1 gallon-size Ziploc bag (optional) – useful for easy dredging and less mess.
step-by-step instructions
- Marinate: Soak the chicken pieces in buttermilk for 20-30 minutes in the refrigerator to tenderize the meat.
- Preheat: Set your oven to 400°F to ensure a high-heat environment for crisping.
- Prepare Coating: Mix the flour and seasonings in a large Ziploc bag or bowl until well combined.
- Prepare Pan: Melt the butter in a 9×13-inch baking pan inside the preheated oven.
- Dredge: Remove chicken from the buttermilk, shake off any excess liquid, and coat thoroughly in the seasoned flour mixture.
- Arrange: Place the coated chicken pieces in the buttered baking pan.
- Bake: Bake for 20 minutes, then flip each piece and bake for another 20 minutes until golden brown and cooked through.
Optimizing Texture and Crunch
The Role of High Heat
Baking at 400°F is essential to trigger the Maillard reaction quickly. This ensures the exterior browns and crisps before the interior overcooks and dries out.
Correct Flour Application
Press the flour firmly into the chicken pieces during the dredging process. This creates a dense layer that prevents juices from leaking and steaming the breading.
Avoiding Excess Moisture
Shake off as much buttermilk as possible before coating the chicken. Excess liquid creates a paste that can lead to a gummy texture rather than a crunch.
The Impact of Pan Selection
Use a metal baking pan rather than glass for better heat conduction. Metal heats up faster and more evenly, which promotes a crispier bottom on the chicken.
Marinade Variations for Tender Meat
Using Plain Yogurt
Plain Greek yogurt can replace buttermilk for a thicker, creamier coating. Its natural acidity also helps tenderize the chicken proteins effectively.
Adding Citrus Juice
Adding a teaspoon of lemon juice to the marinade increases the acidity level. This further breaks down connective tissues for a more tender result.
Salt Brining Before Soaking
Salt the chicken lightly before adding it to the buttermilk soak. This allows the seasoning to penetrate deeper into the meat fibers.
The Benefits of Long-Term Marinating
Soaking the chicken for up to four hours increases flavor absorption. Do not exceed 24 hours, as the acidity can eventually make the meat too soft.
Flavor Enhancements for the Coating
Incorporating Garlic Powder
Adding a tablespoon of garlic powder to the flour mix adds a savory depth. It complements the paprika and seasoned salt for a more robust taste.
Adding Onion Powder for Depth
Onion powder provides a subtle sweetness and richness to the breading. It helps round out the salty notes of the seasoned salt mixture.
White Pepper for a Sharp Bite
White pepper offers a more fermented, floral heat than standard black pepper. It is often used in professional recipes for a distinct, sharp profile.
Using Smoked Paprika for Richness
Use smoked paprika instead of sweet paprika for a wood-fired flavor. This mimics the complexity of outdoor grilling while staying in the oven.
Accompanying Side Dishes
Traditional Mashed Potatoes
Pair the chicken with creamy mashed potatoes. The richness of the potatoes balances the savory, crispy coating of the oven-baked chicken.
Steamed Seasonal Vegetables
Serve the dish with steamed broccoli or glazed carrots. These provide a fresh, nutrient-dense contrast to the fried-style chicken.
Coleslaw for Freshness
A vinegar-based coleslaw adds essential acidity and crunch to the meal. This cuts through the richness of the butter-baked coating.
Cornbread Pairings
Warm honey cornbread is a traditional accompaniment for this dish. Its sweetness pairs well with the salty and spicy notes of the chicken.
Storage and Preservation
Cooling Before Storing
Let the chicken reach room temperature before placing it in the refrigerator. This prevents condensation from forming inside the container, which would soften the crust.
Air-Tight Container Use
Use glass containers with airtight lids to keep the chicken fresh. This prevents the meat from absorbing other food odors in the refrigerator.
Optimal Refrigeration Time
Store the cooked chicken for up to three to four days. Beyond this window, the quality and texture of the breading will begin to degrade.
Freezing and Thawing Process
Flash-freeze the pieces on a tray before transferring them to a freezer bag. This prevents the chicken from sticking together in one large block.
Effective Reheating Methods
The Oven Method
Heat the oven to 350°F and place the chicken on a wire rack. Bake for 10-15 minutes to restore the original crispiness of the coating.
Air Fryer Reheating
Set the air fryer to 375°F and heat the chicken for 3-5 minutes. This is the fastest way to achieve a crunch without adding more oil.
Avoiding the Microwave
Do not use a microwave to reheat the chicken. Microwaves heat the moisture within the breading, making it soft and rubbery rather than crispy.
Maintaining Moisture
To prevent the meat from drying out during reheating, avoid overcooking. Check the internal temperature with a meat thermometer to ensure it is just hot.
Meal Prep and Advanced Planning
Preparing the Flour Mix in Advance
You can mix the seasoned flour days in advance and store it in a sealed jar. This saves time and reduces cleanup during the actual cooking process.
Pre-Slicing the Breasts
Cut the chicken breasts into thirds the night before. Store them in a sealed container to keep them fresh for the next day’s marinade.
Organizing the Station
Set up a dredging station with the buttermilk in one bowl and flour in another. This prevents cross-contamination and keeps the process efficient.
Scheduling the Soak
Start the buttermilk soak first. This allows the chicken to tenderize while you handle the oven preheating and pan preparation.
Troubleshooting Breading Issues
Preventing Breading from Peeling
Ensure the chicken is patted dry if not using buttermilk. If using buttermilk, shake off the excess to ensure the flour adheres properly to the meat.
Fixing Under-Browned Chicken
If the chicken is cooked through but remains pale, turn on the broiler for 2-3 minutes. Watch it closely to prevent the flour from burning.
Managing Over-Seasoning
If the flour mix tastes too salty, add an extra 1/4 cup of plain flour. This dilutes the concentration of seasoned salt in the coating.
Handling Excess Flour
Shake off excess flour from the chicken before placing it in the pan. Too much flour can create a thick, doughy layer that doesn’t crisp.
Frequently Asked Questions
Can I use skin-on chicken?
Yes, you can use skin-on chicken, but it will take longer to cook through. Ensure the skin is patted dry before dredging for maximum crispiness.
Is buttermilk necessary?
Buttermilk is not strictly necessary, but it is highly recommended. It tenderizes the meat and helps the flour stick more effectively.
Can I use an oven-safe skillet?
A cast-iron skillet is an excellent alternative to a baking pan. It provides superior heat retention and can help create a better sear on the bottom.
How to tell when the chicken is done?
Use a meat thermometer to ensure the internal temperature reaches 165°F. This ensures the chicken is safe to eat without overcooking it.
Print
Crispy Oven-Baked Fried Chicken
- Total Time: 100 minutes
- Yield: 6 servings 1x
- Diet: General
Description
This baked fried chicken recipe offers all the crispy, flavorful goodness of traditional fried chicken without the excess oil. Buttermilk-soaked chicken pieces are coated in a seasoned flour mixture, then baked to golden perfection in a buttered pan.
Ingredients
- 6 boneless skinless chicken breasts (cut into thirds)
- 1 cup all-purpose flour
- 1/2 teaspoon salt
- 1 tablespoon seasoned salt
- 3/4 teaspoon pepper
- 2 teaspoons paprika
- 1/2 stick butter (or 1/4 cup)
- Buttermilk
Instructions
- Step: Soak the chicken pieces in buttermilk for 20-30 minutes in the refrigerator.
- Step: Preheat your oven to 400°F.
- Step: Mix the flour and seasonings in a large Ziploc bag or bowl.
- Step: Melt the butter in a 9×13-inch baking pan in the preheated oven.
- Step: Remove chicken from buttermilk, shake off excess, and coat thoroughly in the seasoned flour mixture.
- Step: Arrange the coated chicken in the buttered pan.
- Step: Bake for 20 minutes, then flip and bake for another 20 minutes until golden brown and cooked through.
Notes
If buttermilk is unavailable, substitute with regular milk mixed with a tablespoon of lemon juice or vinegar. For extra heat, add cayenne pepper to the flour mixture.
- Prep Time: 60 minutes
- Cook Time: 40 minutes
- Category: Main Course
- Method: Baking
- Cuisine: American
Nutrition
- Serving Size: 3 pieces
- Calories: 610 kcal
- Sugar: 4 g
- Sodium: 1050 mg
- Fat: 16 g
- Saturated Fat: 7 g
- Unsaturated Fat: 8 g
- Trans Fat: 0 g
- Carbohydrates: 20 g
- Fiber: 1 g
- Protein: 46 g
- Cholesterol: 125 mg
Keywords: baked fried chicken, crispy oven chicken, healthy fried chicken, buttermilk chicken