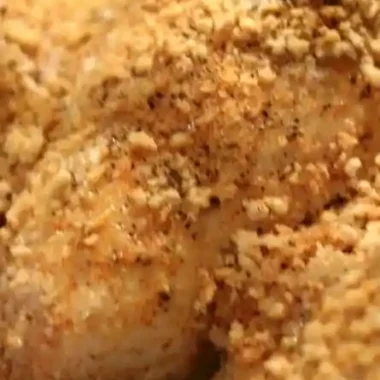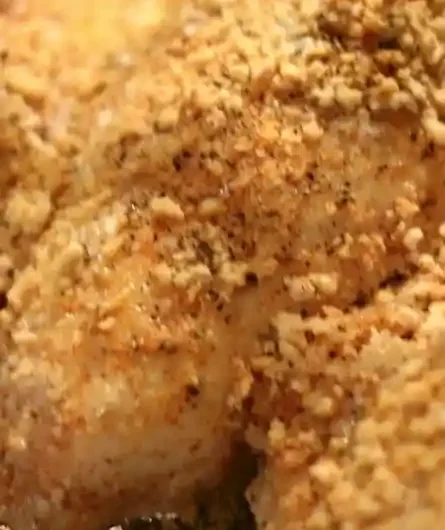
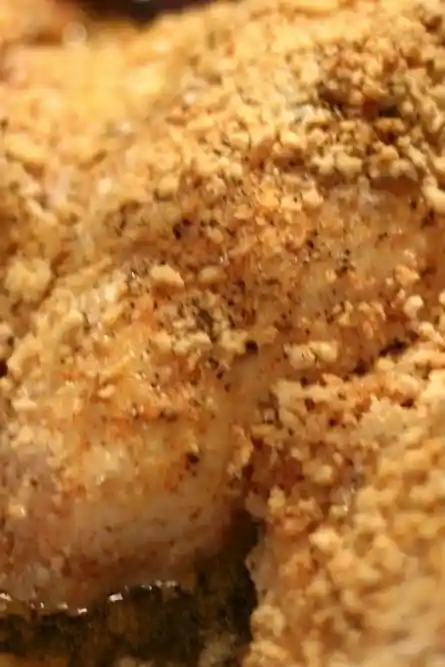
Experience the satisfaction of creating restaurant-quality crispy chicken right in your own oven. This method delivers a golden, crunchy exterior and incredibly moist interior without the need for deep frying. By utilizing a specific blend of pantry spices and a unique baking technique, you can achieve that familiar, comforting flavor profile in your own kitchen.
List of ingredients
- bone in chicken breasts
- 1/2 cup flour
- 1/2 cup panko
- 1 tsp salt
- 2 tsp pepper
- 1/2 tsp white pepper
- 1 tsp oregano (optional)
- 1/2 tsp cayenne (optional)
- 1/2 cup butter (melted)
- 1 cup buttermilk
- spray butter
step-by-step instructions
- Step: Heat oven to 400.
- Step: In a bowl mix together well the flour, panko, salt, 1 tsp black pepper, 1/2 tsp white pepper, paprika, cayenne, and oregano.
- Step: In a second bowl pour in buttermilk.
- Step: Pour 1/2 cup melted butter into a prepared 9 x 13 baking dish.
- Step: Take chicken breasts and dip into buttermilk. Then dip into flour mixture, coating both sides well. Once coated, place into the 9 x 13 baking dish. Once all of the chicken is placed into the dish, cover with the remaining tsp of pepper.
- Step: Place in the preheated oven and bake for 15 minutes. Open oven and using spray butter, coat the top of the chicken.
- Step: Place back into the oven and bake another 10 minutes. After 10 minutes, open oven and spray another coat of butter over the chicken.
- Step: Bake for an additional 10 minutes, or until chicken is cooked thoroughly through.
- Step: Place chicken on a paper towel to remove any excess drippings before serving.
- Step: Allow to cool and serve with your favorite sides!
Mastering the Crispy Coating
Why Panko Outperforms Standard Breadcrumbs
Panko breadcrumbs are made from crustless bread, processed into large, airy flakes rather than dense crumbs. When used in this recipe, they resist absorbing too much moisture, remaining light and shatteringly crisp throughout the baking cycle. This creates a higher surface area for the butter and heat to act upon, resulting in a much crunchier final product than traditional flour-only or fine-breadcrumb coatings.
Achieving Uniform Breading Adhesion
To ensure your coating does not slide off during the transition from the bowl to the oven, focus on the moisture level of the chicken. Pat the chicken pieces dry with paper towels before dipping them into the buttermilk, as excessive surface water can create a barrier that prevents the batter from sticking. After breading, press the flour mixture into the meat with the palm of your hand, allowing the pieces to rest for three to five minutes before putting them in the pan to help the crust set.
Refining the Baking Process
Managing Steam and Moisture
Baking chicken in a dish with melted butter can generate significant steam, which is the enemy of a crisp crust. To mitigate this, ensure you are using a sufficiently large baking dish that doesn’t crowd the chicken, as overcrowding traps moisture between the pieces. If you prefer an even crispier skin, you can place a wire cooling rack inside the baking dish and cook the chicken on the rack, allowing hot air to circulate underneath the pieces while the drippings collect safely below.
Effective Use of the Spray Butter
The secret to achieving the color associated with deep-fried items without the oil bath is the strategic application of fat during the baking process. The spray butter acts as a surface conductor, browning the flour and panko flakes while adding a rich, toasted flavor. If you find your oven is running slightly cool, consider adding an extra burst of spray butter in the final three minutes of cooking to help the crust caramelize deeply.
Flavor Enhancements and Variations
Adjusting the Spice Profile
This recipe uses a balanced foundation, but you can easily customize it to suit your household preferences. For a smoky profile, add a half-teaspoon of smoked paprika to the flour mixture. If you prefer a sharper, more pungent crust, add a pinch of garlic powder or onion powder, both of which toast beautifully in the oven alongside the panko.
Texture Tweaks for Enthusiasts
If you find that your crust isn’t as crunchy as you desire, try increasing the panko-to-flour ratio by an additional quarter cup. You can also toast the panko in a dry pan on the stove for two minutes before mixing it with the flour, which provides a head start on the browning process and ensures an immediate golden hue when the chicken hits the oven heat.
Serving Suggestions
Balancing the Richness
Because the chicken is rich with butter and seasoning, it pairs exceptionally well with bright, acidic side dishes that cut through the fat. Consider serving this with a crisp coleslaw dressed in an apple cider vinegar vinaigrette or fresh cucumber slices seasoned with lime juice. Warm, fluffy biscuits or mashed potatoes with a light gravy are also traditional accompaniments that complement the savory nature of the dish.
Presentation Tips
To keep the crust intact, avoid stacking the chicken pieces on your serving platter. Arrange them in a single layer, perhaps garnished with fresh parsley or a dash of fresh black pepper to highlight the homemade nature of the preparation. If you are serving this for a special dinner, offering a side of honey or a mild, savory dipping sauce can enhance the dining experience.
Storage and Reheating Protocols
Storing Leftover Chicken
If you have leftovers, allow the chicken to reach room temperature before placing it in an airtight container. Refrigerated chicken will stay fresh for up to three days, but it is important to store it in a way that minimizes moisture accumulation. Placing a folded paper towel in the container can help absorb excess humidity, which is vital for maintaining the integrity of the breading.
Reviving the Texture During Reheating
Avoid the microwave at all costs when reheating this chicken, as it will inevitably turn the crust soft and soggy. Instead, preheat your oven to 375 degrees Fahrenheit and place the chicken on a wire rack over a baking sheet. Reheat for approximately 10 to 12 minutes, which allows the heat to penetrate the meat while crisping the crust once again. A quick blast under the broiler for the final minute can also help restore that essential crunch.
FAQs About Home-Baked Chicken
Can I make this recipe in an air fryer?
Yes, this recipe is highly adaptable to an air fryer environment. Simply reduce the cooking time by approximately 25 percent and ensure the pieces are not overlapping in the basket, which allows for optimal airflow and ensures the coating crisps evenly on all sides.
Why is my breading falling off during the bake?
This usually occurs if the chicken was too wet before breading or if it wasn’t allowed to rest long enough after the coating process. Always ensure the buttermilk dip is thorough, but let the excess drain before moving to the flour mix, and allow the chicken to rest for a few minutes on the counter after breading so the flour can fully hydrate.
Can I substitute the buttermilk with a dairy-free option?
You can create a dairy-free alternative by mixing one cup of unsweetened almond or soy milk with one tablespoon of lemon juice or apple cider vinegar. Let it sit for ten minutes until it curdles, which mimics the acidity and consistency of buttermilk, providing the same tenderizing benefits for the chicken.
Is this recipe suitable for freezing?
You can freeze the cooked chicken for up to two months, though the texture of the breading will be slightly softer upon thawing. For best results, reheat the chicken directly from a frozen state in a hot oven or air fryer rather than thawing it in the refrigerator first, as the quick blast of high heat will help drive off excess moisture.
Can I use boneless chicken breasts instead?
Using boneless, skinless breasts is an option, but keep in mind that they cook much faster than bone-in cuts. Reduce the total baking time by about 10 minutes and monitor the internal temperature carefully with a meat thermometer to avoid overcooking and drying out the meat.
Print
Classic Home-Baked Crispy Chicken
- Total Time: 45 minutes
- Yield: 4 servings 1x
- Diet: non-vegetarian
Description
A deliciously moist and authentic copycat KFC Chicken recipe, perfectly baked for a crisp finish without the need for a deep fryer.
Ingredients
- bone in chicken breasts
- 1/2 cup flour
- 1/2 cup panko
- 1 tsp salt
- 2 tsp pepper
- 1/2 tsp white pepper
- 1 tsp oregano (optional)
- 1/2 tsp cayenne (optional)
- 1/2 cup butter (melted)
- 1 cup buttermilk
- spray butter
Instructions
- Step: Heat oven to 400.
- Step: In a bowl mix together well the flour, panko, salt, 1 tsp black pepper, 1/2 tsp white pepper, paprika, cayenne, and oregano.
- Step: In a second bowl pour in buttermilk.
- Step: Pour 1/2 cup melted butter into a prepared 9 x 13 baking dish.
- Step: Take chicken breasts and dip into buttermilk. Then dip into flour mixture, coating both sides well. Once coated, place into the 9 x 13 baking dish. Once all of the chicken is placed into the dish, cover with the remaining tsp of pepper.
- Step: Place in the preheated oven and bake for 15 minutes. Open oven and using spray butter, coat the top of the chicken.
- Step: Place back into the oven and bake another 10 minutes. After 10 minutes, open oven and spray another coat of butter over the chicken.
- Step: Bake for an additional 10 minutes, or until chicken is cooked thoroughly through.
- Step: Place chicken on a paper towel to remove any excess drippings before serving.
- Step: Allow to cool and serve with your favorite sides!
Notes
Make this keto friendly by substituting regular flour for coconut flour. For extra crispy results, flip and turn the chicken regularly while baking, or cook on a wire cooling rack set over a rimmed baking sheet.
- Prep Time: 10 minutes
- Cook Time: 35 minutes
- Category: dinner
- Method: baking
- Cuisine: American
Nutrition
- Serving Size: 1 breast
- Calories: 331 kcal
- Sugar: 3 g
- Sodium: 902 mg
- Fat: 25 g
- Saturated Fat: 15 g
- Unsaturated Fat: 9 g
- Trans Fat: 0 g
- Carbohydrates: 21 g
- Fiber: 1 g
- Protein: 4 g
- Cholesterol: 67 mg
Keywords: copycat, chicken, oven-baked, crispy, dinner, american