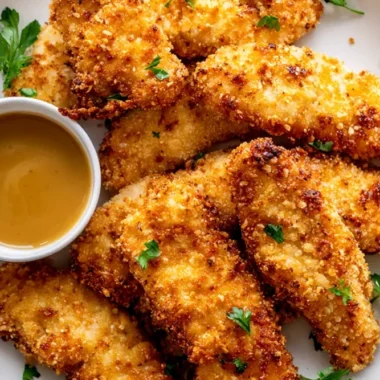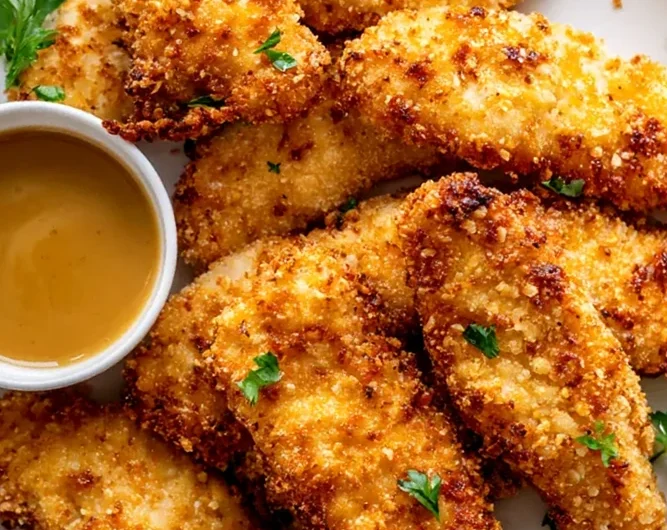
Creating restaurant-quality chicken tenders at home is incredibly simple when you use an air fryer. This method delivers a satisfying, golden-brown crunch without the excess oil found in traditional deep-frying. These tenders are perfect for busy weeknights, offering a fast, family-friendly meal that is consistently juicy and flavorful.
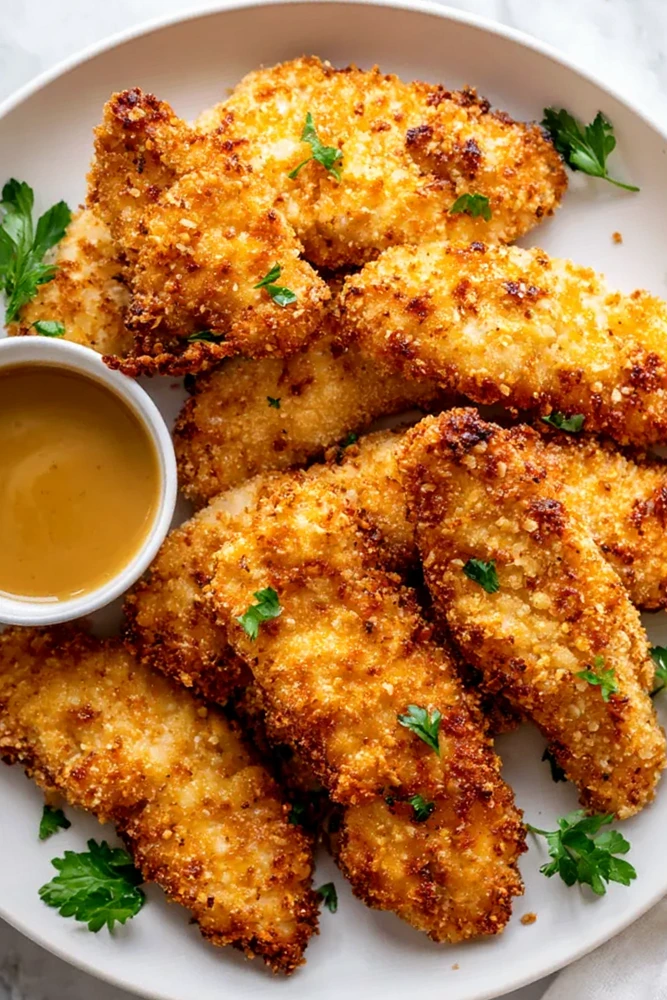
List of ingredients
- 1 lb chicken tenders (about 8–10 pieces)
- 1/2 cup all-purpose flour
- 1 teaspoon garlic powder
- 1 teaspoon paprika
- 1/2 teaspoon salt
- 1/2 teaspoon black pepper
- 2 large eggs
- 1 tablespoon water
- 1 cup panko breadcrumbs
- 1/4 cup grated Parmesan cheese
- Cooking spray or a small amount of olive oil
step-by-step instructions
- Step: Prepare the breading station: Set up three shallow bowls: one with flour, garlic powder, paprika, salt, and pepper; the second with beaten eggs mixed with 1 tablespoon water; and the third with panko breadcrumbs mixed with Parmesan cheese if using.
- Step: Coat the chicken tenders: Take each chicken tender and dredge it first in the flour mixture, shaking off any excess. Next, dip it into the egg mixture, ensuring it is completely covered. Finally, press it into the panko breadcrumb mixture until evenly coated on all sides.
- Step: Preheat the air fryer: Preheat your air fryer to 400°F (200°C) for 3–5 minutes.
- Step: Cook the chicken tenders: Lightly spray the air fryer basket with cooking spray or brush with a small amount of olive oil. Place the tenders in a single layer and cook at 400°F (200°C) for 12–15 minutes, flipping halfway through, until internal temperature reaches 165°F (74°C).
- Step: Serve and enjoy: Remove the tenders from the air fryer and let them rest for 2 minutes before serving hot.
Refining the Cooking Process
Managing Basket Spacing for Maximum Airflow
The secret to achieving a superior crunch lies in the circulation of hot air. If you crowd the chicken tenders, the air cannot reach every side, which often results in soggy spots instead of a consistent, golden crust. Always cook in batches if you have a smaller air fryer basket to guarantee that every piece is exposed to the heat evenly.
Importance of the Breading Sequence
Never skip the flour step, even if it seems unnecessary. The flour creates a dry surface that allows the egg to adhere properly, which in turn acts as the glue for your panko breadcrumbs. If you go straight from wet chicken to egg, the breading will frequently slip off during the cooking cycle.
Testing for Proper Internal Doneness
While timing provides a good baseline, the size of chicken tenders can vary significantly. Using a digital meat thermometer is the most reliable way to ensure safety and quality without overcooking the meat. Aim for 165°F (74°C) exactly, as going much higher can lead to a stringy, dry texture that is less palatable.
Customizing Your Breaded Chicken
Achieving a Gluten-Free Coating
If you need to avoid wheat, you can successfully swap the all-purpose flour for a high-quality almond flour or a gluten-free all-purpose flour blend. For the breading, look for certified gluten-free panko-style breadcrumbs, which are often found in the health food aisle. These substitutes maintain the structural integrity of the crust while making the recipe accessible for those with dietary restrictions.
Adding Heat with Spices
If you prefer a bold, spicy flavor, incorporate a half-teaspoon of cayenne pepper or crushed red pepper flakes into your flour mixture. For a deeper, smokier flavor, use smoked paprika instead of the regular variety. You can also mix a small amount of hot sauce into the egg wash to infuse the heat directly into the meat before the breading layer seals it in.
Exploring Fresh Herb Additions
Dried herbs like thyme, oregano, or rosemary can elevate the flavor profile significantly. Add about one teaspoon of your favorite dried herb into the breadcrumb mixture for a fragrant, aromatic crust. This approach works exceptionally well if you plan to serve the tenders with lemon-based dipping sauces or fresh salads.
Strategic Serving Concepts
Pairing with Refreshing Sides
Because the breaded chicken is savory and rich, it pairs best with lighter, acidic, or crunchy accompaniments. A classic coleslaw made with a vinegar-based dressing provides a bright contrast to the crispy coating. Similarly, roasted vegetables like broccoli or snap peas add necessary texture and a clean finish to the overall meal.
Creating an Interactive Sauce Bar
When serving these as appetizers, offering a variety of dipping sauces turns the meal into a customizable experience. Consider setting out small ramekins filled with honey mustard, barbecue sauce, ranch dressing, and a creamy garlic aioli. Offering one sweet option, one spicy option, and one savory option ensures that every guest finds a pairing they enjoy.
Long-Term Storage and Quality Maintenance
Maximizing Freshness in the Refrigerator
To store leftovers, wait until the chicken has cooled completely to room temperature before placing it into an airtight container. If you seal them while they are still steaming, the trapped moisture will inevitably ruin the crispiness of the crust. When properly sealed, the tenders will maintain their quality in the refrigerator for up to three days.
Restoring Texture After Storage
Avoid using the microwave, as it will inevitably soften the breading. To restore the original texture, place the refrigerated tenders back into the air fryer at 350°F (175°C) for about 3–5 minutes. This gentle reheating cycle removes excess moisture and crisps up the outer layer without burning the exterior or drying out the chicken interior.
Frequently Asked Questions
Can I prepare the chicken ahead of time?
You can bread the tenders up to two hours in advance if you keep them on a wire rack in the refrigerator. Doing this allows the breading to set slightly, which can actually result in an even tighter, crispier crust when you are ready to cook.
Why is my breading falling off during cooking?
This is usually caused by having too much moisture on the chicken before the initial flour dredge or failing to press the panko into the egg-coated surface. Pat your chicken dry with paper towels before starting the breading process to ensure a firm connection.
Is it necessary to use oil?
While the air fryer uses convection to crisp food, a very light spray of oil helps the panko achieve a deep, golden color. Without any oil, the panko may stay pale and appear dry, even if it is technically cooked through.
Can I air fry these from a frozen state?
Yes, though you should avoid pre-breading and freezing them. It is best to purchase store-bought pre-breaded tenders for direct cooking from frozen. If using this homemade recipe, always thaw the chicken fully before beginning the breading process to ensure it cooks safely and evenly.
Print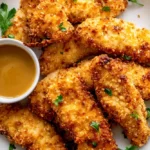
Air Fryer Chicken Tenders Recipe
- Total Time: 30 minutes
- Yield: 4 servings 1x
- Diet: High Protein
Description
This recipe is simple, flexible, and a favorite in my household. The air fryer makes cooking fast, cleanup easy, and the results are always delicious.
Ingredients
- 1 lb chicken tenders (about 8–10 pieces)
- 1/2 cup all-purpose flour
- 1 teaspoon garlic powder
- 1 teaspoon paprika
- 1/2 teaspoon salt
- 1/2 teaspoon black pepper
- 2 large eggs
- 1 tablespoon water
- 1 cup panko breadcrumbs
- 1/4 cup grated Parmesan cheese
- Cooking spray or a small amount of olive oil
Instructions
- Step: Prepare the breading station: Set up three shallow bowls: one with flour, garlic powder, paprika, salt, and pepper; the second with beaten eggs mixed with 1 tablespoon water; and the third with panko breadcrumbs mixed with Parmesan cheese if using.
- Step: Coat the chicken tenders: Take each chicken tender and dredge it first in the flour mixture, shaking off any excess. Next, dip it into the egg mixture, ensuring it is completely covered. Finally, press it into the panko breadcrumb mixture until evenly coated on all sides.
- Step: Preheat the air fryer: Preheat your air fryer to 400°F (200°C) for 3–5 minutes.
- Step: Cook the chicken tenders: Lightly spray the air fryer basket with cooking spray or brush with a small amount of olive oil. Place the tenders in a single layer and cook at 400°F (200°C) for 12–15 minutes, flipping halfway through, until internal temperature reaches 165°F (74°C).
- Step: Serve and enjoy: Remove the tenders from the air fryer and let them rest for 2 minutes before serving hot.
Notes
Preheating is essential for crispiness. Ensure chicken is in a single layer to allow air circulation. Resting the chicken for 2 minutes post-cooking keeps it juicy.
- Prep Time: 15 minutes
- Cook Time: 15 minutes
- Category: Main Course, Snacks
- Method: Air Frying
- Cuisine: American
Nutrition
- Serving Size: 2-3 tenders
- Calories: 320 kcal
- Sugar: 1 g
- Sodium: 650 mg
- Fat: 9 g
- Saturated Fat: 2.5 g
- Unsaturated Fat: 6 g
- Trans Fat: 0 g
- Carbohydrates: 24 g
- Fiber: 1 g
- Protein: 32 g
- Cholesterol: 145 mg
Keywords: air fryer, chicken tenders, crispy chicken, easy dinner, quick snacks, homemade, healthy-style chicken