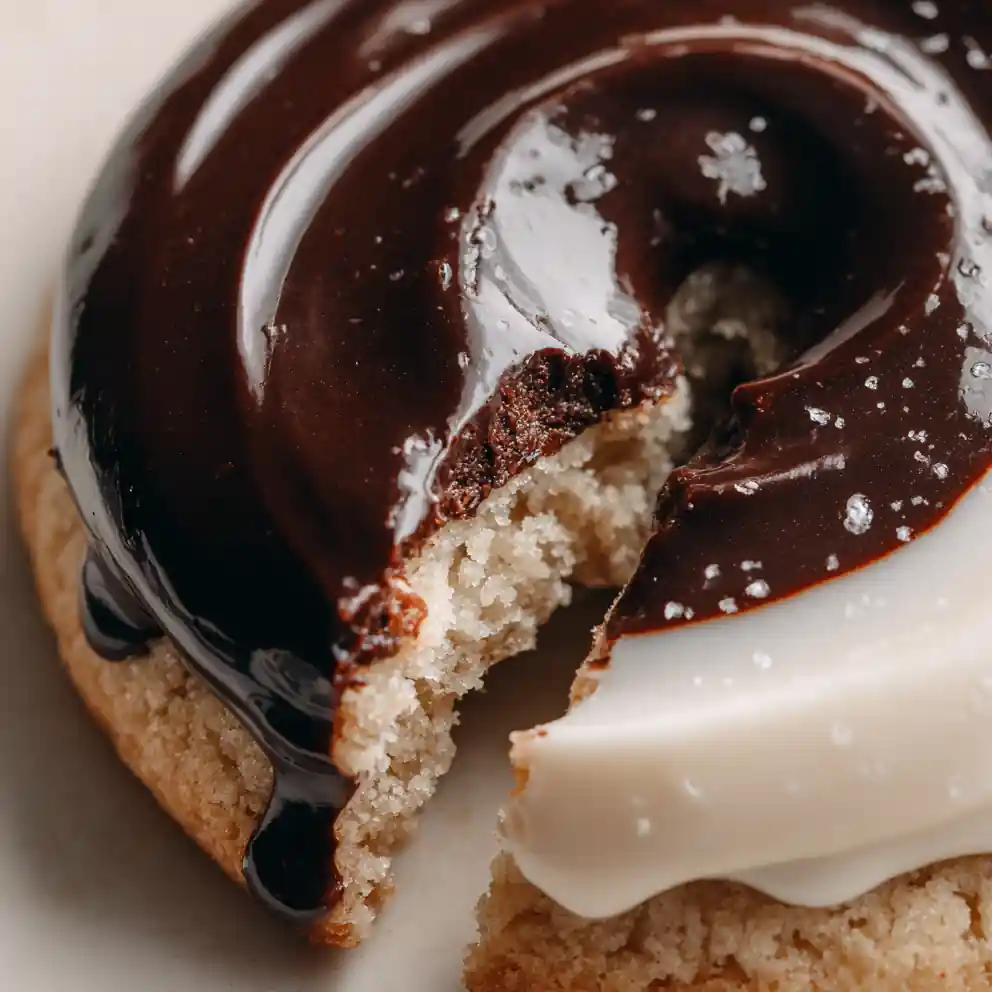
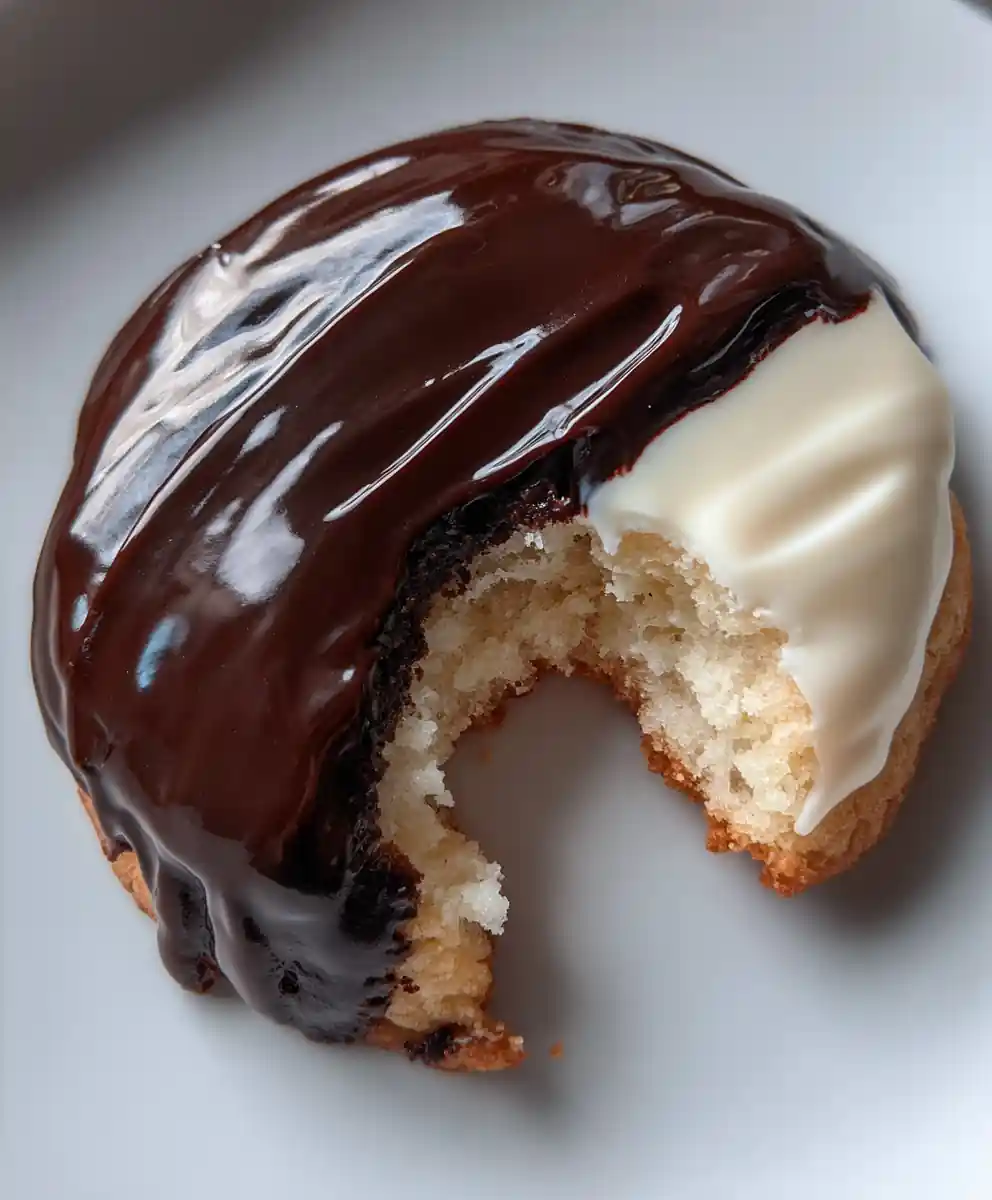
I find such comfort in recreating classic bakery treats at home, and these Black And White Cookies Bakery Style are no exception. That delightful contrast of tender, cake-like cookie and dual vanilla-chocolate frosting just brightens any day. This family-friendly recipe brings that beloved taste of nostalgia home, offering a fun and easy baking project for families or a delightful treat for busy schedules. My foolproof method ensures tender cookies and smooth, delicious frosting every time, perfect for a quick pick-me-up.
Ingredient List with Smart Choices
Crafting homemade Black And White Cookies starts with simple, quality ingredients. Here’s what you’ll need, along with why each one is important:
- All-purpose flour: 2 ½ cups (300g) – Provides the core structure. (For that characteristic tender, cakey texture, I sometimes use cake flour or substitute 2 Tbsp of AP flour with cornstarch.)
- Granulated sugar: 1 cup (200g) – Sweetens the cookie base.
- Baking powder: 1 tsp – Our leavening agent, ensuring a soft rise.
- Salt: ½ tsp – Balances the sweetness and enhances flavor.
- Unsalted butter: ½ cup (113g), softened – Adds richness and tenderizes the dough. (Dairy-free butter works just as well for a plant-based option).
- Large eggs: 2 – Binds ingredients, provides structure and moisture.
- Vanilla extract: 2 tsp for cookies, 1 tsp for vanilla frosting, ½ tsp for chocolate frosting – Essential for that classic bakery flavor. I find a good quality pure vanilla makes a big difference.
- Powdered sugar: 4 cups (480g) – The base for both frostings, giving them a smooth finish.
- Unsweetened cocoa powder: ¼ cup (22g) – Gives the chocolate frosting its deep color and flavor.
- Milk: 5-6 Tbsp for vanilla frosting, 3-4 Tbsp for chocolate frosting – Adjusts frosting consistency to be smooth and spreadable. (Any plant-based milk can be swapped in here.)
Most of these are everyday pantry items, making this an ideal recipe for quick meals or family dinners. The only fresh market pick you really need are eggs, but even those store well!
Highlight Special Diet Options
- Gluten-Free: For Black And White Cookies Bakery Style that are celiac-friendly, simply use a 1:1 gluten-free all-purpose baking blend. The texture will be slightly different but still delicious.
- Dairy-Free: Substitute plant-based butter and milk to create a dairy-free version of these beloved treats.
- Protein-Rich: While not a typical high-protein snack, using a protein-enriched flour blend could slightly boost the protein content if that’s a dietary goal.
Seasonal Upgrades or Affordable Substitutions
- A dash of almond extract (¼ tsp) alongside the vanilla can add a lovely depth to the cookie base.
- If you don’t have cake flour on hand, you can substitute with all-purpose flour. For extra tenderness, remove 2 tablespoons of all-purpose flour from each cup and replace with 2 tablespoons of cornstarch.
Easy Step-by-Step Cooking Directions
- Preheat your oven to 375°F (190°C) and line two large baking sheets with parchment paper; this prevents sticking and helps ensure even browning around the edges.
- Whisk dry ingredients: In a medium bowl, combine the flour, baking powder, and salt. Whisk until well-blended, ensuring leavening is evenly distributed. Set aside.
- Cream wet ingredients: In a large mixing bowl, beat the softened butter and granulated sugar together with an electric mixer until the mixture is light, fluffy, and pale yellow (about 3-4 minutes). Beat in the eggs one at a time, incorporating each fully before adding the next, then stir in the vanilla extract, noting its lovely aroma.
- Combine: Gradually add the dry ingredient mixture to the wet ingredients, mixing on low speed until just combined. The dough should look shaggy but come together. If it appears too dry, add milk one teaspoon at a time until a soft dough forms. Do not overmix, as this can make your Black And White Cookies tough.
- Scoop and bake: Drop rounded tablespoons of dough onto your prepared baking sheets, leaving about 2 inches of space between each. I like using a 1.5-inch cookie scoop for uniform size. Bake for 8-10 minutes, or until the edges are lightly golden and centers look set and spring back slightly when touched.
- Cool: Let the Black And White Cookies cool on the baking sheet for just a few minutes, about 5, to firm up before carefully transferring them to a wire rack. They need to cool completely before frosting to avoid any melting.
- Prepare vanilla frosting: In a medium bowl, whisk the powdered sugar, milk, and vanilla extract until smooth and spreadable. The consistency should be thick but pourable; add more milk a tiny bit at a time if it’s too thick.
- Prepare chocolate frosting: In another medium bowl, whisk the powdered sugar, cocoa powder, milk, and vanilla extract until smooth. Ensure there are no lumps of cocoa powder, yielding a rich, dark color.
- Frosting time: Once cookies are completely cool, spread vanilla frosting over half the flat side of each Black And White Cookie. Let it set slightly (about 10 minutes). Then, spread chocolate frosting over the other half, creating that iconic two-tone look for your Black And White Cookies Bakery Style.
Inline Shortcuts for Busy Cooks
- Use a cookie scoop for perfectly uniform cookies, which also speeds up the dropping process considerably, making this a quicker family cooking project.
- For extra-smooth frosting, sift your powdered sugar before mixing to avoid any lumps.
Notes for Flavor Variations or Healthier Twists
- For a brighter, citrusy note, add a teaspoon of fresh lemon zest to the cookie dough in step 3.
- Reduce the granulated sugar by ¼ cup in the cookie dough for a slightly less sweet treat without compromising flavor or texture, contributing to more mindful eating.
Ideal Uses and Serving Suggestions
These delightful cookies are perfect for many moments. They bring a touch of bakery charm right to your home, making everyday meals feel special.
- Weeknight dinners: A delightful dessert to cap off any family meal.
- Kid lunches: A special, homemade treat to tuck into lunchboxes for a little surprise.
- Gatherings and holidays: Impress guests with classic Black And White Cookies Bakery Style on your dessert platter.
- Coffee breaks: The perfect accompaniment to your morning coffee or afternoon tea.
Pairings
- Milk: The timeless pairing for any cookie, especially these rich treats.
- Coffee or tea: Complements the classic vanilla and chocolate flavors.
- Hot chocolate: A cozy indulgence for cooler days, perfect with a sweet bite.
Guidance for Leftovers, Storage, and Reheating
Ensure your delicious cookies stay fresh. Proper storage helps maintain their tender texture and distinct frosting.
Store leftover cookies in an airtight container at room temperature for up to 3-4 days, or in the refrigerator for up to a week. For longer keeping, unfrosted cookies can be frozen for up to 2 months. Thaw them at room temperature before frosting. Frosted cookies can also be frozen; layer them carefully with parchment paper in an airtight container for up to a month.
Everyday Benefits of Cooking with Black And White Cookies Bakery Style
Making these iconic treats at home offers more than just a sweet reward. It’s a smart choice for convenience and wholesome family enjoyment.
Showcase Practical Wins
- Saves time: Skip the bakery line and enjoy homemade cookies whenever the craving strikes.
- Budget-friendly: Making treats at home is often more economical than store-bought options, giving you more for less.
- Nourishing: While an indulgent treat, you control the ingredients, making them a more wholesome option for homemade delights for families.
Tie to Balanced Lifestyle Goals
Incorporating simple baking projects into your routine supports a well-rounded and joyful family life.
- Satisfying desserts: Enjoy a mindful treat that satisfies cravings without overdoing it.
- Family-friendly: A fun activity to bake together, creating lasting memories and simple baking projects everyone can enjoy.
- Meal prep (for treats): Bake a big batch to have delicious Black And White Cookies on hand for the week’s dessert or snack options.
Tips, Variations, and Dietary Adjustments
Elevate your baking experience with these insights, ensuring perfect results and catering to various needs.
Technique Upgrades to Improve Results
- Don’t overmix the cookie dough; mix until just combined for a tender crumb.
- Ensure cookies are completely cool before frosting to prevent melting and messy results. This is crucial for neat lines.
- Use a warm, clean knife to create a sharp, neat line between the vanilla and chocolate frostings.
Flavor/Spice Tweaks for Different Cuisines
- Add a pinch of espresso powder to the chocolate frosting for a deeper, richer chocolate flavor.
- A touch of orange zest can provide a pleasant twist to the cookie base.
Adjustments for Common Diets
- Low-carb: Experiment with almond flour and sugar substitutes, though the texture will differ from traditional Black And White Cookies.
- Plant-based: As mentioned, use dairy-free butter and plant-based milk to make these classic cookies vegan-friendly.
- Kid-safe: Kids love helping to scoop the dough and spread the frosting. My kids always argue over who gets to do the vanilla half! Use kid-friendly cookie cutters for fun shapes if desired.
Frequently Asked Questions
What makes Black And White Cookies Bakery Style so special?
Their unique cake-like texture, distinct vanilla and chocolate icings, and classic look are what set these delicious treats apart from typical cookies, making them an iconic delight.
How can I ensure my Black And White Cookies have a perfectly smooth frosting?
For perfectly smooth Black And White Cookies Bakery Style frosting, ensure your powdered sugar is sifted and spread the frosting while the cookies are completely cooled. I always sift my powdered sugar twice to guarantee there are no lumps, which makes a huge difference.
Is this recipe for Black And White Cookies suitable for gluten-free diets?
Yes, you can easily adapt this Black And White Cookies Bakery Style recipe to be gluten-free by using a high-quality 1:1 gluten-free all-purpose flour blend. Simply swap the regular flour cup-for-cup with your preferred blend.
How long do homemade Black And White Cookies Bakery Style stay fresh?
Homemade Black And White Cookies Bakery Style stay fresh for up to 3-4 days when stored in an airtight container at room temperature. For longer storage, refrigerate them for up to a week.
Can I make Black And White Cookies ahead of time for a party?
Absolutely! You can bake the cookie bases a day or two in advance and frost them closer to serving time for optimal freshness and presentation. This is a great meal prep strategy for entertaining.
What’s the secret to a tender Black And White cookie?
The secret to a truly tender cookie base is using cake flour or a combination of all-purpose flour with cornstarch, and careful mixing to avoid over-developing gluten. A light touch ensures that signature cake-like crumb.
Conclusion
There’s nothing quite like the joy of biting into a freshly baked cookie. Enjoy the satisfaction of bringing these iconic Black And White Cookies Bakery Style from scratch to your table, creating sweet memories for your family. Save this recipe on Pinterest so you can bake these delightful treats again and again!
Print
Black And White Cookies Bakery Style
- Total Time: 90 minutes
- Yield: 24 cookies 1x
- Diet: General
Description
These Black And White Cookies Bakery Style offer a tender, cake-like cookie with a delightful dual vanilla-chocolate frosting. This family-friendly recipe brings a beloved taste of nostalgia home, perfect for a quick pick-me-up.
Ingredients
- 2.5 cups all-purpose flour (300g), (For tender, cakey texture, consider cake flour or substitute 2 Tbsp of AP flour with cornstarch)
- 1 cup granulated sugar (200g)
- 1 tsp baking powder
- 0.5 tsp salt
- 0.5 cup unsalted butter (113g), softened (Dairy-free butter can be used)
- 2 large eggs
- 3.5 tsp vanilla extract (2 tsp for cookies, 1 tsp for vanilla frosting, 0.5 tsp for chocolate frosting)
- 4 cups powdered sugar (480g)
- 0.25 cup unsweetened cocoa powder (22g)
- 8 to 10 Tbsp milk (5–6 Tbsp for vanilla frosting, 3–4 Tbsp for chocolate frosting, any plant-based milk can be swapped in)
Instructions
- Preheat Oven and Prepare Pans: Preheat your oven to 375 F (190 C) and line two large baking sheets with parchment paper; this prevents sticking and ensures even browning.
- Whisk Dry Ingredients: In a medium bowl, combine the flour, baking powder, and salt. Whisk until well-blended, ensuring leavening is evenly distributed. Set aside.
- Cream Wet Ingredients: In a large mixing bowl, beat the softened butter and granulated sugar together with an electric mixer until the mixture is light, fluffy, and pale yellow (about 3-4 minutes). Beat in the eggs one at a time, incorporating each fully before adding the next, then stir in the vanilla extract, noting its lovely aroma.
- Combine Dough: Gradually add the dry ingredient mixture to the wet ingredients, mixing on low speed until just combined. The dough should look shaggy but come together. If it appears too dry, add milk one teaspoon at a time until a soft dough forms. Do not overmix, as this can make your cookies tough.
- Scoop and Bake Cookies: Drop rounded tablespoons of dough onto your prepared baking sheets, leaving about 2 inches of space between each. Use a 1.5-inch cookie scoop for uniform size. Bake for 8-10 minutes, or until the edges are lightly golden and centers look set and spring back slightly when touched.
- Cool Cookies: Let the cookies cool on the baking sheet for just a few minutes, about 5, to firm up before carefully transferring them to a wire rack. They need to cool completely before frosting to avoid any melting.
- Prepare Vanilla Frosting: In a medium bowl, whisk the powdered sugar, milk, and vanilla extract until smooth and spreadable. The consistency should be thick but pourable; add more milk a tiny bit at a time if it’s too thick.
- Prepare Chocolate Frosting: In another medium bowl, whisk the powdered sugar, cocoa powder, milk, and vanilla extract until smooth. Ensure there are no lumps of cocoa powder, yielding a rich, dark color.
- Frost Cookies: Once cookies are completely cool, spread vanilla frosting over half the flat side of each cookie. Let it set slightly (about 10 minutes). Then, spread chocolate frosting over the other half, creating that iconic two-tone look.
Notes
For perfectly uniform cookies and faster dropping, use a cookie scoop. Sift powdered sugar for extra-smooth frosting, avoiding lumps. For a brighter flavor, add 1 tsp fresh lemon zest to the cookie dough. To reduce sweetness, decrease granulated sugar by 0.25 cup.
- Prep Time: 30 minutes
- Cook Time: 10 minutes
- Category: Dessert
- Method: Baking
- Cuisine: American
Nutrition
- Serving Size: 1 cookie
- Calories: 250 calories
- Sugar: 28 g
- Sodium: 50 mg
- Fat: 14 g
- Saturated Fat: 7 g
- Unsaturated Fat: 6 g
- Trans Fat: 0 g
- Carbohydrates: 40 g
- Fiber: 1 g
- Protein: 2 g
- Cholesterol: 17 mg
Keywords: Black and White Cookies, bakery style, classic, vanilla, chocolate, frosting, easy, family-friendly, homemade, dessert
FREE PRINTABLE RECIPE
Get the Printable Recipe PDF (Free)
Enter your email and we’ll send you the ingredients + step-by-step instructions as a clean PDF you can save to your phone.
- ✅ Printable PDF (ingredients + steps)
- ✅ Save it to your phone (no long scrolling)
- ✅ Includes cook time + servings
- ✅ Easy to follow
FAQ
Where’s the full recipe?
It’s delivered as a printable PDF so you can save it and cook without scrolling.
I didn’t get the email.
Check Spam/Promotions and search your inbox for your site name. Then click Confirm to receive the PDF.