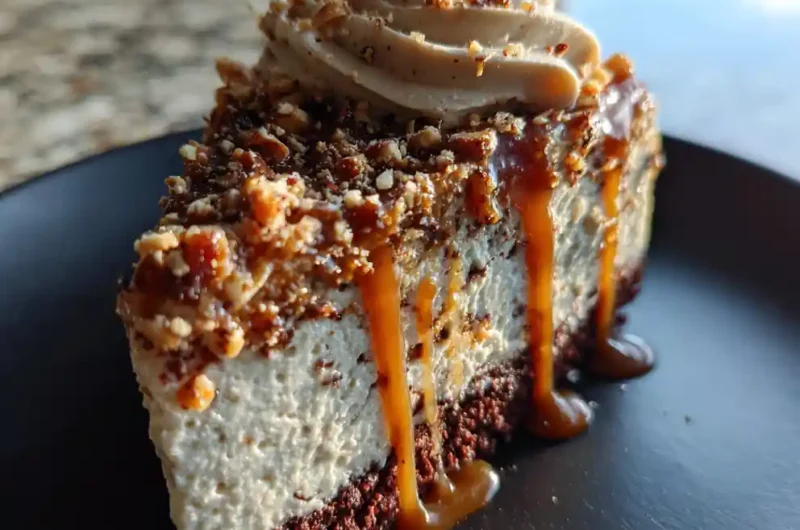
Get ready to experience a dessert that’s pure indulgence! This Butterfinger Poke Cake isn’t just a cake; it’s a symphony of textures and flavors. Imagine a moist, chocolatey cake infused with the irresistible crunch of Butterfinger, drenched in a luscious salty caramel ribbon, and topped with a cloud of creamy peanut butter mousse. It’s the perfect treat for birthdays, potlucks, or simply satisfying your sweet tooth. This recipe balances the rich chocolate with the salty caramel and peanut butter, creating a truly unforgettable dessert experience. Let’s get baking!

What You’ll Need
- 200 g (7 oz) All-Purpose Flour: The foundation of our cake, providing structure and a tender crumb. Using all-purpose flour ensures a balanced texture – not too dense, not too light.
- 45 g (1/3 cup) Unsweetened Cocoa Powder: This is where the chocolate magic begins! Unsweetened cocoa powder delivers a deep, rich chocolate flavor without adding extra sweetness.
- 200 g (1 cup) Granulated Sugar: Essential for sweetness and contributing to the cake’s tender texture. Granulated sugar dissolves easily, creating a smooth batter.
- 100 g (1/2 cup) Brown Sugar: Adds a lovely caramel note and moisture to the cake. The molasses in brown sugar also enhances the overall flavor complexity.
- 1 tsp Baking Powder: A leavening agent that helps the cake rise, creating a light and fluffy texture.
- 1/2 tsp Baking Soda: Works in conjunction with the baking powder to provide extra lift and a tender crumb.
- 1/4 tsp Salt: Balances the sweetness and enhances all the other flavors in the cake. Don’t skip this – it makes a big difference!
- 120 ml (1/2 cup) Whole Milk: Provides moisture and helps bind the ingredients together. Whole milk contributes to a richer flavor and texture.
- 120 ml (1/2 cup) Unsalted Butter, Melted: Adds richness, tenderness, and flavor to the cake. Using melted butter ensures it incorporates easily into the batter.
- 2 Large Eggs: Bind the ingredients together and contribute to the cake’s structure.
- 1 tsp Alcohol-Free Vanilla Extract: Enhances the overall flavor profile, adding a warm and aromatic note.
- 100 g (3½ oz) Chopped Butterfinger Candy Bars (about 4 bars): The star of the show! Butterfinger provides that signature peanut butter and chocolate crunch.
- 150 ml (2/3 cup) Heavy Cream: Used to create a silky smooth caramel sauce. The high fat content of heavy cream results in a luxurious texture.
- 100 g (3½ oz) Caramel Sauce (store-bought or homemade): Adds a delightful salty-sweet element to the cake. Feel free to use your favorite brand or make your own!
- 120 g (4 oz) Smooth Peanut Butter (no added sugar): The base for our creamy mousse topping. Using a smooth peanut butter ensures a silky texture.
- 100 g (3½ oz) Cream Cheese, Softened: Adds tanginess and creaminess to the peanut butter mousse. Make sure it’s fully softened for a smooth consistency.
- 2 tbsp Powdered Sugar: Sweetens the peanut butter mousse to perfection.
- 30 g (2 tbsp) Toasted Crushed Peanuts: Provides a delightful crunch and nutty flavor as a garnish.
- Extra Caramel Drizzle (optional): For an extra touch of visual appeal and sweetness.
Substitutions & Variations
While this recipe is fantastic as is, feel free to make a few adjustments to suit your preferences:
- Flour: Gluten-free all-purpose flour blend can be used for a gluten-free version.
- Butterfinger: If you can’t find Butterfinger, you can substitute with another peanut butter cup candy bar, but the flavor will be slightly different.
- Peanut Butter: Almond butter or cashew butter can be used in place of peanut butter for a different nutty flavor.
- Caramel Sauce: Homemade or store-bought salted caramel sauce works best, but regular caramel sauce can be used with a pinch of salt added.
Poke & Soak: Mastering the Butterfinger Infusion
- Poke the Cake: Once the cake has cooled slightly (about 10 minutes in the pan), it’s time to create those all-important holes. Use a wooden skewer, a thin chopstick, or even the handle of a wooden spoon. The goal is to create a grid pattern, about 2cm (¾ inch) apart, all over the surface. Don’t be shy – the more holes, the more Butterfinger goodness will seep in!
- Melt the Butterfinger: While the cake is cooling and getting poked, melt any remaining Butterfinger pieces. Microwave in 30-second intervals, stirring in between, to prevent burning. You want a smooth, pourable consistency. This melted Butterfinger is the key to that intense flavor throughout the cake.
- Pour & Set: Immediately pour the melted Butterfinger over the poked cake. Don’t worry if it seems like a lot – it will find its way into all those holes. Let it sit for about 5 minutes to firm up slightly before moving on to the caramel ribbon. This allows the Butterfinger to partially set, preventing it from completely running off when you slice the cake.
Creating the Salty Caramel Ribbon
The salty caramel ribbon isn’t just a topping; it’s a flavor counterpoint to the sweet Butterfinger and peanut butter. Warming the caramel with heavy cream creates a silky, pourable sauce that clings beautifully to the cake.
- Warm the Caramel: In a small saucepan, combine the caramel sauce and heavy cream.
- Gentle Heat: Heat over low heat, stirring constantly, until the mixture is smooth and pourable. Avoid boiling, as this can change the texture of the caramel.
- Drizzle with Flair: Drizzle the warm caramel over the Butterfinger-infused cake in a lazy S-pattern. Let it pool slightly at the edges for a visually appealing effect. The caramel will create a beautiful ribbon that remains visible even after slicing.
The Peanut Butter Mousse: A Creamy Crown
The peanut butter mousse adds a luxurious, creamy texture and complements the Butterfinger and caramel flavors perfectly. Using softened cream cheese is crucial for a smooth, fluffy consistency.
- Cream Together: In a medium bowl, beat together the softened cream cheese, peanut butter, and powdered sugar until light and fluffy. An electric mixer is highly recommended for this step.
- Pipe & Swirl: Transfer the mousse to a piping bag fitted with a large star tip. This creates an elegant swirl on each plate. If you don’t have a piping bag, you can simply spoon the mousse onto the plates.
Why Poke Cakes Work: The Science of Flavor Infusion
Poke cakes aren’t just about aesthetics; they’re a brilliant way to infuse flavor deep into the cake’s crumb. By creating holes, you dramatically increase the surface area for the liquid (in this case, melted Butterfinger) to penetrate. This results in a cake that’s intensely flavorful from every bite, not just on top. The cake absorbs the melted candy, creating a moist and decadent texture that’s far superior to simply frosting a cake.
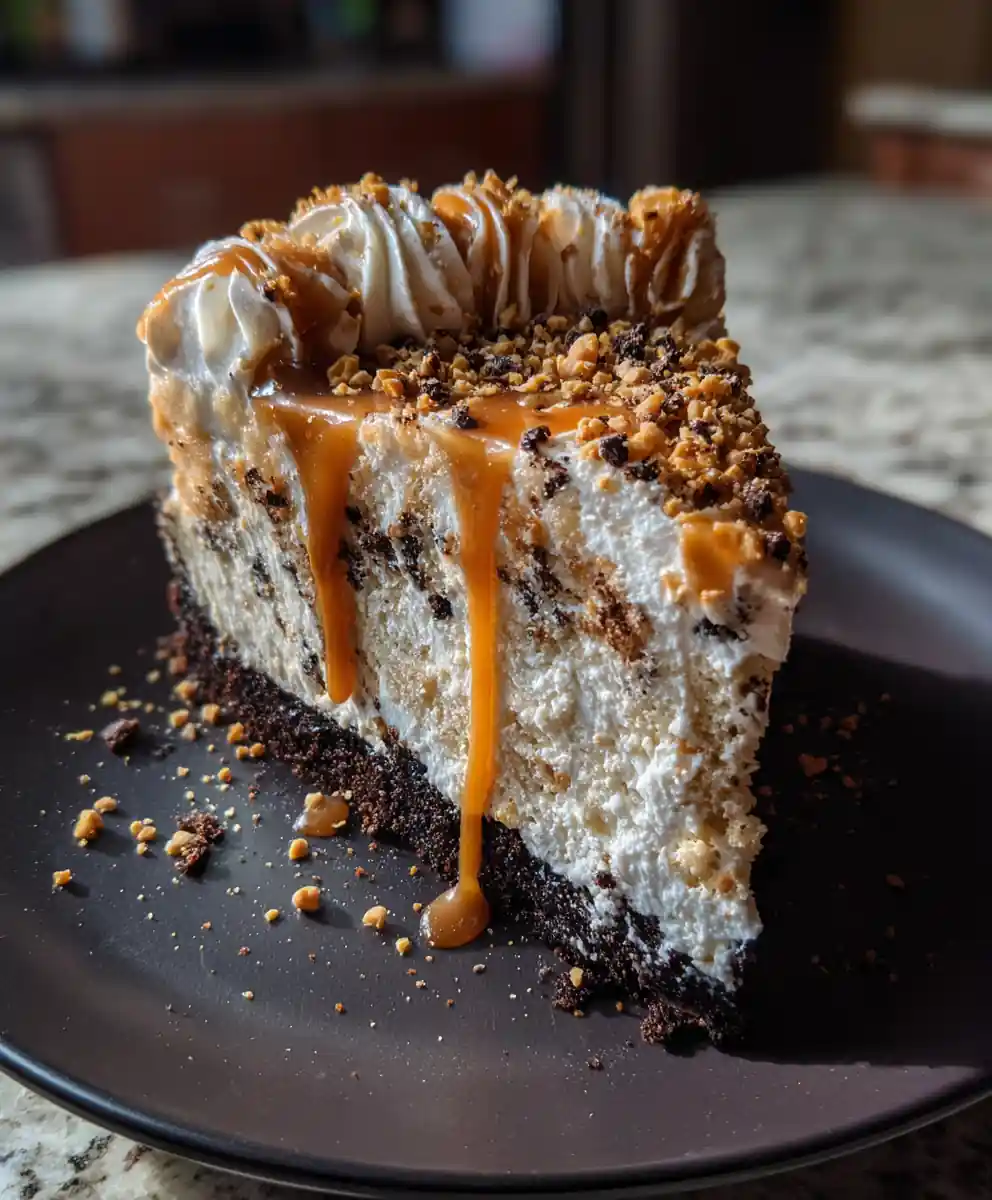
Serving Suggestions & Plating
Presentation matters! A simple, elegant plating can elevate this already decadent dessert. Consider using white or matte black plates to make the colors pop. A thin trail of caramel flowing from the cake onto the plate adds a touch of artistry. Don’t forget the final flourish of toasted crushed peanuts for added texture and visual appeal.
Frequently Asked Questions
Can I use a different type of peanut butter?
While smooth, no-added-sugar peanut butter is recommended for the mousse, you can experiment with crunchy peanut butter for added texture. Keep in mind that this will change the overall consistency of the mousse.
Can I make the caramel sauce from scratch?
Absolutely! Homemade caramel sauce will add an extra layer of flavor. There are many excellent recipes available online. Just ensure it’s cooled slightly before mixing with the heavy cream.
How long can I store leftover Butterfinger Poke Cake?
Leftover cake can be stored in an airtight container in the refrigerator for up to 3 days. The mousse may soften slightly over time.
This Butterfinger Poke Cake with Salty Caramel Ribbon is a guaranteed crowd-pleaser! Its combination of textures and flavors is simply irresistible. Don’t forget to save this recipe to Pinterest so you can easily find it when you’re ready to bake!
Print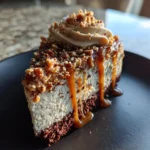
butterfinger candy bar poke cake irresistible dessert
- Total Time: 55 minutes
- Yield: 12 servings 1x
- Diet: General
Description
Indulge in this Butterfinger Poke Cake, a moist chocolate cake infused with Butterfinger candy, a salty caramel ribbon, and a creamy peanut butter mousse. It’s a perfect dessert for any occasion!
Ingredients
- 200 g (7 oz) All-Purpose Flour: Provides structure and a tender crumb.
- 45 g (1/3 cup) Unsweetened Cocoa Powder: Delivers a rich chocolate flavor.
- 200 g (1 cup) Granulated Sugar: For sweetness and texture.
- 100 g (1/2 cup) Brown Sugar: Adds caramel notes and moisture.
- 1 tsp Baking Powder: Helps the cake rise.
- 1/2 tsp Baking Soda: Provides extra lift.
- 1/4 tsp Salt: Balances sweetness and enhances flavors.
- 120 ml (1/2 cup) Whole Milk: Provides moisture and binds ingredients.
- 120 ml (1/2 cup) Unsalted Butter, Melted: Adds richness and tenderness.
- 2 Large Eggs: Bind ingredients and contribute to structure.
- 1 tsp Alcohol-Free Vanilla Extract: Enhances the flavor profile.
- 100 g (3.5 oz) Chopped Butterfinger Candy Bars: The signature crunch.
- 150 ml (2/3 cup) Heavy Cream: Creates a silky caramel sauce.
- 100 g (3.5 oz) Caramel Sauce: Adds a salty-sweet element.
- 120 g (4 oz) Smooth Peanut Butter: The base for the creamy mousse.
- 100 g (3.5 oz) Cream Cheese, Softened: Adds tanginess and creaminess.
- 2 tbsp Powdered Sugar: Sweetens the mousse.
- 30 g (2 tbsp) Toasted Crushed Peanuts: Provides a nutty garnish.
Instructions
- Prepare Cake Batter: Combine flour, cocoa, sugars, baking powder, baking soda, and salt. Mix in milk, melted butter, eggs, and vanilla.
- Bake & Cool: Pour batter into a pan and bake until set. Cool slightly before poking holes.
- Infuse with Butterfinger: Melt Butterfinger and pour over poked cake. Let set.
- Create Caramel Ribbon: Warm caramel sauce with heavy cream and drizzle over cake.
- Make Peanut Butter Mousse: Beat cream cheese, peanut butter, and powdered sugar until fluffy.
- Finish & Garnish: Pipe or spoon mousse onto cake and garnish with crushed peanuts.
Notes
For a gluten-free version, use a gluten-free flour blend. Feel free to experiment with different nut butters.
- Prep Time: 20 minutes
- Cook Time: 35 minutes
- Category: Dessert
- Method: Baking
- Cuisine: American
Nutrition
- Serving Size: 1 slice
- Calories: 450 kcal
- Sugar: 40 g
- Sodium: 250 mg
- Fat: 25 g
- Saturated Fat: 15 g
- Unsaturated Fat: 8 g
- Trans Fat: 0 g
- Carbohydrates: 50 g
- Fiber: 3 g
- Protein: 8 g
- Cholesterol: 75 mg
Keywords: butterfinger,poke cake,caramel,peanut butter,chocolate,dessert,easy,bake
FREE PRINTABLE RECIPE
Get the Printable Recipe PDF (Free)
Enter your email and we’ll send you the ingredients + step-by-step instructions as a clean PDF you can save to your phone.
- ✅ Printable PDF (ingredients + steps)
- ✅ Save it to your phone (no long scrolling)
- ✅ Includes cook time + servings
- ✅ Easy to follow
FAQ
Where’s the full recipe?
It’s delivered as a printable PDF so you can save it and cook without scrolling.
I didn’t get the email.
Check Spam/Promotions and search your inbox for your site name. Then click Confirm to receive the PDF.