On my busiest nights, I reach for simple yet impressive desserts, and I can’t wait to share one of my favorites with you.
Tired of store-bought desserts that lack that special homemade touch, or complex recipes that leave you overwhelmed? Discover how simple it is to whip up our luscious Chocolate Mousse Recipe Silky Dessert Cups – a truly indulgent yet surprisingly easy treat. This recipe is crafted for busy home cooks and families who crave impressive desserts without the fuss. We’ll guide you through every step to create perfect, velvety smooth chocolate mousse, guaranteeing smiles around your table. Tried and true in our own kitchen, this recipe is a consistent crowd-pleaser and a personal favorite.

Table of Contents
Table of Contents
Ingredient Breakdown (with Measurements, Purpose) — Crafting Your Silky Chocolate Mousse Dessert Cups
Core Ingredients:
- 200g good quality dark chocolate (60-70% cocoa), chopped: For rich chocolate flavor and setting.
- 2 large eggs, separated: Yolks for richness, whites for airy texture (or explore egg-free options below).
- 50g granulated sugar: To sweeten and stabilize egg whites.
- 300ml heavy cream, chilled: For luscious body and whipped topping.
- 1 tsp vanilla extract: Enhances chocolate flavor.
- Pinch of sea salt: Brightens and balances sweetness.
Optional Add-ins & Smart Swaps:
- 1 tbsp espresso powder: Deepens chocolate flavor.
- 1 tbsp orange liqueur or rum: For a grown-up twist.
- Dairy-free option: Use full-fat canned coconut cream (chilled overnight) instead of heavy cream, and dairy-free chocolate.
- Egg-free option: Use aquafaba (chickpea brine) whipped to stiff peaks instead of egg whites, and omit yolks, or use a gelatin/agar-agar thickener.
Notes on Quality & Seasonality:
Always opt for high-quality chocolate; it makes a huge difference in the final taste of your Chocolate Mousse Recipe Silky Dessert Cups. Brands like Ghirardelli, Lindt, or Callebaut work beautifully. Ensure your heavy cream is very cold for best whipping results. Fresh, free-range eggs often yield the best texture.
Step-by-Step Preparation Instructions
- Melt the Chocolate (5-7 minutes): Gently melt chopped chocolate in a heatproof bowl over a simmering pot of water (double boiler) or in the microwave in 30-second bursts, stirring until smooth. Let cool slightly.
- Prepare Yolks (2-3 minutes): In a separate bowl, whisk egg yolks with half the sugar until pale and creamy. Slowly whisk the slightly cooled melted chocolate into the yolk mixture until well combined. (For egg-free, skip this and move to cream.)
- Whip Cream (3-5 minutes): In a large, chilled bowl, whip the heavy cream with vanilla extract until soft peaks form. Be careful not to over-whip or it will become grainy. (For dairy-free, whip chilled coconut cream.)
- Fold in Chocolate (2-3 minutes): Gently fold about a third of the whipped cream into the chocolate-yolk mixture to lighten it, then fold in the remaining cream until just combined, being careful not to deflate the airy texture. (Troubleshooting: If it looks streaky, keep folding gently.)
- Whip Egg Whites (3-5 minutes): In another very clean bowl, whip egg whites until foamy, then gradually add the remaining sugar, whipping until stiff, glossy peaks form. (For egg-free, whip aquafaba here.)
- Combine & Chill (2-3 minutes prep, 2-4 hours chill): Gently fold the whipped egg whites (or aquafaba) into the chocolate mixture until no streaks remain. Divide the silky chocolate mousse among individual dessert cups or a large serving bowl. Chill in the refrigerator for at least 2-4 hours, or until firm and set.
Brief Troubleshooting:
- Mousse not setting? This usually means the chocolate mixture wasn’t cooled enough before folding in the cream and whites, or the folding was too vigorous, deflating the air. Chill longer.
- Grainy texture? You might have over-whipped the cream or chocolate mixture. Next time, fold more gently.
When and How to Use It (Occasions, Storage)
Situations:
- Effortless Entertaining: Perfect for dinner parties, potlucks, or holidays. Make ahead to reduce stress!
- Special Weeknight Treat: Elevate a regular family dinner with this simple yet luxurious dessert.
- Romantic Dinners: Serve in elegant small cups for a sophisticated touch.
Serving Ideas & Pairings:
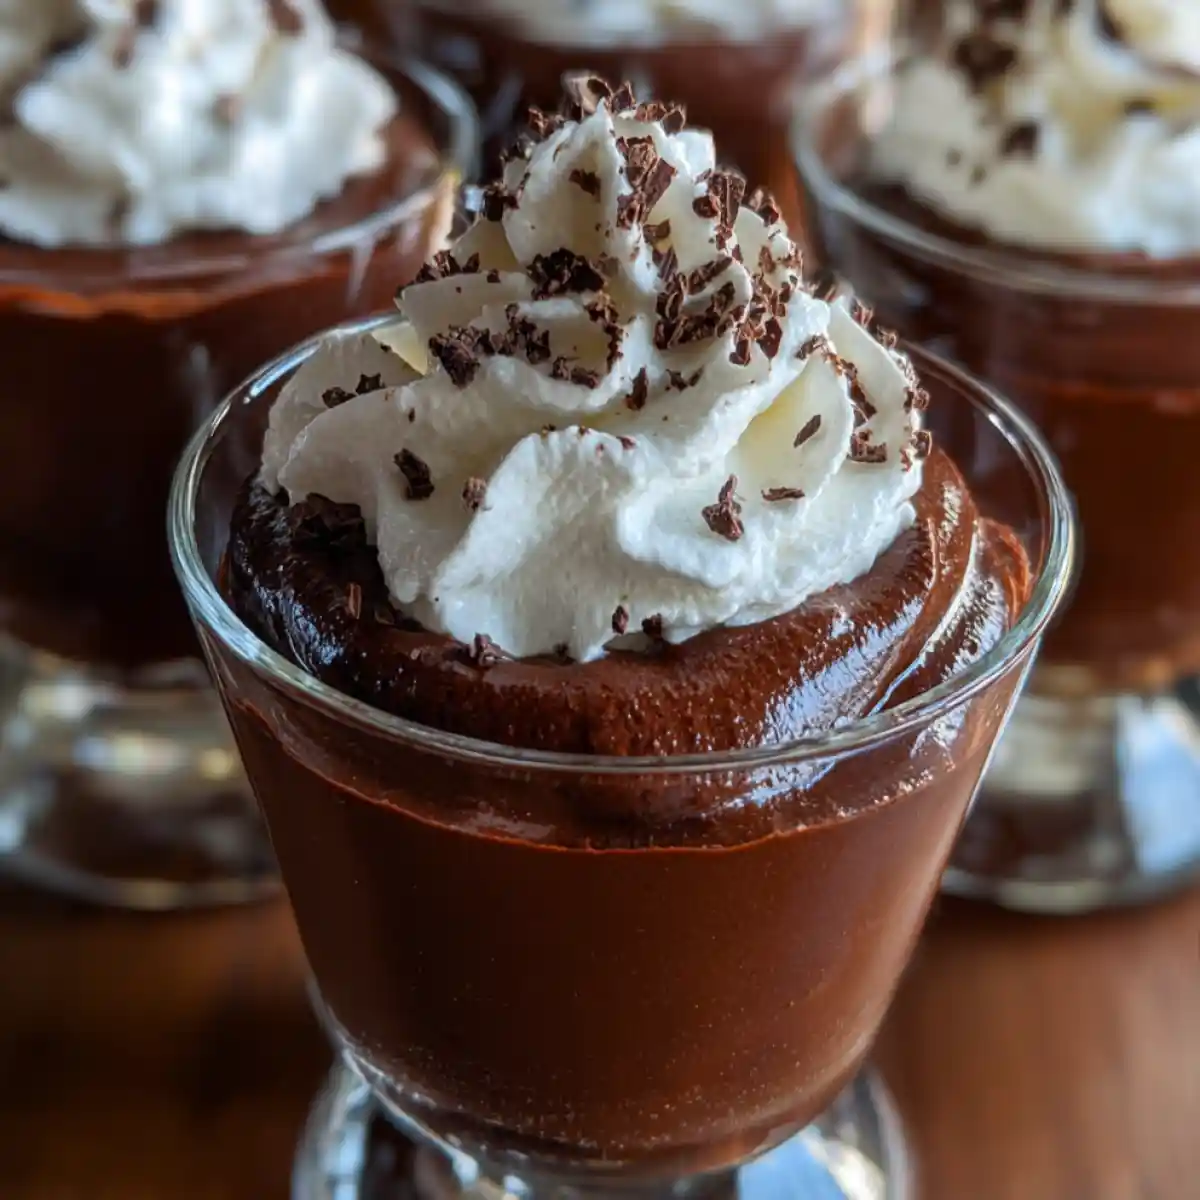
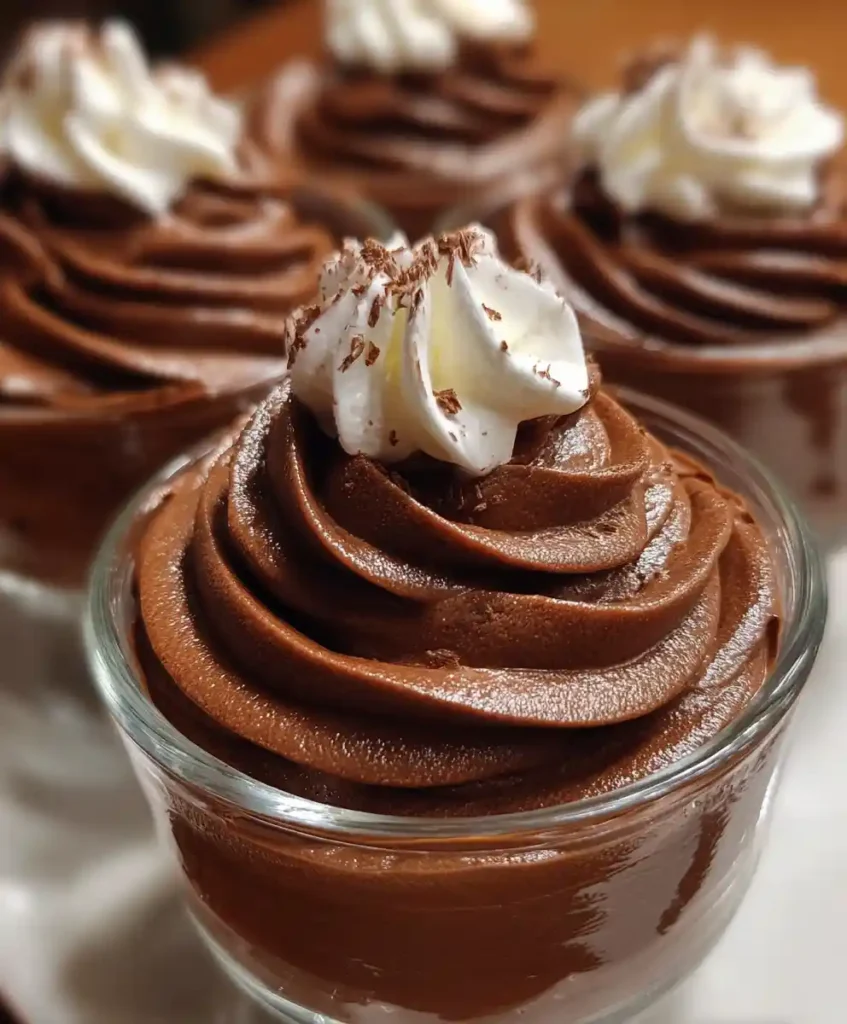
- Classic: Top with a dollop of fresh whipped cream and a sprinkle of chocolate shavings.
- Fruity: Garnish with fresh raspberries, strawberries, or orange zest for a burst of freshness.
- Nutty: A sprinkle of toasted chopped almonds or pistachios adds delightful crunch.
- Coffee: Serve alongside a hot cup of coffee or espresso.
Storage & Reheating Guidance:
- Refrigerator: Store your Chocolate Mousse Recipe Silky Dessert Cups covered in the fridge for up to 3-4 days. The silky texture holds up beautifully.
- Freezer: While generally best fresh, you can freeze individual portions for up to 1 month. Thaw in the refrigerator for several hours before serving. (Note: Texture may be slightly different after freezing.)
- Containers: Use airtight containers or cover individual cups tightly with plastic wrap to prevent absorption of fridge odors.
How It Supports Effortless Elegance for Your Dessert Table
This recipe uses readily available ingredients, making it accessible for any home cook. With minimal active preparation time (under 30 minutes), you can create an impressive dessert without spending hours in the kitchen. The ability to make these Silky Chocolate Mousse Dessert Cups completely ahead of time means you can focus on your guests or other meal preparations on the day of your event.
Tips, Adjustments, and Cautions — Perfecting Your Silky Chocolate Mousse Dessert Cups
Technique Upgrades:
- Tempering Chocolate (Advanced): For extra shine, temper your chocolate before melting. (Not strictly necessary for mousse, but a pro tip.)
- Folding Gently: The key to a light and airy chocolate mousse is gentle folding. Don’t overmix, or you’ll lose the air.
- Seasoning Adjustments: A tiny pinch of flaky sea salt on top before serving enhances the chocolate’s depth.
- Texture Control: For a richer, denser mousse, you can reduce the amount of whipped egg whites. For a lighter, airier one, ensure your whites are whipped to very stiff peaks.
Allergy or Dietary Notes:
- Gluten-Free: This Chocolate Mousse Recipe is naturally gluten-free!
- Nut-Free: Ensure your chocolate is nut-free if serving to someone with allergies.
- Dairy-Free: Refer to the ingredient section for coconut cream and dairy-free chocolate alternatives. Always check labels.
- Egg Safety: If concerned about raw eggs, use pasteurized eggs or an egg-free alternative like aquafaba. Cooked custard bases are another option for mousse, though this recipe is designed for simplicity.
FAQs
Why isn’t my Chocolate Mousse setting properly?
This is a common concern! It usually means the melted chocolate mixture wasn’t cooled enough before you folded in the whipped cream and egg whites, which can melt the air bubbles. Or, the folding might have been too vigorous, deflating the air. Ensure sufficient chilling time; sometimes it just needs an extra hour or two in the fridge to firm up properly for a perfect Chocolate Mousse Recipe Silky Dessert Cups.
Can I make these Silky Chocolate Mousse Dessert Cups ahead of time?
Absolutely! In fact, these dessert cups truly benefit from chilling for at least 2-4 hours. You can easily make them up to 3-4 days in advance and store them covered in the refrigerator. This makes them a fantastic option for entertaining!
What’s the best type of chocolate to use for this Chocolate Mousse Recipe?
High-quality dark chocolate, typically 60-70% cocoa, is highly recommended for the best flavor and to achieve that beautiful silky texture. Avoid using milk chocolate as it tends to be too sweet and may not set as well.
Can I make a larger batch of these Chocolate Mousse Dessert Cups for a party?
Yes, you certainly can! Simply scale up all the ingredients proportionally. Just be sure to use larger mixing bowls to accommodate the increased volume, especially when whipping the cream and egg whites for your Chocolate Mousse Recipe.
How do I achieve that truly ‘silky’ texture?
The secret to that irresistible silky texture lies in a few key points: using good quality chocolate, being careful not to over-whip your cream, and gently folding all the ingredients together to retain as much air as possible. Proper chilling is also crucial for developing that perfect, melt-in-your-mouth feel in your Chocolate Mousse Recipe Silky Dessert Cups.
Can kids help make this Chocolate Mousse Recipe?
Yes, absolutely! This is a great recipe for getting kids involved in the kitchen. Younger children can help with simpler tasks like carefully chopping the chocolate (with supervision), measuring ingredients, and spooning the finished mousse into the dessert cups. Older kids can assist with whipping the cream and egg whites and practicing their gentle folding techniques. It’s a fun project to do together!
Conclusion
Our easy Chocolate Mousse Recipe Silky Dessert Cups proves that decadent, homemade desserts don’t have to be complicated. With just a few simple steps and quality ingredients, you can craft this impressive, velvety treat that’s sure to delight everyone. I truly hope you enjoy making and sharing this family favorite!
Ready to indulge? Pin this recipe now for your next special occasion or family dessert night!
Print
Chocolate Mousse Silky Dessert Cups
- Total Time: 2 hours 30 minutes
- Yield: 6 servings 1x
- Diet: Gluten Free
Description
Luscious Chocolate Mousse Silky Dessert Cups: an indulgent yet easy treat. This naturally gluten-free recipe is perfect for busy home cooks craving impressive desserts without the fuss.
Ingredients
- 200g good quality dark chocolate (60-70% cocoa), chopped
- 2 large eggs, separated
- 50g granulated sugar
- 300ml heavy cream, chilled
- 1 tsp vanilla extract
- Pinch of sea salt
- 1 tbsp espresso powder (optional)
- 1 tbsp orange liqueur or rum (optional)
- Dairy-free option: full-fat canned coconut cream (chilled overnight)
- Dairy-free option: dairy-free chocolate
- Egg-free option: aquafaba (chickpea brine)
- Egg-free option: gelatin/agar-agar thickener
Instructions
- Melt the Chocolate (5-7 minutes): Gently melt chopped chocolate in a heatproof bowl over a simmering pot of water (double boiler) or in the microwave in 30-second bursts, stirring until smooth. Let cool slightly.
- Prepare Yolks (2-3 minutes): In a separate bowl, whisk egg yolks with half the sugar until pale and creamy. Slowly whisk the slightly cooled melted chocolate into the yolk mixture until well combined. (For egg-free, skip this and move to cream.)
- Whip Cream (3-5 minutes): In a large, chilled bowl, whip the heavy cream with vanilla extract until soft peaks form. Be careful not to over-whip or it will become grainy. (For dairy-free, whip chilled coconut cream.)
- Fold in Chocolate (2-3 minutes): Gently fold about a third of the whipped cream into the chocolate-yolk mixture to lighten it, then fold in the remaining cream until just combined, being careful not to deflate the airy texture.
- Whip Egg Whites (3-5 minutes): In another very clean bowl, whip egg whites until foamy, then gradually add the remaining sugar, whipping until stiff, glossy peaks form. (For egg-free, whip aquafaba here.)
- Combine & Chill (2-3 minutes prep, 2-4 hours chill): Gently fold the whipped egg whites (or aquafaba) into the chocolate mixture until no streaks remain. Divide the silky chocolate mousse among individual dessert cups or a large serving bowl. Chill in the refrigerator for at least 2-4 hours, or until firm and set.
Notes
Tips & Customizations: For best flavor, use high-quality dark chocolate (60-70% cocoa) and ensure heavy cream is very cold. Gently fold all ingredients to maintain airiness and achieve a silky texture; avoid overmixing. A pinch of flaky sea salt can enhance chocolate’s depth.
Substitutions: For dairy-free, use chilled full-fat coconut cream and dairy-free chocolate. For egg-free, use whipped aquafaba instead of egg whites and omit yolks, or use a gelatin/agar-agar thickener. Use pasteurized eggs if concerned about raw eggs.
Troubleshooting: If mousse isn’t setting, ensure chocolate mixture was cooled sufficiently and folding was gentle; chill longer. Grainy texture often results from over-whipped cream.
Storage: Store covered in the refrigerator for up to 3-4 days. Individual portions can be frozen for up to 1 month, but texture may slightly change. Use airtight containers.
Dietary Notes: This recipe is naturally gluten-free. Ensure chocolate is nut-free if needed.
Estimates: Yield and nutritional information are estimated as they were not provided in the original article.
- Prep Time: 25 minutes
- Cook Time: 5 minutes
- Category: Desserts
- Method: No-Cook
Nutrition
- Serving Size: 1 serving
- Calories: 390
- Sugar: 11g
- Sodium: 25mg
- Fat: 30g
- Saturated Fat: 20g
- Unsaturated Fat: 10g
- Trans Fat: 0g
- Carbohydrates: 25g
- Fiber: 3g
- Protein: 5g
- Cholesterol: 83mg
Keywords: Chocolate Mousse, Silky Dessert Cups, Easy Dessert, Gluten-Free, Make-Ahead
FREE PRINTABLE RECIPE
Get the Printable Recipe PDF (Free)
Enter your email and we’ll send you the ingredients + step-by-step instructions as a clean PDF you can save to your phone.
- ✅ Printable PDF (ingredients + steps)
- ✅ Save it to your phone (no long scrolling)
- ✅ Includes cook time + servings
- ✅ Easy to follow
FAQ
Where’s the full recipe?
It’s delivered as a printable PDF so you can save it and cook without scrolling.
I didn’t get the email.
Check Spam/Promotions and search your inbox for your site name. Then click Confirm to receive the PDF.