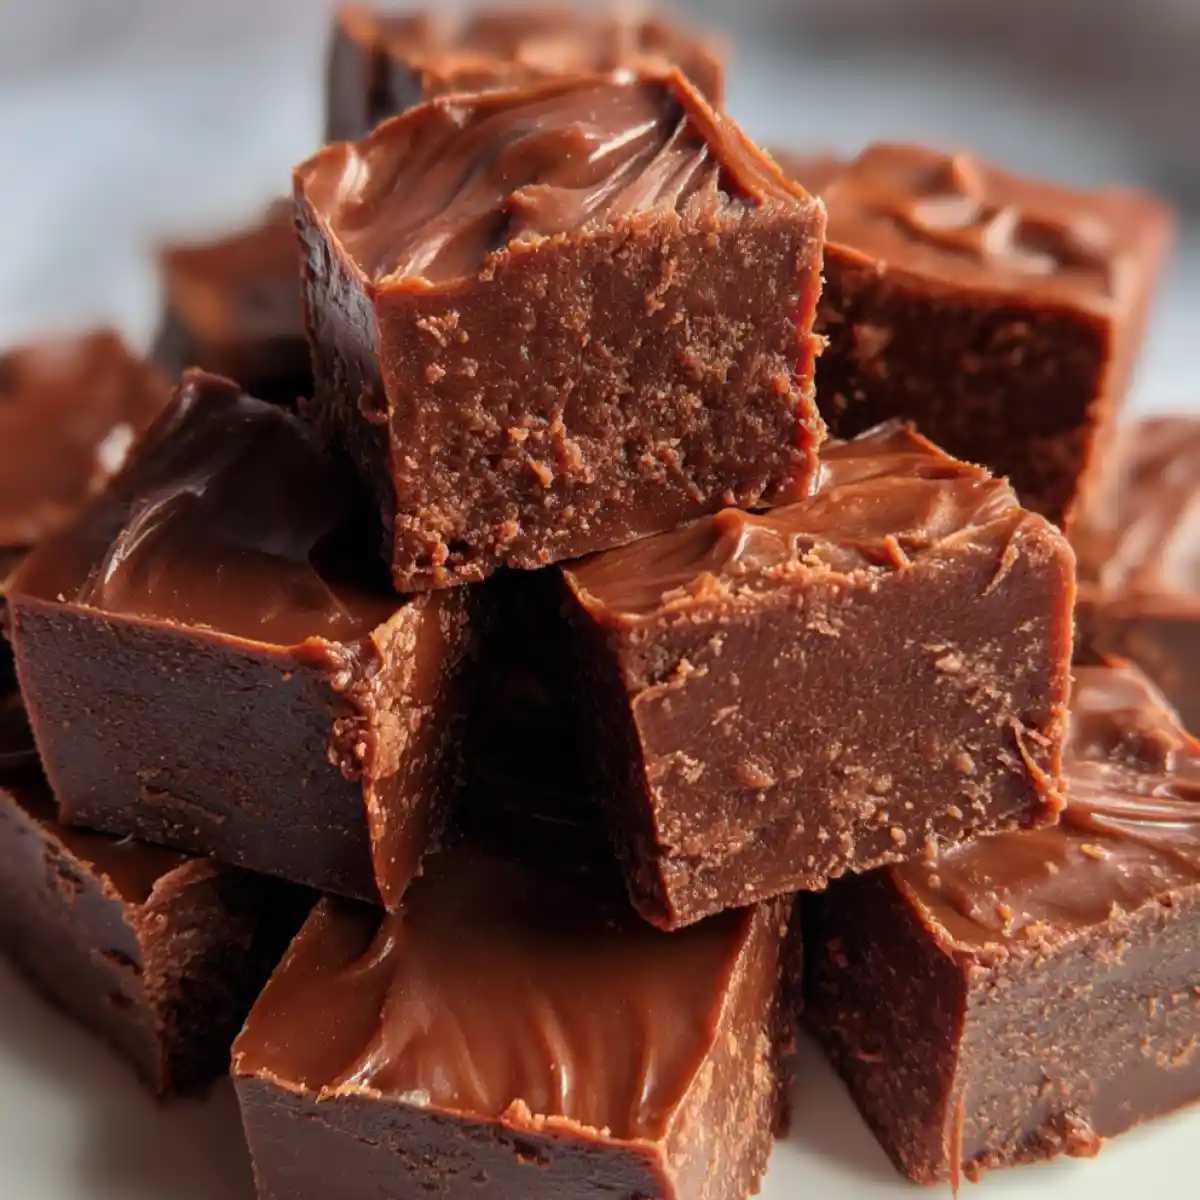
When that sudden sweet craving hits, or I need a quick dessert for my family, this recipe is my absolute go-to! This Easy Fudge Recipe Without Condensed Milk One-Bowl Style is your new best friend for rich, chocolatey goodness, all made in one bowl, perfect for satisfying sweet cravings after family dinners.
It’s ideal for busy parents looking for quick meals, last-minute dessert needs, or anyone who loves minimal cleanup in the kitchen. Whether you’re looking for healthy dessert ideas or just a simple, satisfying sweet, this is a treasured family favorite, perfected for simplicity and irresistible flavor. Enjoy decadent fudge with less fuss, fewer ingredients, and the convenience of a single mixing bowl – truly an Easy Fudge Recipe Without Condensed Milk One-Bowl Style you’ll cherish.

Table of Contents
Table of Contents
Ingredient Guide with Flavor & Function
Here’s what you’ll need for this delicious treat, along with a note on what each ingredient brings to the table:
- Unsweetened Cocoa Powder: 1/2 cup (45g) – The heart of our rich chocolate flavor. Opt for high-quality cocoa for the best taste.
- Butter: 1/2 cup (113g), unsalted – Adds richness and a smooth, creamy texture. Real butter makes a big difference!
- Granulated Sugar: 2 cups (400g) – Provides sweetness and structure for that perfect fudge consistency.
- Milk (whole or 2%): 1/2 cup (120ml) – Helps achieve that classic fudge consistency. Ensure your milk is fresh.
- Vanilla Extract: 1 teaspoon (5ml) – Enhances all the chocolate notes. Pure vanilla extract is always best.
- Pinch of Salt: 1/4 teaspoon – Balances sweetness and deepens the chocolate flavor.
For smart swaps for dietary goals, you can use dairy-free milk (almond, soy, oat) and dairy-free butter alternatives for a plant-based or dairy-free Easy Fudge Recipe Without Condensed Milk One-Bowl Style. Cocoa powder stores well, but always check its expiration date for optimal potency.
Cooking Instructions Made Simple
- Combine & Microwave First Round: Combine granulated sugar, unsweetened cocoa powder, milk, and butter in a large microwave-safe bowl. Microwave for 1-2 minutes on high power, then carefully remove and stir until the butter is melted and the mixture is smooth.
- Microwave & Stir Until Glossy: Return to the microwave for another 1-2 minutes. Stir well again. Repeat this process, microwaving in 1-2 minute intervals and stirring vigorously, until the mixture is glossy and comes together smoothly. This typically takes a total of 4-6 minutes in the microwave, but watch for that beautiful sheen!
- Thicken & Flavor: Remove the bowl from the microwave. Stir in the vanilla extract and a pinch of salt until well combined. Continue to stir vigorously for about 1-2 minutes; you’ll notice the mixture thickening slightly as it cools. This crucial stirring ensures a creamy texture for your fudge.
- Pour & Smooth: Pour the warm Easy Fudge Recipe Without Condensed Milk One-Bowl Style mixture into a parchment-lined 8×8 inch pan. Use a spatula to smooth the top evenly.
- Chill & Serve: Chill in the refrigerator for at least 2-3 hours, or until completely firm. Once firm, lift the parchment paper to remove the fudge, then slice into desired squares and serve.
Inline Variations:
- Spicy Kick: For a subtle warmth, add a tiny pinch of cayenne pepper with the vanilla.
- Texture Boost: Stir in ½ cup of mini chocolate chips or chopped nuts (like walnuts or pecans) after adding the vanilla for extra texture.
- Kid-Friendly Fun: Top with colorful sprinkles immediately after pouring into the pan for a fun, kid-friendly Easy Fudge Recipe Without Condensed Milk One-Bowl Style.
Quick Callouts for Common Mistakes:
Overcooking: Fudge can become grainy if cooked too long. The key is to watch for glossiness and a smooth texture, not to boil it for an extended period. My trick is to stop when it looks perfectly shiny!
Under-chilling: Ensure it’s fully firm before slicing to prevent a gooey, messy outcome. Patience pays off here for clean, perfect squares.
Perfect Moments to Serve Easy Fudge Without Condensed Milk
This delightful treat isn’t just for special occasions; it’s a versatile dessert perfect for a myriad of moments!
Occasions
- Casual family dinners: A sweet ending that everyone will love.
- Holiday cookie platters: Its rich flavor and simple preparation make it a standout.
- Gifting: Wrap up a few squares for a thoughtful, homemade present.
- Movie nights: The perfect companion for a cozy evening in.
- A simple pick-me-up treat: Because sometimes you just need a little chocolate!
Pairings with Sides, Drinks, or Toppings
- Serve alongside a glass of cold milk or a steaming cup of hot coffee for a classic pairing.
- Top with a sprinkle of flaky sea salt to enhance the chocolate.
- Crushed peppermints or toasted coconut flakes add a lovely texture and flavor contrast.
Make-ahead Tips
This easy fudge recipe without condensed milk is excellent for making ahead, making it a dream for meal prep or future cravings!
- Store in an airtight container at room temperature for up to 1 week.
- Keep it in the fridge for up to 2 weeks for even longer freshness.
- For extended enjoyment, freeze individual squares in an airtight container for up to 3 months. Thaw at room temperature before serving.
Nutrition & Wellness Spotlight
While fudge is always a treat, this particular easy fudge recipe without condensed milk offers a few benefits that can fit into a balanced eating plan when enjoyed mindfully.
Show How Easy Fudge Without Condensed Milk Fits into Balanced Eating
It’s a delicious, satisfying treat to enjoy in moderation, giving you that rich flavor without excessive fuss.
- Simple Ingredients: You have control over what goes into your dessert, as it’s made with common pantry items.
- Avoids Condensed Milk: No need for processed ingredients, relying on basic staples for this easy fudge recipe without condensed milk.
- Portion Control: Easily cut into small squares, making it simple to manage your sweet intake. This helps maintain healthy eating habits.
- A Fulfilling Treat: A small, rich piece of homemade fudge can satisfy cravings better than highly processed alternatives, contributing to a more wholesome approach to dessert.
Everyday Benefits Beyond the Plate
This convenient one-bowl fudge isn’t just tasty; it brings practical advantages to your kitchen too.
Tie Recipe Qualities to Reader Goals
- Time-Saving: Our one-bowl method means less cleanup and a quick path to a satisfying dessert, perfect for busy family dinners or quick meals.
- Affordable: It uses budget-friendly ingredients you likely already have on hand, making it an economical choice for a sweet treat.
- Satisfying Comfort: It delivers that comforting, homemade taste without extra effort, proving that delicious doesn’t have to be complicated.
Expert Tips & Adaptations for Easy Fudge Without Condensed Milk
Even though this recipe is designed for simplicity, a few expert touches can elevate your results or cater to specific dietary needs.
Techniques for Richer Flavor or Better Texture
- For extra depth of chocolate flavor, bloom your cocoa powder first by mixing it with a small amount of hot milk before adding it to the main mixture.
- Stir vigorously after microwaving to ensure a super smooth, creamy texture. This is key for that perfect melt-in-your-mouth feel!
Flavor Adjustments
- Add a teaspoon of instant coffee granules to intensify the chocolate flavor without making it taste like coffee.
- Try different extracts like almond or peppermint for variety. My family loves a hint of peppermint during the holidays!
- Swirl in melted peanut butter or a dollop of caramel just before chilling for an extra layer of indulgence.
Dietary Adaptations
- For vegan fudge, simply use dairy-free milk (like almond or oat) and dairy-free butter alternatives.
- For a lower-sugar version, you can explore using alternative sweeteners, keeping in mind that the texture and set may vary slightly from the original easy fudge recipe without condensed milk.
Questions Readers Often Ask
Can Easy Fudge Without Condensed Milk be prepped ahead for busy weeks?
Yes, absolutely! Prepare it over the weekend, store it, and enjoy quick treats all week long. It’s a fantastic option for meal prep snacks.
What are the healthiest substitutes for Easy Fudge Without Condensed Milk ingredients?
For a slightly lighter version, you can experiment with lower-fat milk, but I recommend sticking with real butter for the best texture and flavor. You could also reduce the sugar slightly if preferred.
Where can I find high-quality cocoa powder for this recipe?
Check your local grocery store’s baking aisle for popular brands, or order premium varieties online. A good quality cocoa powder makes a noticeable difference in the richness of this easy fudge recipe without condensed milk.
Why is my one-bowl fudge grainy?
Graininess usually happens if the sugar doesn’t fully dissolve or if the mixture is overcooked. Ensure thorough stirring and don’t overheat the mixture in the microwave to maintain a smooth texture.
Can I make this easy fudge recipe without condensed milk on the stovetop?
Yes, you certainly can! Combine ingredients in a saucepan over medium heat, stirring constantly until smooth and glossy. Once it comes together, remove from heat and stir in the vanilla. Chill as usual.
How long does one-bowl fudge last?
Stored properly in an airtight container, it lasts about a week at room temperature or two weeks in the refrigerator. For longer storage, freeze it as mentioned above.
Can I add nuts or dried fruit to this easy fudge recipe without condensed milk?
Absolutely! Stir in about ½ cup of your favorite chopped nuts (like walnuts or pecans) or dried fruit (such as cranberries or cherries) after adding the vanilla extract for extra texture and flavor.
Can I use a different type of chocolate?
This specific easy fudge recipe without condensed milk uses cocoa powder for its base. While you can melt in some chocolate chips along with the other ingredients for extra richness, adjusting the cocoa powder amount might be needed for balance.
Conclusion
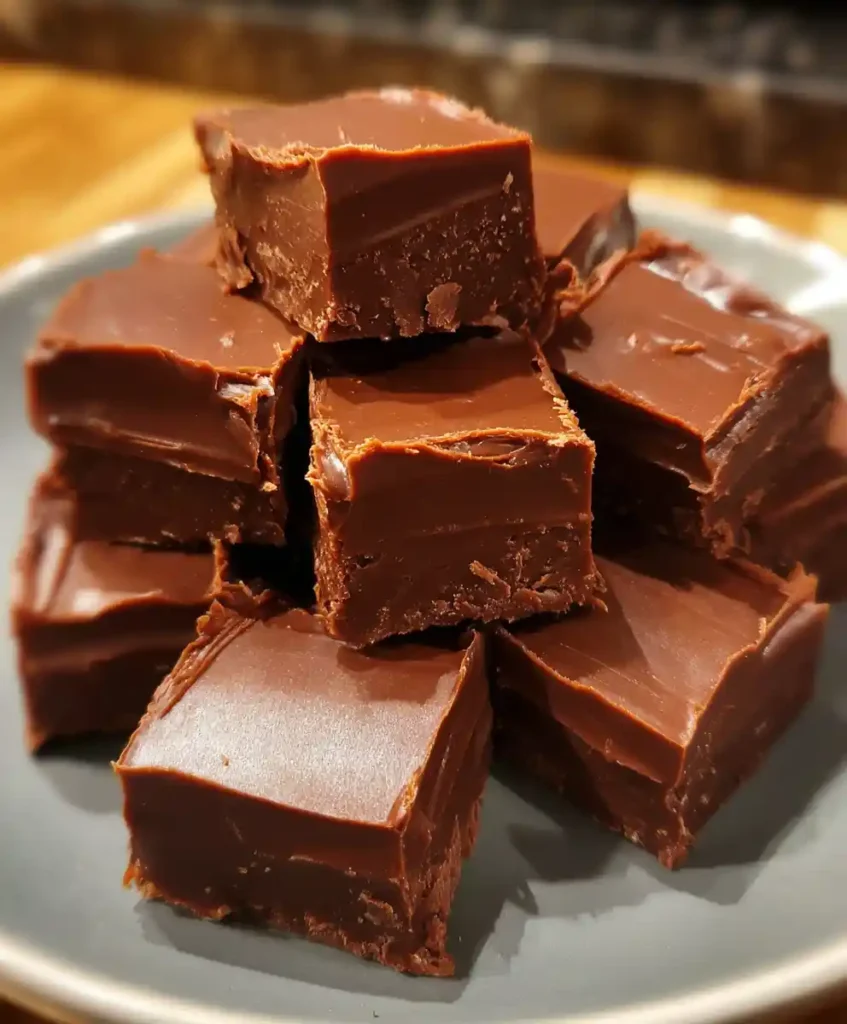
Enjoy the pure joy of homemade chocolate fudge with incredible ease and minimal fuss. This easy fudge recipe without condensed milk is a guaranteed crowd-pleaser for any occasion, delivering rich, satisfying flavor that’s perfect for family-friendly indulgence.
Pin this recipe for later, share it with a friend, or add it to your weekly meal plan for a sweet treat that’s always a hit and makes healthy eating more enjoyable. It’s truly one of my go-to quick meals for dessert!
Print
Easy Fudge Recipe Without Condensed Milk One-Bowl Style
- Total Time: 2 hours 13 minutes
- Yield: 16–24 servings 1x
- Diet: Vegetarian
Description
Rich, chocolatey fudge made in one bowl with no condensed milk. Perfect for satisfying sweet cravings with minimal cleanup.
Ingredients
- 1/2 cup (45g) Unsweetened Cocoa Powder
- 1/2 cup (113g) unsalted Butter
- 2 cups (400g) Granulated Sugar
- 1/2 cup (120ml) Milk (whole or 2%)
- 1 teaspoon (5ml) Vanilla Extract
- 1/4 teaspoon Pinch of Salt
Instructions
- Combine & Microwave First Round: Combine granulated sugar, unsweetened cocoa powder, milk, and butter in a large microwave-safe bowl. Microwave for 1-2 minutes on high power, then carefully remove and stir until the butter is melted and the mixture is smooth.
- Microwave & Stir Until Glossy: Return to the microwave for another 1-2 minutes. Stir well again. Repeat this process, microwaving in 1-2 minute intervals and stirring vigorously, until the mixture is glossy and comes together smoothly. This typically takes a total of 4-6 minutes in the microwave, but watch for that beautiful sheen!
- Thicken & Flavor: Remove the bowl from the microwave. Stir in the vanilla extract and a pinch of salt until well combined. Continue to stir vigorously for about 1-2 minutes; you’ll notice the mixture thickening slightly as it cools. This crucial stirring ensures a creamy texture for your fudge.
- Pour & Smooth: Pour the warm mixture into a parchment-lined 8×8 inch pan. Use a spatula to smooth the top evenly.
- Chill & Serve: Chill in the refrigerator for at least 2-3 hours, or until completely firm. Once firm, lift the parchment paper to remove the fudge, then slice into desired squares and serve.
Notes
- Substitutions: For a plant-based or dairy-free version, use dairy-free milk (almond, soy, oat) and dairy-free butter alternatives.
- Variations: Add a tiny pinch of cayenne pepper for a spicy kick. Stir in ½ cup of mini chocolate chips or chopped nuts (walnuts, pecans) for texture. Top with colorful sprinkles immediately after pouring into the pan for a kid-friendly treat.
- Common Mistakes: Avoid overcooking to prevent grainy fudge; stop when glossy. Ensure thorough chilling (2-3 hours) for firm, clean slices.
- Nutrition Note: Nutritional data is an estimate as it was not provided in the original article.
- Prep Time: 5 minutes
- Cook Time: 8 minutes
- Category: Desserts
- Method: Microwave
- Cuisine: American
Nutrition
- Serving Size: 1 square
- Calories: 0
- Sugar: 0g
- Sodium: 0g
- Fat: 0g
- Saturated Fat: 0g
- Unsaturated Fat: 0g
- Trans Fat: 0g
- Carbohydrates: 0g
- Fiber: 0g
- Protein: 0g
- Cholesterol: 0g
Keywords: {{keyword}}
FREE PRINTABLE RECIPE
Get the Printable Recipe PDF (Free)
Enter your email and we’ll send you the ingredients + step-by-step instructions as a clean PDF you can save to your phone.
- ✅ Printable PDF (ingredients + steps)
- ✅ Save it to your phone (no long scrolling)
- ✅ Includes cook time + servings
- ✅ Easy to follow
FAQ
Where’s the full recipe?
It’s delivered as a printable PDF so you can save it and cook without scrolling.
I didn’t get the email.
Check Spam/Promotions and search your inbox for your site name. Then click Confirm to receive the PDF.