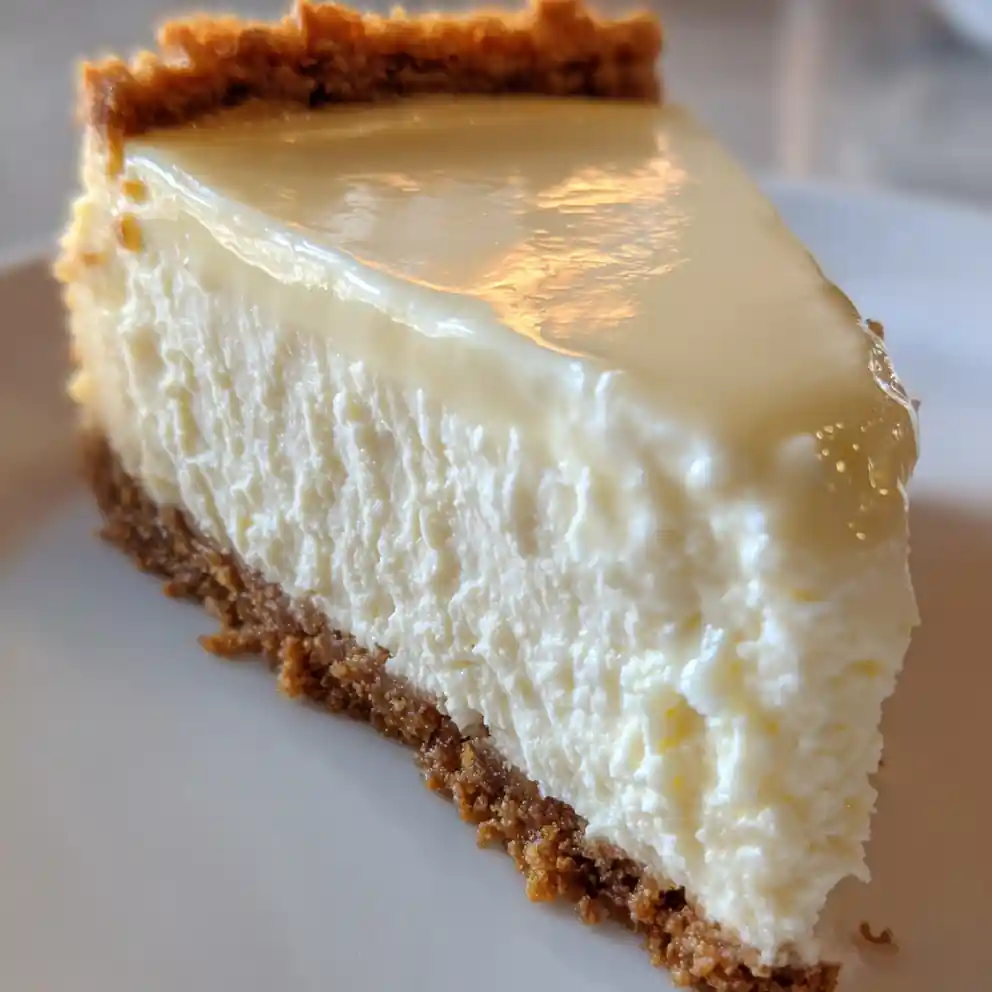
I’ve always loved the idea of a rich, creamy cheesecake, but often skip making one because of the oven time. You’re not alone! Our No Bake Cheesecake Recipe Silky Filling is here to save your dessert dreams. This recipe guarantees that melt-in-your-mouth texture with its luscious, silky filling, making it perfect for busy families craving an impressive dessert without the fuss. It’s incredibly simple, deliciously rich, and always a crowd-pleaser!
Ingredient Spotlight and Why They Matter
- Cream Cheese: 2 blocks (16 oz / 450g). The star for classic cheesecake tang and rich body. Ensure it’s full-fat and softened to room temperature for the smoothest filling for our No Bake Cheesecake Recipe Silky Filling. (Swap: Reduced-fat cream cheese also works, but may require slightly longer chilling.)
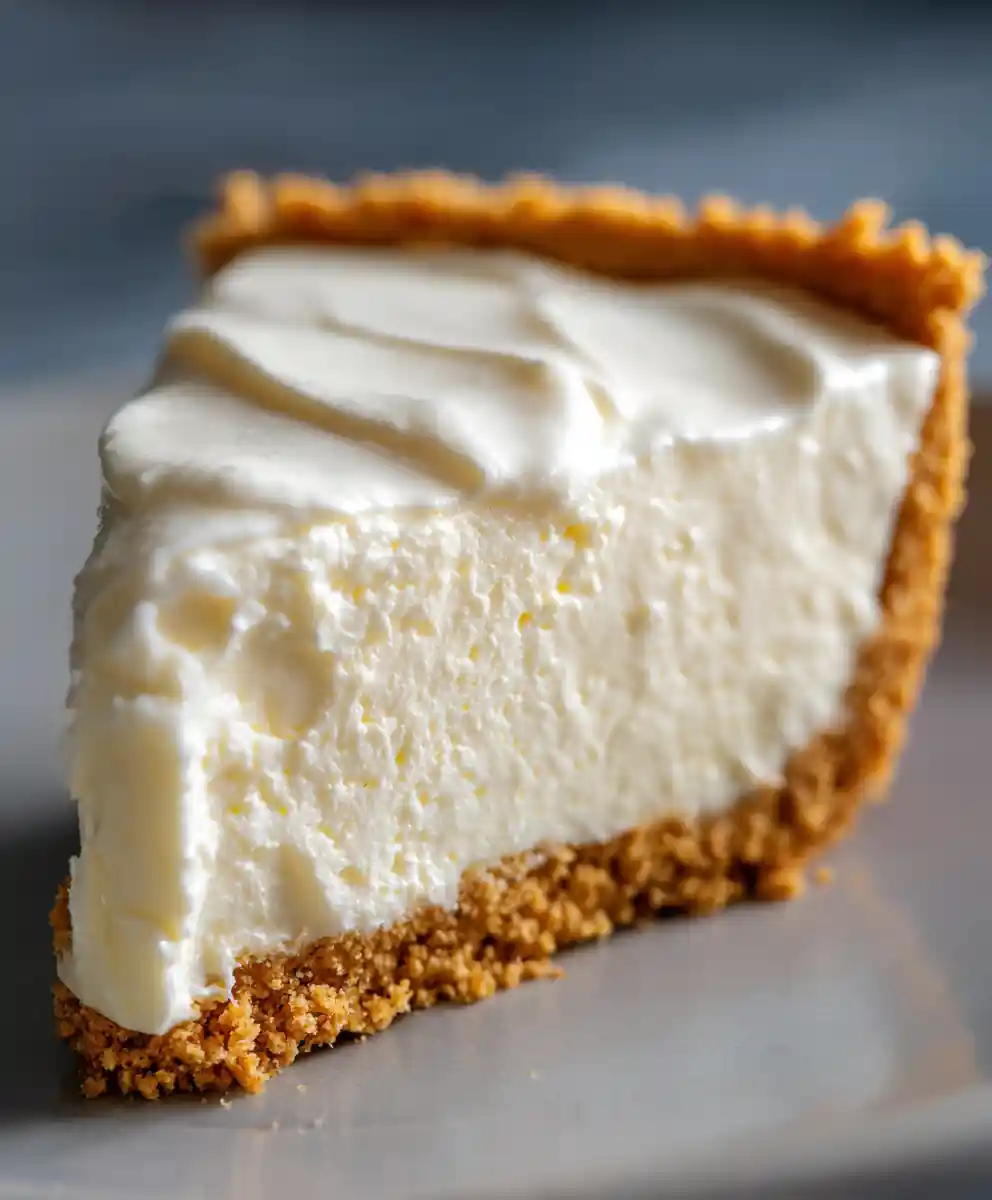
- Heavy Cream: 2 cups (480ml). Whips up light and airy, creating that luscious, silky texture. Use fresh, cold heavy whipping cream for best results.
- Powdered Sugar: 1 cup (120g). Dissolves easily for a super smooth, grit-free filling.
- Vanilla Extract: 1 tsp (5ml). Essential for that warm, comforting dessert aroma. Use good quality pure vanilla for best flavor.
- Graham Cracker Crust: 1 (9-inch / 23cm) pre-made crust or ingredients for homemade. The perfect crunchy base. (Swap: Try crushed shortbread or Oreo cookies for a different base.)
Substitutions and Alternatives
- For a Lighter Touch: Use reduced-fat cream cheese or a dairy-free cream cheese alternative (adjust chilling time as needed).
- Different Crusts: Try Oreo cookies, shortbread, or even gluten-free crackers for variety.
- Flavor Swaps: Add citrus zest, almond extract, or a swirl of chocolate syrup to the filling for a customized touch.
Notes on Pantry Staples
- Always have a good quality vanilla extract on hand for baking.
- Keep an eye on cream cheese sales for best value and stock up.
- Make sure ingredients are at room temperature for the ultimate silky smooth filling, essential for a perfect No Bake Cheesecake Recipe Silky Filling.
Easy Cooking Instructions for Your No Bake Cheesecake
Mastering this incredible No Bake Cheesecake Recipe Silky Filling is easier than you think!
- Step 1: Prep Your Crust. Press graham cracker crumbs (mixed with melted butter and sugar) firmly into a 9-inch pie plate or springform pan. Or, unwrap your store-bought crust! (Time: 10 minutes active)
- Step 2: Beat the Cream Cheese. In a large bowl, beat softened full-fat cream cheese using an electric mixer until it’s perfectly smooth and creamy, with no lumps allowed! This is key for that unbelievably silky filling. (Time: 3-5 minutes, texture: fluffy) If you find lumps, beat for another minute or two, scraping down the sides.
- Step 3: Whip the Cream. In a separate, chilled bowl, whip cold heavy cream with powdered sugar until stiff peaks form. The cream should hold its shape firmly. Be careful not to overmix, as it can become grainy. (Time: 3-4 minutes, sound: motor slows slightly)
- Step 4: Combine Gently. Fold the whipped cream into the cream cheese mixture until just combined and uniformly colored. Overmixing can deflate the cream and make the filling less silky. (Time: 2-3 minutes, feel: light and airy)
- Step 5: Pour and Chill. Pour the silky filling into your prepared crust using a spatula. Smooth the top evenly. When I’m making this for a quick family dessert, I often use a ready-made graham cracker crust to save time on busy weeknights, and the results are just as good! (Time: 5 minutes, look: smooth surface)
- Step 6: Set It Right. Refrigerate for at least 4-6 hours, or preferably overnight, until firm and perfectly set. This patience ensures a perfectly firm, silky slice every time. (Time: 4-6 hours, feel: firm to the touch)
Inline Variation Notes
- For a Quick Chocolate Swirl: Before chilling, dollop melted chocolate on top and swirl gently with a knife.
- For Individual Servings: Use mini pie crusts or small dessert glasses for portion-controlled treats.
Quick Warnings and Tips
- Don’t skip softening the cream cheese – cold cream cheese means a lumpy filling and less silky texture.
- Do not overmix the whipped cream into the cream cheese; gentle folding keeps it airy and luscious.
- Give your No Bake Cheesecake Recipe Silky Filling enough chilling time! Patience ensures a perfectly firm, silky slice that holds its shape.
Everyday Uses and Make-Ahead Convenience
This No Bake Cheesecake Recipe Silky Filling easily fits into your family’s busy schedule.
- Family Meals: A simple, delightful dessert for any weeknight.
- Gatherings: Impresses guests without last-minute stress.
Creative Serving Ideas
- Toppings: Fresh berries, chocolate shavings, or caramel sauce.
Make-Ahead Tips
- Storage: Refrigerate covered for 3-4 days.
- Freezing: Freeze individual slices for up to 1 month; thaw in refrigerator.
Nutrition & Lifestyle Advantages of this No Bake Cheesecake
Beyond taste, this No Bake Cheesecake Recipe Silky Filling offers practical benefits for a modern, family-friendly lifestyle.
- Satisfying Treat: A delicious way to enjoy dessert in moderation.
- Meal Prep Friendly: Excellent for make-ahead dessert options.
Healthy Highlights
- Fresh fruit toppings add vitamins.
Why This No Bake Cheesecake Recipe Helps You Save Time and Money
This dessert is a smart choice for your budget and schedule. I often whip this up on Sunday for busy weeknights!
- Simplifies Cooking: No oven required means less active time.
- Budget-Friendly: Uses common, affordable pantry ingredients.
Saving Time with Ingredients
Choose quick-buy ingredients often on sale to save time.
Smart Tips, Adjustments, and Special Notes for Your Silky Filling
- Flavor Upgrades: Add a tablespoon of lemon juice or a hint of espresso powder.
- Presentation Upgrades: Garnish with edible flowers or a dusting of cocoa powder.
- Sweetness Adjustments: Reduce powdered sugar slightly if you prefer less sweet.
- Texture Adjustments: Ensure sufficient chilling time for a firmer set.
Safety and Allergy-Friendly Tweaks
- Nut Allergies: Use a nut-free graham cracker or shortbread crust.
- Dairy-Free: Explore dairy-free cream cheese and whipped topping options for a delightful No Bake Cheesecake Recipe Silky Filling.
Common Questions About This No Bake Cheesecake
Q: How do I make my no bake cheesecake filling extra silky?
A: Use softened, full-fat cream cheese and gently fold in whipped cream to maintain its airiness. I always let my cream cheese sit out for an hour to get that perfect smooth base.
Q: Can I freeze no bake cheesecake slices?
A: Yes! Freeze individual slices tightly wrapped for up to a month. Thaw them in the refrigerator for a few hours before serving.
Q: What’s the best way to prevent a runny no bake cheesecake?
A: Adequate chilling time, at least 4-6 hours or ideally overnight, is crucial. Also, don’t skimp on the heavy cream quantity; it provides essential structure for a firm, silky set.
Q: How long does no bake cheesecake last in the fridge?
A: Your delicious No Bake Cheesecake Recipe Silky Filling will stay fresh, covered, for 3-4 days in the refrigerator. It is great for make-ahead dessert planning!
Q: Can I use a different crust for this no bake cheesecake?
A: Absolutely! Oreo, shortbread, or even gluten-free cookie crumbs work wonderfully. For a gluten-free version, simply swap out graham crackers for gluten-free cookie crumbs using the same proportions.
Q: Do I need to soften cream cheese for no bake cheesecake?
A: Yes, absolutely! Softened cream cheese ensures a smooth, lump-free filling and the desired silky texture. Cold cream cheese will result in a grainy, less luxurious No Bake Cheesecake Recipe Silky Filling.
Conclusion
There you have it – your new go-to No Bake Cheesecake Recipe Silky Filling! It’s easy, delicious, and promises a perfect dessert without the oven. I truly enjoy making this for my family.
Save this recipe for quick meals, share it with friends, or add the ingredients to your next grocery order – you won’t regret it!
Print
No Bake Cheesecake Recipe Silky Filling
- Total Time: 390 minutes
- Yield: 10 servings 1x
- Diet: General
Description
This no-bake cheesecake recipe features a luscious, silky filling, making it a simple yet impressive dessert perfect for busy families. It offers a melt-in-your-mouth texture without the oven time, promising a rich and delicious crowd-pleaser.
Ingredients
- 2 blocks (16 oz) cream cheese, full-fat, softened
- 2 cups heavy cream, cold
- 1 cup powdered sugar
- 1 tsp vanilla extract, pure
- 1 (9-inch) graham cracker crust, pre-made or homemade
Instructions
- Prep Your Crust: Press graham cracker crumbs (mixed with melted butter and sugar) firmly into a 9-inch pie plate or springform pan, or unwrap your store-bought crust.
- Beat Cream Cheese: In a large bowl, beat softened full-fat cream cheese using an electric mixer until it is perfectly smooth and creamy, with no lumps allowed.
- Whip Heavy Cream: In a separate, chilled bowl, whip cold heavy cream with powdered sugar until stiff peaks form and the cream holds its shape firmly.
- Combine Mixtures Gently: Fold the whipped cream into the cream cheese mixture until just combined and uniformly colored, being careful not to overmix.
- Pour and Smooth Filling: Pour the silky filling into your prepared crust using a spatula and smooth the top evenly.
- Refrigerate and Set: Refrigerate for at least 4-6 hours, or preferably overnight, until firm and perfectly set, ensuring a perfectly firm, silky slice.
Notes
Ensure cream cheese is softened and heavy cream is cold for optimal texture. Do not overmix the filling. Allow sufficient chilling time (at least 4-6 hours) for a firm set. Consider using reduced-fat cream cheese for a lighter version or alternative crusts like Oreo or shortbread. Flavor variations can include citrus zest, almond extract, or a chocolate swirl. For individual servings, use mini crusts or dessert glasses.
- Prep Time: 30 minutes
- Cook Time: 0 minutes
- Category: Dessert
- Method: No-Bake, Chilling
- Cuisine: American
Nutrition
- Serving Size: 1 slice (100 g)
- Calories: 380 calories
- Sugar: 30 g
- Sodium: 250 mg
- Fat: 28 g
- Saturated Fat: 17 g
- Unsaturated Fat: 10 g
- Trans Fat: 0 g
- Carbohydrates: 35 g
- Fiber: 1 g
- Protein: 6 g
- Cholesterol: 100 mg
Keywords: No Bake Cheesecake, Silky Filling, Easy Dessert, Cream Cheese, Graham Cracker Crust, Vanilla, Quick, Crowd-pleaser, Rich, Creamy
FREE PRINTABLE RECIPE
Get the Printable Recipe PDF (Free)
Enter your email and we’ll send you the ingredients + step-by-step instructions as a clean PDF you can save to your phone.
- ✅ Printable PDF (ingredients + steps)
- ✅ Save it to your phone (no long scrolling)
- ✅ Includes cook time + servings
- ✅ Easy to follow
FAQ
Where’s the full recipe?
It’s delivered as a printable PDF so you can save it and cook without scrolling.
I didn’t get the email.
Check Spam/Promotions and search your inbox for your site name. Then click Confirm to receive the PDF.