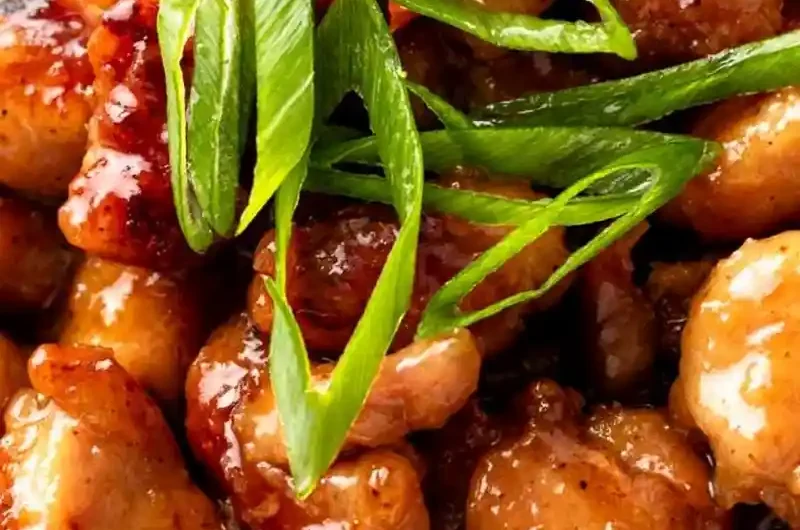
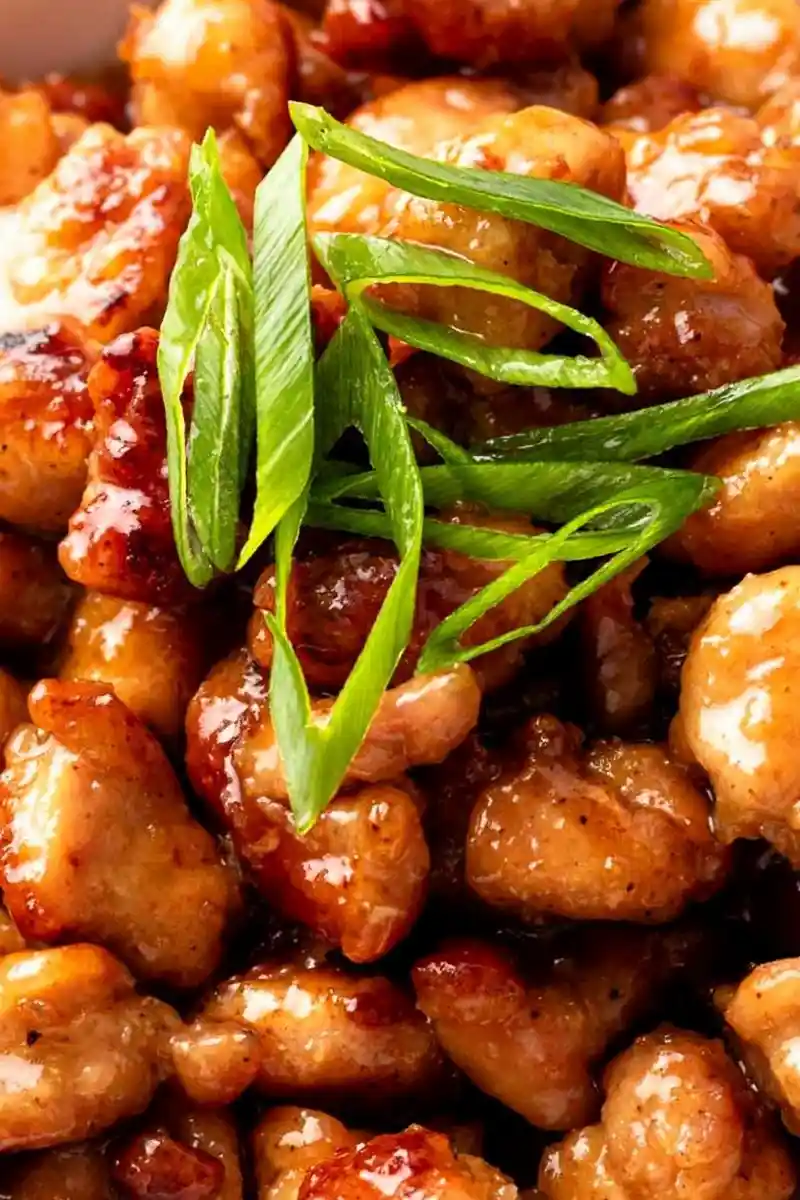
This quick honey butter chicken delivers a crispy exterior and a sweet, sticky glaze in just 30 minutes. It uses a shallow-frying method to keep the dish lighter than traditional deep-fried versions.
List of ingredients
- 1.7 lbs Boneless chicken thighs or chicken tenders – cut into bite-sized pieces.
- 2/3 cup Flour – used for the initial coating.
- 1 tsp Kosher salt – for basic seasoning.
- 1/2 tsp Black pepper – adds a slight spicy note.
- 1 tsp Garlic powder – enhances the savory flavor of the crust.
- 3 tbsp Olive oil, canola oil, or vegetable oil – for shallow frying.
- 1/3 cup Honey – provides the primary sweetness and stickiness.
- 1/2 cup Unsalted butter – creates a rich, silky emulsion.
- 2 cloves Garlic, minced – adds aromatic depth to the sauce.
- 2 tbsp Light soy sauce – contributes umami and salty balance.
step-by-step instructions
- Coat the chicken: In a large bowl or flat plate, whisk together the flour, salt, black pepper, and garlic powder. Add the chicken chunks and toss until every piece is thoroughly coated.
- Fry until golden: Heat oil in a large pan over medium-high heat. Fry the chicken pieces until they are golden brown and crispy on all sides. Remove the chicken and set it aside on a plate.
- Prepare the glaze: Reduce the heat to medium. In the same pan, melt the butter with the honey, soy sauce, and minced garlic. Stir well and let the mixture simmer for about 2 minutes until it becomes thick and bubbly.
- Combine and finish: Add the crispy chicken back into the pan. Toss for 1 minute, allowing the glaze to thicken further and cling to the crust. Serve immediately while hot.
Pro Tips for Maximum Crispiness
Avoid Overcrowding the Pan
For the crispiest results, fry the chicken in small batches. If the pan is too full, the chicken will release moisture and steam instead of frying. This results in a soggy crust rather than a golden-brown exterior. Ensure each piece has enough space to sear properly.
Remove Excess Flour Coating
Before the chicken hits the hot oil, shake off any extra flour from the pieces. Excess flour can cause the oil to become gunky and thick. Shaking it off ensures a light, thin, and shatter-crisp exterior. This keeps the oil cleaner for subsequent batches.
Select a High-Smoke Point Oil
Use vegetable, canola, or avocado oil for the shallow-frying process. These oils can handle medium-high heat without burning or smoking. Using an oil with a low smoke point can leave a bitter taste on the chicken. Always ensure the oil is shimmering before adding the meat.
Monitor the Honey Caramelization
Honey contains high amounts of natural sugars that caramelize very quickly. Once the sauce begins to bubble and thicken, you must act quickly. Toss the chicken in and remove the pan from the heat immediately to avoid burning the glaze. Burnt honey will taste bitter rather than sweet.
Simmer the Sauce Before Combining
Ensure the honey, butter, and soy sauce mixture is bubbly and syrupy before adding the chicken back in. This step allows the water content to evaporate and the flavors to concentrate. If the sauce is too thin, it will soak into the breading. A thick syrup clings to the crust and maintains the crunch.
Solving Common Cooking Challenges
Addressing Non-Crispy Chicken
If your chicken is not getting crispy, the oil may not have been hot enough. Ensure the oil is shimmering and hot before the first piece is added. Additionally, verify that you are not overcrowding the pan, which lowers the oil temperature. Using a heavy-bottomed pan also helps maintain a consistent heat.
Fixing a Runny Glaze
When the sauce is too thin and won’t stick, let the honey and butter mixture simmer for an extra minute. It needs to reach a concentrated, bubbly state to adhere to the meat. Stirring constantly prevents the butter from separating. The goal is a thick syrup that coats the chicken evenly.
Balancing Excessive Sweetness
If the final sauce tastes too sweet, you can balance it with a touch of acidity. Add one teaspoon of apple cider vinegar or a squeeze of fresh lemon juice. The acid cuts through the richness of the butter and the sugar of the honey. This brightens the overall flavor profile of the dish.
Preventing Coating Separation
If the flour coating falls off during frying, it is often because the chicken was too wet. Pat the chicken pieces dry with paper towels before dredging them in the flour. This prevents the flour from turning into a slippery paste. A dry surface allows the flour to bond better to the protein.
Frequently Asked Questions
Can I use chicken breasts instead of thighs?
Yes, chicken breasts can be used as a leaner alternative to thighs. Be aware that breasts dry out much faster than thighs during the frying process. Reduce the frying time slightly to ensure the meat stays juicy. Thighs are generally recommended for a more tender result.
Is this recipe gluten-free?
To make this dish gluten-free, substitute the all-purpose flour with a 1:1 gluten-free flour blend or cornstarch. Additionally, replace the soy sauce with tamari or coconut aminos. These substitutions maintain the texture and flavor while removing gluten. Ensure all used ingredients are certified gluten-free.
Can I prepare the chicken in an air fryer?
Yes, you can coat the chicken in the flour mixture and spray it generously with oil. Air fry at 200°C for 12 to 15 minutes, flipping the pieces halfway through. Prepare the honey butter sauce on the stovetop separately. Toss the air-fried chicken in the sauce just before serving.
Can this meal be made ahead of time?
This dish is best served fresh to maintain the contrast between the crispy crust and sticky glaze. However, you can coat the chicken in the flour mixture up to 30 minutes in advance. Store the prepared chicken in the fridge until you are ready to fry. Do not toss them in the sauce until the moment of serving.
Storage and Reheating Advice
Refrigeration Guidelines
Place any leftover chicken in an airtight container once it has cooled to room temperature. Store it in the refrigerator for up to 3 to 4 days. Keep the chicken and any extra sauce in separate containers if possible. This helps prevent the crust from becoming overly saturated.
Freezing Instructions
Cooked chicken can be frozen in a freezer-safe bag for up to 2 months. For the best results, freeze the crispy chicken and the sauce separately. This allows you to restore the crunch of the meat during the reheating process. Label the bags with the date of preparation.
Reheating via Air Fryer
The air fryer is the best method for restoring the original crispiness. Reheat the chicken at 180°C for 3 to 5 minutes. This evaporates surface moisture and crisps the flour coating again. Toss the chicken in warmed sauce immediately after heating.
Reheating in the Oven
Place the chicken on a baking sheet and heat in the oven at 190°C. Bake until the chicken is heated through and the glaze begins to sizzle. This method is effective for larger quantities of leftovers. Avoid covering the pan to keep the exterior from steaming.
Stovetop Reheating Method
Warm the chicken in a skillet over medium heat. Add a tiny splash of water or extra honey to loosen the thickened sauce. Stir gently to avoid scraping the coating off the meat. This method is faster than the oven and keeps the sauce glossy.
Using the Microwave for Reheating
The microwave is the fastest way to heat leftovers, but it is not recommended for texture. The chicken will lose its crunch and become soft. Use this method only if time is a critical factor. Heat in short bursts to avoid overcooking the meat.
Ingredient Substitutions
Cornstarch for a Lighter Crust
You can replace the flour with cornstarch for a different texture. Cornstarch creates a lighter, more shatter-crisp exterior that is common in Asian-style fried chicken. It also helps the sauce adhere more smoothly. Mix it with the same salt and pepper measurements.
Alternative Protein Options
This glaze works well with shrimp or extra-firm tofu. For shrimp, reduce the frying time to about 2 minutes per side to avoid overcooking. For tofu, press the blocks dry for 30 minutes before coating them in flour. This ensures the tofu stays firm and crispy.
Different Natural Sweeteners
Maple syrup or agave nectar can be used instead of honey. Maple syrup adds a distinct woody flavor, while agave is more neutral. Note that these alternatives may result in a slightly thinner glaze. You may need to simmer the sauce for an extra minute to achieve the desired thickness.
Flavor Variations
Creating a Hot Honey Glaze
For a spicy version, stir one teaspoon of red chili flakes or Sriracha into the bubbling sauce. The heat balances the sweetness of the honey and the richness of the butter. Add the spice during the simmering phase for better integration. This is ideal for those who prefer a sweet-and-spicy profile.
Adding a Sesame Twist
Incorporate one teaspoon of toasted sesame oil into the sauce for a nutty aroma. Garnish the finished dish with toasted sesame seeds for added texture. This variation gives the dish a more traditional East Asian flavor. It pairs exceptionally well with steamed white rice.
Enhancing the Garlic Profile
If you enjoy a strong garlic taste, add one teaspoon of garlic powder directly into the flour mixture. This creates a double layer of garlic flavor, both in the crust and the glaze. Ensure the minced garlic in the pan does not brown too deeply. Lightly golden garlic provides the best sweetness.
Essential Kitchen Equipment
Selecting the Right Skillet
A heavy-bottomed stainless steel or non-stick pan is best for this recipe. Heavy pans distribute heat more evenly, preventing hot spots that burn the honey. Non-stick surfaces make cleaning the sticky glaze much easier. Ensure the pan is large enough to avoid overcrowding the chicken.
Using Tongs for Precision
Tongs are essential for flipping the chicken chunks without damaging the breading. Using a fork or spoon can poke holes in the crust, allowing oil to seep in. Tongs allow you to rotate the pieces quickly and efficiently. They are also useful for tossing the chicken in the final glaze.
Utilizing a Wire Cooling Rack
Place the fried chicken on a wire rack while preparing the sauce. This allows air to circulate around the chicken, preventing the bottom from getting soggy. Placing chicken directly on a plate traps steam against the meat. A rack preserves the maximum amount of crunch.
Serving Suggestions
Pairing with Steamed Rice
Serve the honey butter chicken over a bed of steamed jasmine or basmati rice. The rice absorbs the extra honey butter glaze, ensuring no sauce goes to waste. This creates a balanced meal with a neutral base for the bold flavors. Add a sprinkle of green onions for color.
Serving with Mashed Potatoes
Creamy mashed potatoes provide a rich and comforting contrast to the crispy chicken. The buttery texture of the potatoes complements the honey glaze perfectly. This pairing turns the dish into a more hearty, American-style dinner. Season the potatoes with white pepper for a subtle kick.
Adding Steamed Green Vegetables
Balance the sweetness of the dish with steamed broccoli, snap peas, or bok choy. The freshness and slight bitterness of green vegetables cut through the richness of the butter. Toss the vegetables in a light lemon dressing before serving. This adds a healthy component to the meal.
Print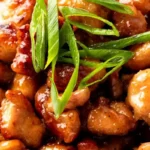
Crispy 30-Minute Honey Butter Chicken
- Total Time: 30 minutes
- Yield: 5 servings 1x
- Diet: General
Description
This 30-minute honey butter chicken is crispy, sweet, and juicy. Instead of deep-frying, it is shallow-fried in a pan with very little oil.
Ingredients
- 1.7 lbs Boneless chicken thighs (or chicken tenders)
- 2/3 cup Flour
- 1 tsp Kosher salt
- 1/2 tsp Black pepper
- 1 tsp Garlic powder
- 3 tbsp Olive oil (or canola oil or vegetable oil)
- 1/3 cup Honey
- 1/2 cup Butter (unsalted)
- 2 cloves Garlic (minced)
- 2 tbsp Soy sauce (light soy sauce)
Instructions
- Step: In a large bowl or flat plate, whisk together the flour, salt, black pepper, and garlic powder. Add the chicken chunks and toss until every piece is thoroughly coated.
- Step: Heat oil in a large pan over medium-high heat. Fry the chicken pieces until they are golden brown and crispy on all sides. Remove the chicken and set it aside on a plate.
- Step: Reduce the heat to medium. In the same pan, melt the butter with the honey, soy sauce, and minced garlic. Stir well and let the mixture simmer for about 2 minutes until it becomes thick and bubbly.
- Step: Add the crispy chicken back into the pan. Toss for 1 minute, allowing the glaze to thicken further and cling to the crust. Serve immediately while hot.
Notes
Avoid overcrowding the pan to ensure crispiness; fry in batches if needed. Shake off excess flour before frying to prevent gunky oil. Use a high-smoke point oil like vegetable or canola. Watch the honey closely as it caramelizes quickly to avoid burning. Ensure the sauce is bubbly and syrupy before returning chicken to the pan.
- Prep Time: 10 minutes
- Cook Time: 20 minutes
- Category: Main Course
- Method: Shallow-frying
- Cuisine: American
Nutrition
- Serving Size: 1 serving
- Calories: 645 kcal
- Sugar: 19 g
- Sodium: 1209 mg
- Fat: 45 g
- Saturated Fat: 19 g
- Unsaturated Fat: 22 g
- Trans Fat: 1 g
- Carbohydrates: 33 g
- Fiber: 1 g
- Protein: 28 g
- Cholesterol: 200 mg
Keywords: Honey Butter Chicken, crispy chicken, quick dinner, 30-minute meal