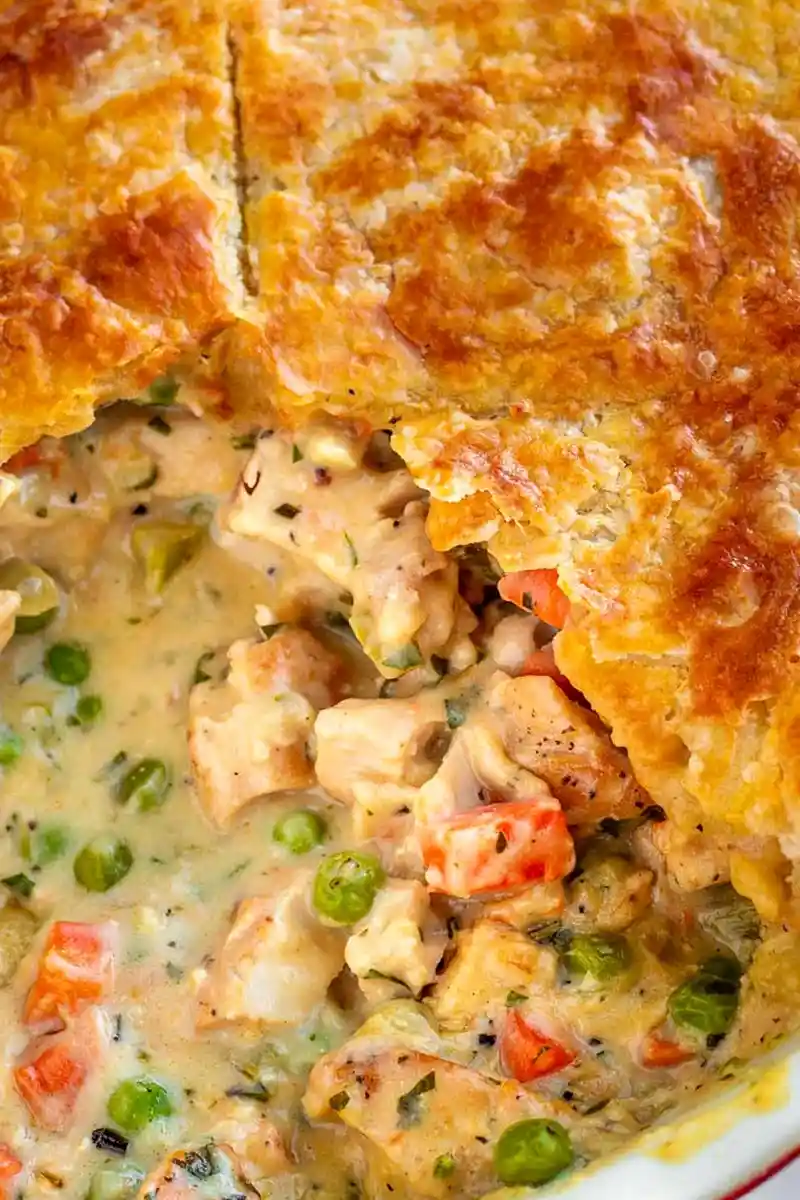
This recipe delivers a rich, creamy chicken pot pie encased in a sturdy buttermilk crust. It is designed to provide a thick filling that remains stable and does not become runny when sliced.
List of ingredients
- Buttermilk pie crust (makes 2 disks)
- 1 egg – for egg wash
- 1 to 2 teaspoons heavy cream – for egg wash
- 2 large skinless chicken breasts (or 3 medium breasts) – cubed
- 1/2 teaspoon garlic powder – for seasoning chicken
- 1/2 teaspoon fresh thyme leaves – for seasoning chicken
- Salt and pepper – to taste
- Olive oil – for searing
- 2 tablespoons unsalted butter – for sautéing vegetables
- 1 small onion, small diced
- 3 medium carrots, peeled and diced
- 2 stalks celery, diced
- 3 to 4 cloves garlic, minced
- 1/3 cup all-purpose flour – for thickening
- 2 cups chicken broth
- 1/2 cup heavy cream (plus more as needed)
- 1 teaspoon fresh thyme leaves – for the filling
- 1/2 teaspoon minced fresh rosemary – for the filling
- 1/4 cup chopped fresh parsley – for the filling
- 3/4 cup frozen peas
step-by-step instructions
- Prepare the crust: Make the buttermilk double pie crust at least 2 hours in advance, or preferably overnight. If the dough is too firm to roll after chilling, let it sit at room temperature for about 15 to 20 minutes.
- Prep the oven and chicken: Preheat your oven to 400°F. Pound the chicken breasts to a uniform 1/2-inch thickness, then season generously with garlic powder, fresh thyme, salt, pepper, and a drizzle of olive oil. Let the meat marinate for 15 minutes.
- Cook the chicken: Heat 1-2 tablespoons of olive oil in a large deep skillet over medium heat. Sear the chicken for 6-8 minutes per side until fully cooked. Transfer to a plate, let rest for 10 minutes, and then cut into cubes.
- Sauté the aromatics: In the same skillet, melt 2 tablespoons of butter over medium heat. Add the diced onions, carrots, celery, and minced garlic, cooking for about 8 to 10 minutes until tender.
- Create the roux: Stir in the all-purpose flour until the vegetables are well coated. Cook for 30 seconds to remove the raw flour taste.
- Build the sauce: Gradually pour in the chicken broth while stirring to dissolve the flour. Stir in the heavy cream, fresh thyme, rosemary, salt, and pepper.
- Thicken the filling: Bring the mixture to a boil, then reduce to a simmer over medium-low heat. Let it simmer uncovered for 6-7 minutes until the sauce has thickened.
- Combine ingredients: Stir in the cubed chicken, fresh parsley, and frozen peas. Simmer for another 1-2 minutes until everything is incorporated, then remove from heat and let cool slightly.
- Roll the dough: On a floured surface, roll both dough disks into 12-inch circles using a floured rolling pin.
- Assemble the pie: Place one dough circle into a 9-inch pie pan, allowing the edges to overhang. Pour in the chicken filling and cover with the second dough circle.
- Seal the pie: Tuck and fold the overhang of the top crust under the bottom crust. Crimp the edges firmly with your fingers or a fork to seal. Cut several slits in the top for steam ventilation.
- Apply egg wash: Whisk together the egg and 1 teaspoon of heavy cream. Brush this mixture lightly over the top and edges of the crust for a golden finish.
- Bake the pie: Place the pie pan on a large aluminum sheet pan to improve heat transfer and catch drips. Bake at 400°F for 35 minutes.
- Protect the edges: Fifteen minutes into baking, cover the edges of the crust with a pie crust shield or aluminum foil to prevent over-browning.
- Cool and serve: Remove from the oven and let the pie cool for 20-30 minutes before slicing. This allows the internal filling to set properly.
Professional Crust Techniques
Maintain Cold Butter for Maximum Flakiness
The secret to a flaky crust is keeping the butter in small, cold chunks within the dough. When these cold pockets of fat melt during baking, they create steam that lifts the layers of flour. Avoid over-working the dough with your hands, as the heat from your palms can melt the butter prematurely.
Utilize Proper Chilling Times
Chilling the dough for at least 2 hours or overnight is essential for structural integrity. This process allows the gluten to relax and the fats to solidify. If you skip this step, the dough may shrink during baking or lose its characteristic flakiness.
Prevent Dough Tearing During Rolling
Always use a generous amount of flour on both the work surface and the rolling pin. If the dough feels too stiff after refrigeration, allow it to soften for 15-20 minutes at room temperature. This prevents the dough from cracking while you are expanding it to the required 12-inch diameter.
Filling Customizations and Substitutions
Using Rotisserie Chicken for Efficiency
You can replace the raw chicken breasts with 4-5 cups of shredded or cubed rotisserie chicken. Since the meat is already cooked, simply stir it in during the final steps of the filling process. Be sure to season the filling more aggressively to compensate for the lack of seared meat flavor.
Substituting Turkey for Leftovers
Cooked turkey breast is an excellent alternative to chicken, especially after holiday meals. Use the same quantity of meat as required for the chicken. The flavor profile remains very similar, making it a practical way to repurpose leftovers.
Incorporating Additional Vegetables
You can add mushrooms, corn, or diced root vegetables to increase the nutritional value. If adding fresh potatoes, par-cook them first to ensure they are soft. For a faster option, use frozen diced potatoes which integrate quickly into the simmering sauce.
Adjusting Herb Profiles
While fresh thyme and rosemary are standard, you can use dried herbs if fresh are unavailable. Use approximately one-third of the amount of dried herbs compared to fresh, as dried versions are more concentrated. Parsley should always be added at the end to maintain its bright color.
Baking and Assembly Secrets
The Advantage of Using a Sheet Pan
Placing your pie dish on a metal sheet pan serves two primary purposes. First, it conducts heat more efficiently to the bottom crust, reducing the risk of a soggy bottom. Second, it catches any filling that may bubble over the edges, keeping your oven clean.
Managing Edge Browning
The edges of a pie crust cook faster than the center due to increased exposure to heat. Using a silicone pie crust shield or aluminum foil strips after the first 15 minutes of baking is crucial. This ensures the edges remain golden brown rather than burnt.
Allowing the Filling to Set
Wait 20-30 minutes after removing the pie from the oven before you attempt to slice it. The sauce is very hot and fluid immediately after baking. Letting it cool allows the starches and fats to stabilize, ensuring a clean cut and a thick consistency.
Creating a Vacuum-Tight Seal
When crimping the edges, ensure the top and bottom crusts are pressed firmly together. A loose seal can allow the creamy filling to leak out during the baking process. Use a fork to press deep grooves into the dough for a secure and decorative finish.
Storage and Reheating Guidance
Optimal Oven Reheating
To maintain the crispness of the crust, reheat slices in the oven at 350°F. Avoid using a microwave, as this often makes the crust chewy and the filling overly hot in spots. Cover the slices loosely with foil to prevent the top from drying out.
Refrigeration and Shelf Life
Store leftover pot pie in an airtight container in the refrigerator for up to 3 days. The buttermilk crust is designed to be sturdy, so it should resist sogginess better than standard crusts. Ensure the pie is completely cooled before sealing the container to prevent condensation.
Freezing the Unbaked Pie
You can assemble the pie entirely and freeze it before baking. Wrap the unbaked pie in two layers of heavy-duty aluminum foil for protection. Label the package with the date and bake directly from the freezer, allowing for additional cooking time.
Baking from a Frozen State
When baking a frozen pie, leave it on the counter for 30 minutes to take the chill off. Bake it covered with foil at 400°F for 35 minutes, then remove the foil, apply the egg wash, and bake for another 30 minutes. This ensures the center is heated through without burning the exterior.
Common Troubleshooting
Correcting a Runny Filling
If your filling is too thin after simmering, allow it to cook for a few more minutes uncovered to reduce the liquid. You can also whisk a small amount of additional flour with water or broth to create a slurry and stir it in. Simmer for another 2 minutes to thicken.
Preventing a Soggy Bottom Crust
To avoid a soggy bottom, ensure the filling has cooled slightly before pouring it into the raw dough. Using a very cold crust and placing the pan on a preheated baking sheet also helps. Avoid overfilling the pie, as excess liquid can saturate the bottom layer.
Fixing a Sauce That Is Too Thick
If the sauce becomes too paste-like, stir in a tablespoon of chicken broth or heavy cream at a time. Do this over low heat, stirring constantly until the desired creamy consistency is reached. This usually happens if the filling is simmered for too long.
Frequently Asked Questions
Can I use store-bought pie crust?
Yes, you can use a high-quality store-bought double crust if you are short on time. While homemade buttermilk crust provides more flakiness, commercial versions are a practical alternative. Just ensure the dough is chilled before rolling it into the pan.
Do I need to blind-bake the bottom crust?
There is no need to blind-bake or par-bake the bottom crust for this recipe. The filling is already cooked and thickened, which prevents it from soaking into the dough. Additionally, blind-baking makes it harder to seal the top and bottom crusts together.
Can I substitute milk for heavy cream?
It is not recommended to use milk or half-and-half as they are too thin to provide the necessary stability. Heavy cream provides the fat content required for a rich, thick sauce that holds its shape. If you must substitute, use a cream-based alternative or a thickened coconut cream.
How do I store leftover slices?
Place individual slices in airtight containers or wrap them tightly in plastic wrap. Keep them in the coldest part of your refrigerator. When reheating, use the oven method to ensure the crust returns to its original flaky texture.
Print
Homemade Chicken Pot Pie with Flaky Buttermilk Crust
- Total Time: 1 hour 20 minutes
- Yield: 8 servings 1x
- Diet: General
Description
This homemade chicken pot pie is a nostalgic classic featuring a flaky, buttery buttermilk pie crust and a creamy, herb-infused filling packed with tender chicken and vegetables.
Ingredients
- Buttermilk pie crust (makes 2 disks)
- 1 egg (for egg wash)
- 1 to 2 teaspoons heavy cream (for egg wash)
- 2 large skinless chicken breasts (or 3 medium)
- ½ teaspoon garlic powder
- ½ teaspoon fresh thyme leaves
- Salt and pepper
- Olive oil
- 2 tablespoons unsalted butter
- 1 small onion, small diced
- 3 medium carrots, peeled and diced
- 2 stalks celery, diced
- 3 to 4 cloves garlic, minced
- ⅓ cup all-purpose flour
- 2 cups chicken broth
- ½ cup heavy cream (plus more as needed)
- 1 teaspoon fresh thyme leaves
- ½ teaspoon minced fresh rosemary
- ¼ cup chopped fresh parsley
- ¾ cup frozen peas
Instructions
- Prepare Crust: Make the buttermilk double pie crust at least 2 hours in advance or overnight; let sit at room temperature for 15 minutes if too firm to roll.
- Cook Chicken: Preheat oven to 400°F. Pound chicken breasts to ½ inch thick, season with garlic powder, fresh thyme, salt, pepper, and olive oil; let sit for 15 minutes, then cook in a skillet 6-8 minutes per side until done. Rest 10 minutes and cube.
- Sauté Vegetables: Melt butter in the same skillet over medium heat. Cook onions, carrots, celery, and garlic for about 8 minutes until tender.
- Thicken Sauce: Stir in flour and cook for 30 seconds. Gradually add chicken broth, stirring to dissolve flour. Add thyme, rosemary, salt, and pepper.
- Simmer Filling: Stir in heavy cream and simmer over medium-low heat for 6-7 minutes until thickened. Stir in cubed chicken, parsley, and frozen peas; simmer for another 1-2 minutes. Set aside to cool slightly.
- Assemble Pie: Roll dough into two 12-inch circles. Place one in a 9-inch pie pan. Pour in filling and cover with the second dough. Fold and crimp edges to seal tightly.
- Finish and Bake: Cut slits on top for ventilation. Brush with egg wash (beaten egg and heavy cream). Place pie pan on a large aluminum sheet pan and bake at 400°F for 35 minutes, covering edges with a shield or foil after 15 minutes.
- Cool: Let the pie cool for 20-30 minutes before slicing to allow the filling to set.
Notes
To ensure a flaky crust, keep the dough cold. Using a metal sheet pan under the pie dish helps conduct heat to the bottom crust and prevents sogginess. Let the pie rest before serving so the inside isn’t runny.
- Prep Time: 40 minutes
- Cook Time: 40 minutes
- Category: Main Course
- Method: Baking
- Cuisine: American
Nutrition
- Serving Size: 1 slice
- Calories: 1031 kcal
- Sugar: 3 g
- Sodium: 482 mg
- Fat: 60 g
- Saturated Fat: 20 g
- Unsaturated Fat: 34 g
- Trans Fat: 1 g
- Carbohydrates: 11 g
- Fiber: 2 g
- Protein: 65 g
- Cholesterol: 300 mg
Keywords: chicken pot pie, buttermilk crust, comfort food, creamy chicken pie, homemade pie