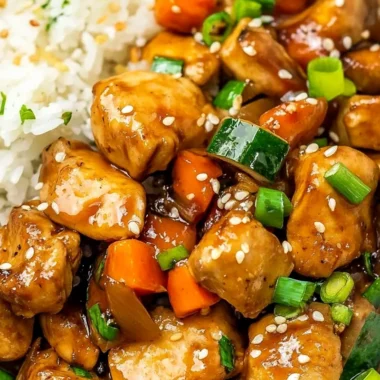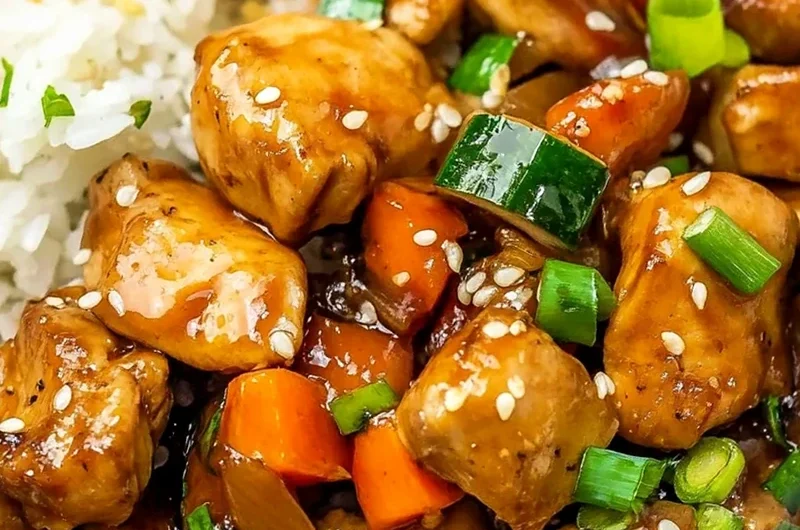
This Instant Pot Hibachi Chicken offers a convenient, high-protein meal that mimics the savory, umami-packed flavors of your favorite Japanese grill house. By using the pressure cooker to infuse aromatics into the meat, you can achieve a tender result that pairs perfectly with steamed grains and crisp vegetables for a complete weeknight dinner.
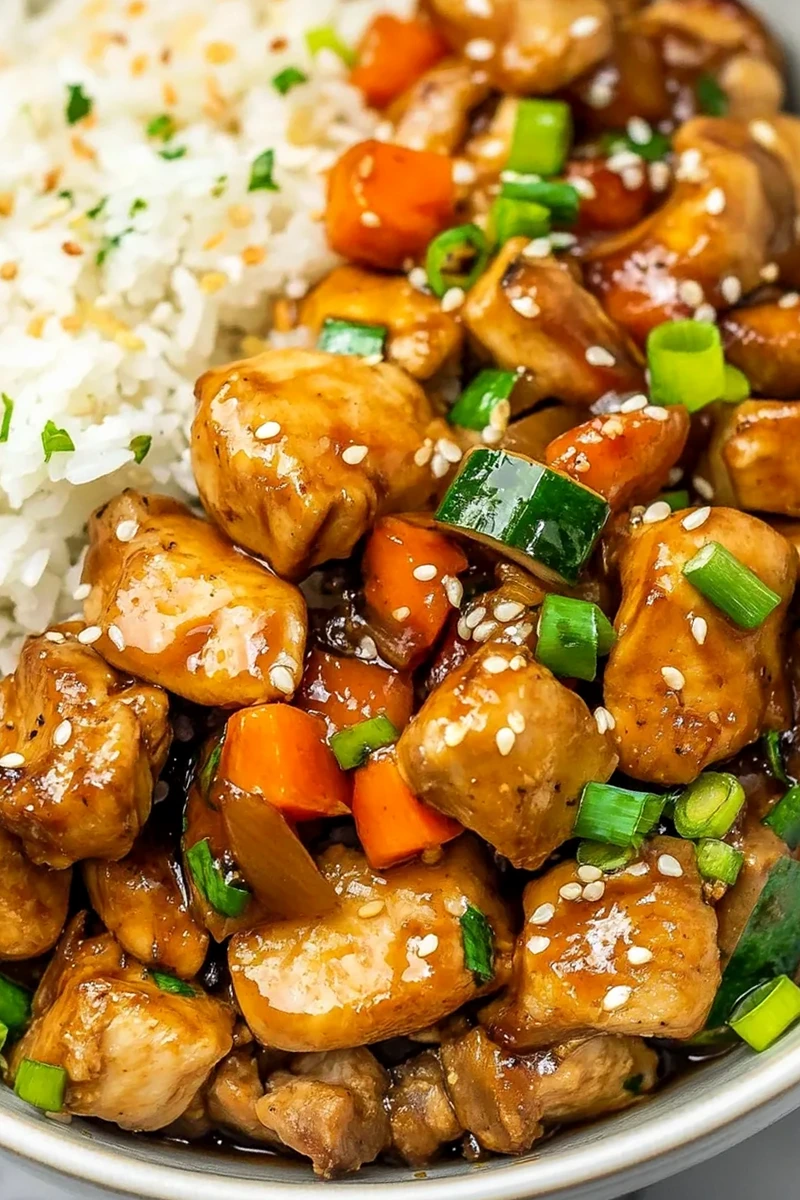
List of ingredients
- ¼ cup low-sodium soy sauce
- ¼ cup water
- 2 tablespoons apple cider vinegar
- 1 tablespoon fresh ginger, grated
- 2 cloves garlic, minced
- 1 tablespoon honey
- ¼ teaspoon ground white pepper
step-by-step instructions
- Step 1: Prepare the Chicken – Start by cutting boneless, skinless chicken breasts or thighs into bite-sized pieces.
- Step 2: Mix the Sauce – In a medium bowl, whisk together the low-sodium soy sauce, water, vinegar, grated ginger, minced garlic, honey, and pepper.
- Step 3: Sauté the Chicken – Turn on your Instant Pot and select the ‘Sauté’ function. Once hot, add a splash of oil and the chicken pieces. Sauté for about 3-4 minutes, until the chicken is lightly browned.
- Step 4: Add the Sauce – Once the chicken is browned, pour the sauce mixture over the chicken in the pot. Stir to combine.
- Step 5: Pressure Cook – Secure the lid on your Instant Pot and set it to pressure cook on high for 8 minutes. After cooking, allow the pressure to release naturally for 5 minutes, then perform a quick release.
- Step 6: Serve – Carefully open the lid and give the chicken a gentle stir. Serve it over steamed rice, sautéed vegetables, or in lettuce wraps.
Refining the Cooking Process
Optimizing the Browning Phase
To ensure your chicken develops a golden exterior before pressure cooking, avoid overcrowding the pot during the sauté stage. If you have a larger batch, brown the meat in two separate sessions to maintain high heat and achieve a true sear rather than steaming the protein.
Importance of Natural Pressure Release
Allowing the pot to sit for a 5-minute natural release is essential for maintaining the integrity of the chicken fibers. Rushing to a full manual release immediately can lead to tougher meat because the rapid drop in pressure causes the muscle fibers to contract too quickly.
Flavor Balancing and Enhancements
Achieving a Richer Sauce Texture
If you prefer a coating consistency rather than a thin liquid, whisk one tablespoon of cornstarch with two tablespoons of cold water to create a slurry. After the chicken is cooked, remove the meat, set the pot to ‘Sauté’ mode, and stir in the slurry until the sauce thickens to your liking.
Balancing the Sweet and Salty Profile
The beauty of this dish lies in the contrast between the saltiness of the soy sauce and the sweetness of the sugar. If the sauce tastes too sharp, add an extra half-teaspoon of honey at a time until the flavors reach a mellow, cohesive balance that suits your palate.
Versatile Serving Recommendations
Selecting Complementary Carbohydrates
This dish is classically served over steamed jasmine rice, which acts as a neutral canvas for the bold, savory sauce. For a lower-glycemic alternative, consider pairing the chicken with cauliflower rice or quinoa, both of which absorb the sauce without losing their structural integrity.
Vegetable Pairings for Added Texture
To turn this into a one-bowl meal, add quick-cooking vegetables like snap peas, thinly sliced carrots, or zucchini rounds during the last minute of the sauté process. Alternatively, steam broccoli florets separately and fold them into the pot once the pressure cooking is complete to maintain their bright green color and crunch.
Managing Leftovers and Prep
Proper Storage for Best Quality
Store any leftover chicken in a sealed glass or BPA-free plastic container within the refrigerator for up to three days. Keeping the chicken submerged in a small amount of the cooking liquid will prevent it from drying out during the storage period, ensuring it remains succulent for your next meal.
Effective Reheating Strategies
When reheating, use a microwave-safe dish and cover it with a damp paper towel to trap moisture, heating in 30-second increments until steaming. If using a skillet, splash a tablespoon of water into the pan over medium heat to rejuvenate the sauce and prevent the meat from becoming rubbery.
Planning Ahead for Efficient Meals
You can prepare the sauce mixture in advance and store it in a mason jar in the refrigerator for up to five days. When you are ready to cook, simply sear the chicken and pour the pre-mixed sauce directly into the pot, which saves significant prep time on busy evenings.
Frequently Asked Questions
Can I use different types of poultry?
Yes, you can easily substitute chicken breasts with boneless chicken thighs, which provide a slightly higher fat content and are more forgiving during the pressure cooking process. If using thighs, the cook time remains the same, but the result will be noticeably more tender.
What if I do not have apple cider vinegar?
If you are out of apple cider vinegar, white vinegar or rice vinegar can be used as direct replacements. Each will offer a slightly different acidity profile, with rice vinegar providing the mildest and most traditional flavor for this type of dish.
How can I make the dish completely gluten-free?
The primary source of gluten in this recipe is traditional soy sauce, which contains wheat. To make this dish safe for a gluten-free diet, substitute the standard soy sauce with an equal amount of tamari or a high-quality gluten-free soy sauce alternative.
Should I rinse the chicken before cooking?
It is not recommended to rinse chicken before cooking, as this can spread pathogens around your kitchen workspace. Simply pat the chicken dry with a paper towel after slicing it to ensure it browns properly when it hits the hot oil in the Instant Pot.
Why did the sauce fail to thicken?
If the sauce seems too thin, it is likely due to the natural juices released by the chicken during the pressure cooking process. Using the cornstarch slurry method described in the tips section is the most reliable way to achieve a thicker, more glaze-like consistency.
Print
Instant Pot Hibachi Chicken
- Total Time: 30 minutes
- Yield: 4 servings 1x
- Diet: High Protein
Description
This Instant Pot Hibachi Chicken recipe is a quick and easy way to enjoy tender, flavorful chicken with that signature hibachi taste, all in a fraction of the time.
Ingredients
- ¼ cup low-sodium soy sauce
- ¼ cup water
- 2 tablespoons apple cider vinegar
- 1 tablespoon fresh ginger, grated
- 2 cloves garlic, minced
- 1 tablespoon honey
- ¼ teaspoon ground white pepper
Instructions
- Step 1: Prepare the Chicken – Start by cutting boneless, skinless chicken breasts or thighs into bite-sized pieces.
- Step 2: Mix the Sauce – In a medium bowl, whisk together the low-sodium soy sauce, water, vinegar, grated ginger, minced garlic, honey, and pepper.
- Step 3: Sauté the Chicken – Turn on your Instant Pot and select the ‘Sauté’ function. Once hot, add a splash of oil and the chicken pieces. Sauté for about 3-4 minutes, until the chicken is lightly browned.
- Step 4: Add the Sauce – Once the chicken is browned, pour the sauce mixture over the chicken in the pot. Stir to combine.
- Step 5: Pressure Cook – Secure the lid on your Instant Pot and set it to pressure cook on high for 8 minutes. After cooking, allow the pressure to release naturally for 5 minutes, then perform a quick release.
- Step 6: Serve – Carefully open the lid and give the chicken a gentle stir. Serve it over steamed rice, sautéed vegetables, or in lettuce wraps.
Notes
For extra flavor, marinate the chicken in the sauce for an hour before cooking. If you prefer a thicker sauce, mix a tablespoon of cornstarch with water and add it to the pot after cooking.
- Prep Time: 15 minutes
- Cook Time: 15 minutes
- Category: Main
- Method: Pressure Cooking
- Cuisine: Japanese
Nutrition
- Serving Size: 1 serving
- Calories: 350 kcal
- Sugar: 4 g
- Sodium: 650 mg
- Fat: 12 g
- Saturated Fat: 2 g
- Unsaturated Fat: 8 g
- Trans Fat: 0 g
- Carbohydrates: 8 g
- Fiber: 1 g
- Protein: 45 g
- Cholesterol: 120 mg
Keywords: Easy, Chicken, Instant Pot, Hibachi