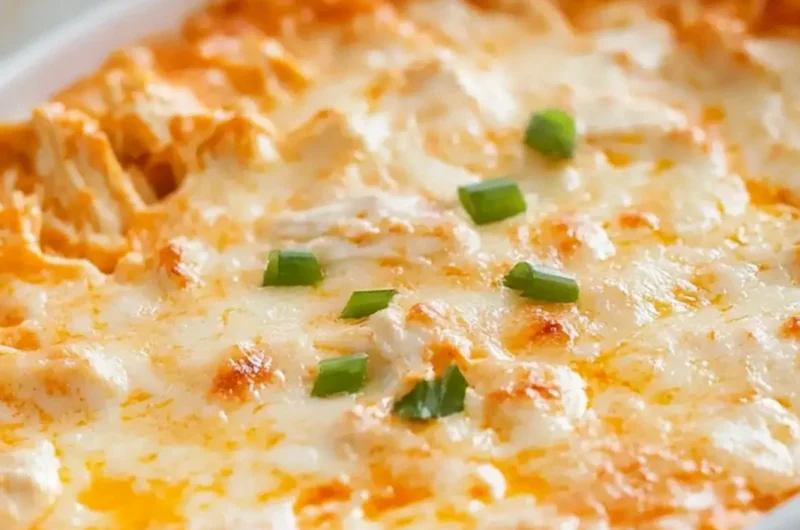
This oven-baked buffalo chicken dip is the ultimate creamy, spicy, and crowd-pleasing appetizer for any occasion. By combining tender shredded chicken with tangy ranch and melted cheeses, you create a rich, indulgent dip that perfectly captures classic flavors. Whether you are hosting a large party or enjoying a quiet weekend, this simple preparation yields impressive results in just over thirty minutes.

List of ingredients
- 2 cups shredded chicken
- 8 ounces cream cheese, softened
- 1/2 cup hot sauce
- 1/2 cup ranch dressing
- 1 cup shredded cheddar cheese
- 1/2 cup blue cheese crumbles
step-by-step instructions
- Step: Preheat your oven to 350°F (175°C).
- Step: Mix the shredded chicken, softened cream cheese, hot sauce, and ranch dressing in a large mixing bowl until smooth.
- Step: Transfer the mixture into an oven-safe dish, spreading it out evenly.
- Step: Top your dip with shredded cheddar cheese and blue cheese crumbles.
- Step: Bake for about 20-25 minutes until the dip is bubbly and the cheese on top is golden brown.
- Step: Cool slightly before serving with your choice of chips, crackers, or vegetables.
Essential Preparation Techniques
Achieving the Ideal Texture
To ensure your dip has the perfect mouthfeel, you must focus on the temperature of your cream cheese. If the cream cheese is too cold, it will remain chunky when mixed with the other ingredients, leading to uneven pockets of plain cheese. Allow it to sit on the counter for at least thirty minutes before preparation so it blends seamlessly into a velvety sauce.
Managing Moisture Levels
The secret to a dip that holds its shape while remaining scoopable lies in the moisture content of your chicken. If you are shredding your own chicken rather than buying it pre-shredded, ensure it is thoroughly drained if it was poached or boiled. Excess liquid from the chicken can thin out the cream cheese base and prevent the dip from firming up properly during the baking process.
Customization and Flavor Variations
Adjusting the Heat Profile
The intensity of this dip can be easily tuned to suit your guests by modifying the hot sauce or adding supplemental spice. If you prefer a sharper kick, mix in a teaspoon of cayenne pepper or finely diced jalapeño peppers directly into the base. For those who find the classic flavor too aggressive, you can replace a portion of the hot sauce with a milder buffalo-style wing sauce to maintain the flavor without the intense burn.
Incorporating Diverse Cheese Blends
While sharp cheddar is the gold standard for this dish, you can experiment with other meltable cheeses to create unique profiles. A combination of Monterey Jack and mild provolone can produce a much stretchier, milder dip that appeals to younger guests. Alternatively, incorporating a small amount of smoked gouda can add a savory, campfire-like note that pairs exceptionally well with the tang of the blue cheese crumbles.
Effective Storage and Reheating
Maintaining Freshness in the Refrigerator
Leftover dip can be stored in the refrigerator for up to three days, provided it is kept in an airtight container. Because the base is dairy-heavy, keeping the container tightly sealed prevents the dip from absorbing other refrigerator odors. When you are ready to eat again, ensure the container is made of a material that can withstand temperature changes if you plan to move it directly to the oven.
Restoring Quality During Reheating
When reheating, avoid the microwave if possible, as it can cause the fats in the cheese and cream cheese to separate, leaving you with an oily mess. Instead, return the dip to an oven-safe dish and warm it at 350°F (175°C) for about 20 minutes, or until the edges are bubbling once more. If the dip appears slightly dry after the second bake, stir in a teaspoon of milk or water to revitalize the creamy consistency.
Serving Suggestions for Any Crowd
Pairing with Crunchy Vessels
The vehicle for your dip is just as important as the dip itself, so offer a variety of textures for your guests to enjoy. Sturdy tortilla chips, pita crisps, and toasted baguette slices are excellent for heavy-duty dipping without breaking. For a lighter contrast, provide fresh vegetable sticks like celery, cucumber rounds, or sliced bell peppers, which provide a crisp, cooling element to balance the rich, warm flavors.
Creative Garnish Options
Visual appeal makes a dish more inviting, so consider adding fresh garnishes just before serving. Finely chopped chives or scallions add a splash of color and a mild, onion-like bite that cuts through the richness of the dairy. You might also consider a light dusting of smoked paprika or a drizzle of extra hot sauce if you want to emphasize the spicy nature of the dish to your guests.
Frequently Asked Questions
Can I prepare this entire dish ahead of time?
Yes, you can assemble the dip entirely, cover it tightly, and keep it in the refrigerator for up to 24 hours. When it is time to serve, simply take the dish out of the refrigerator while the oven preheats, then bake according to the instructions. You may need to add an extra five minutes to the baking time if the dip is still quite cold when it enters the oven.
Why did my dip separate in the oven?
Separation usually occurs if the oven temperature is too high or if the dip is left to bake for too long. If the cheese oils rise to the top, it means the dairy proteins have been overcooked. Always keep a close watch during the final ten minutes of baking and remove the dish as soon as the cheese is golden and the edges are bubbling.
Is it possible to freeze the dip for later?
Yes, you can freeze the dip for up to three months by placing it in a freezer-safe container. The cream cheese may experience a slight change in texture after thawing, but stirring it vigorously after reheating will help incorporate the fats back into the dip. Always thaw the mixture in the refrigerator overnight before baking it to ensure it heats through evenly.
How do I make the dip less spicy for kids?
If you need a milder version, start with half the requested amount of hot sauce and taste the mixture before adding more. You can also mix in a little bit of extra ranch dressing or even a dollop of sour cream to mellow the heat. These ingredients help dilute the vinegar and capsaicin found in the hot sauce without sacrificing the creamy texture of the appetizer.
Print
Buffalo Chicken Dip Oven Recipe Everyone Will Love
- Total Time: 35 minutes
- Yield: 8 servings 1x
- Diet: Low Carb
Description
This Buffalo Chicken Dip Oven recipe combines creamy and spicy flavors, perfect for game day or any gathering.
Ingredients
- 2 cups shredded chicken
- 8 ounces cream cheese, softened
- 1/2 cup hot sauce
- 1/2 cup ranch dressing
- 1 cup shredded cheddar cheese
- 1/2 cup blue cheese crumbles
Instructions
- Step: Preheat your oven to 350°F (175°C).
- Step: Mix the shredded chicken, softened cream cheese, hot sauce, and ranch dressing in a large mixing bowl until smooth.
- Step: Transfer the mixture into an oven-safe dish, spreading it out evenly.
- Step: Top your dip with shredded cheddar cheese and blue cheese crumbles.
- Step: Bake for about 20-25 minutes until the dip is bubbly and the cheese on top is golden brown.
- Step: Cool slightly before serving with your choice of chips, crackers, or vegetables.
Notes
Optional: Garnish with chopped green onions for a fresh touch. Store leftovers in an airtight container in the refrigerator for up to 3 days.
- Prep Time: 10 minutes
- Cook Time: 25 minutes
- Category: Appetizers
- Method: Baking
- Cuisine: American
Nutrition
- Serving Size: 1 serving
- Calories: 300 kcal
- Sugar: 1 g
- Sodium: 900 mg
- Fat: 25 g
- Saturated Fat: 15 g
- Unsaturated Fat: 9 g
- Trans Fat: 0 g
- Carbohydrates: 5 g
- Fiber: 0 g
- Protein: 20 g
- Cholesterol: 75 mg
Keywords: Buffalo Chicken Dip, Appetizer, Game Day, Creamy Dip, Cheesy Dip