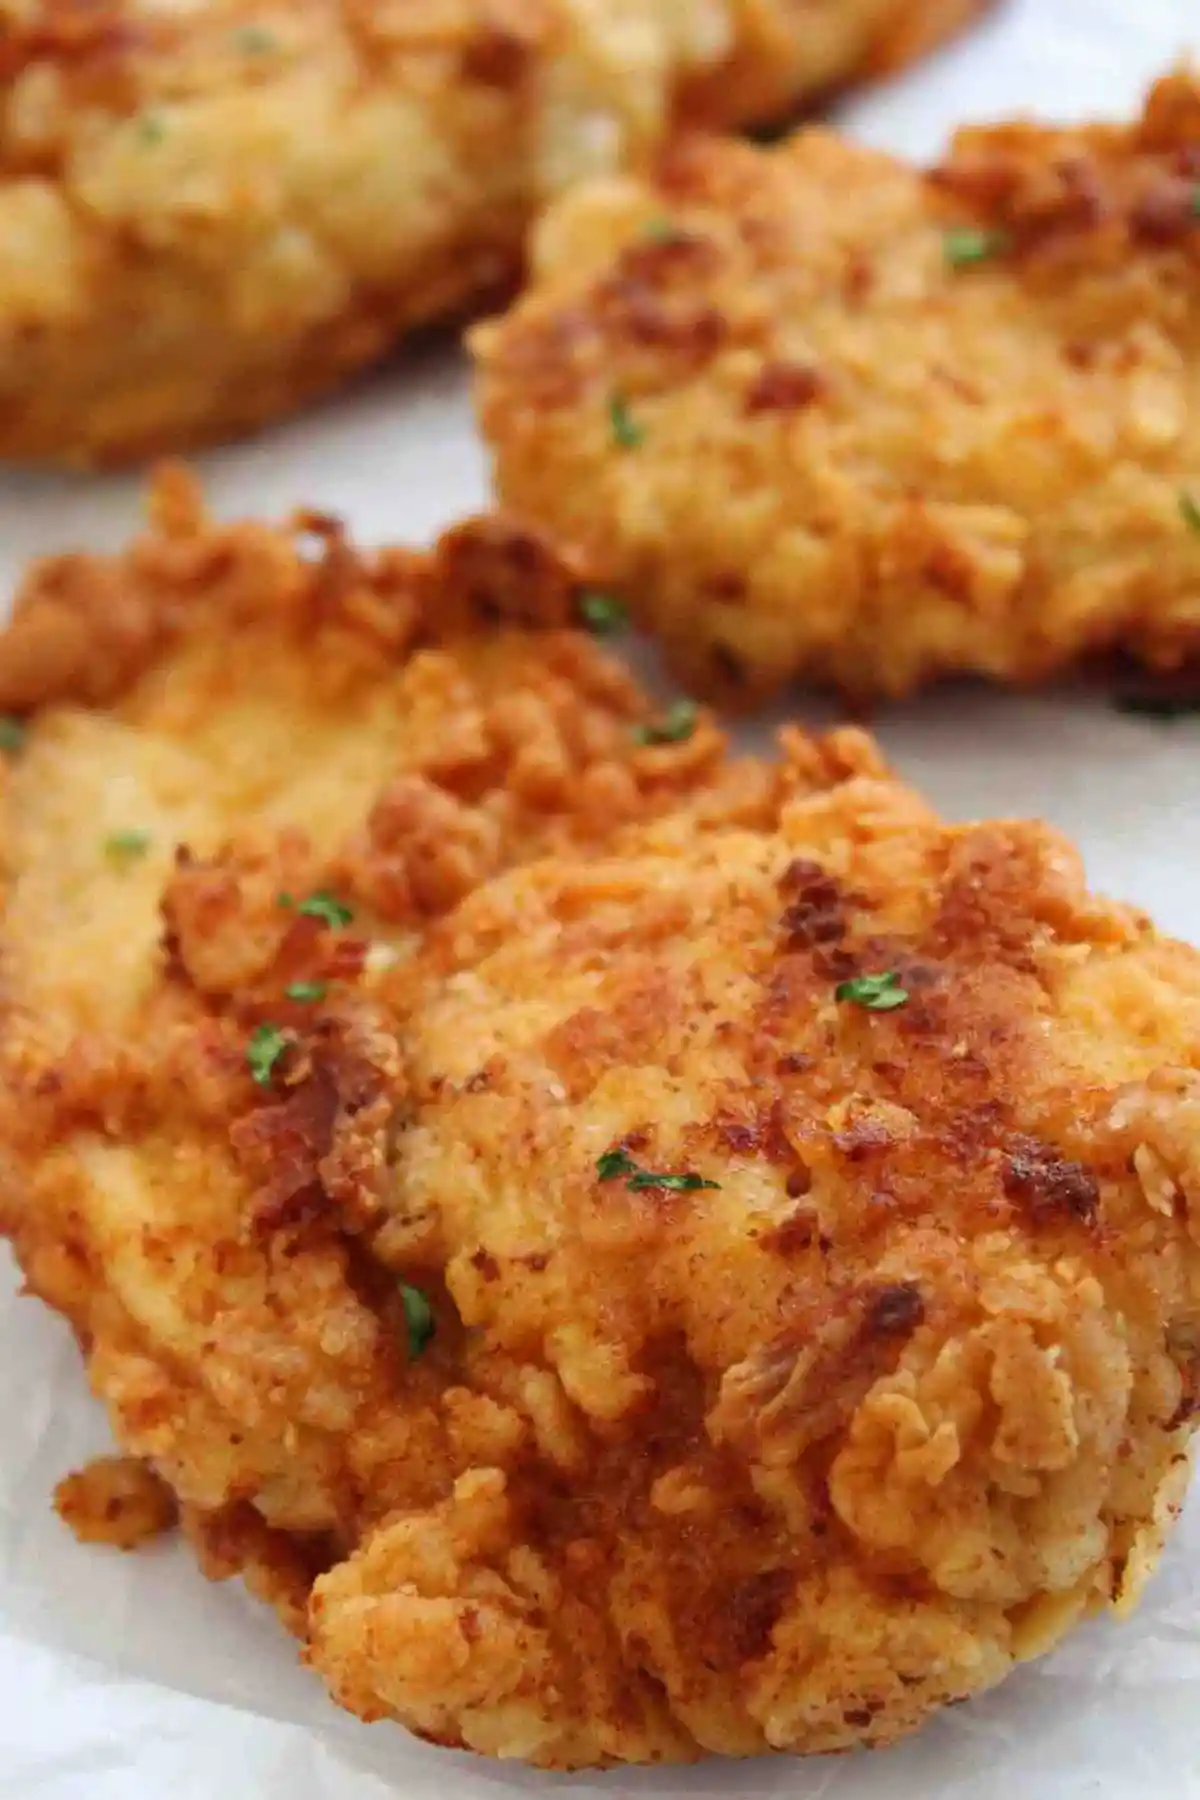
This buttermilk fried chicken breast offers the perfect balance of a light, crunchy exterior and incredibly tender, juicy meat inside. By marinating the chicken in a rich buttermilk brine, you ensure that every bite is seasoned throughout while the coating creates a beautiful, golden-brown crust. Whether you are crafting the ultimate sandwich or preparing a hearty main course, this recipe delivers consistent, professional results every time you fry.
List of ingredients
- 1.5 lbs chicken breast (boneless, skinless)
- 1 cup buttermilk
- 1 egg
- 1 tbsp hot sauce
- 3 tsp salt
- 1 cup flour
- 3 tsp salt
- 1/2 tsp celery salt
- 2 tsp granulated garlic
- 2 tsp paprika powder
- 1 tsp ground white pepper
- oil (for frying)
- fresh parsley (for garnishing)
step-by-step instructions
- Step: In a bowl, whisk together the buttermilk, egg, salt and hot sauce.
- Step: Transfer the chicken breasts to the buttermilk marinade and cover. Refrigerate for a minimum of 1 hour.
- Step: Add at least 2 inches of oil to a large pot and heat to 350 degrees F.
- Step: In a bowl, whisk together the flour, salt, white pepper, celery salt, granulated garlic and paprika powder.
- Step: Remove the chicken breast from the buttermilk marinade allowing the excess to drip off before transferring to the seasoned flour.
- Step: Coat each chicken breast completely with the flour then transfer to the hot oil and deep fry for 15-20 minutes, flipping the chicken throughout the process. Don’t over crowd the pan.
- Step: The fried chicken is ready once a kitchen thermometer inserted into the thickest part of the breast reads at least 165 degrees F.
- Step: Transfer the chicken to a plate or wire rack and blot with a paper towel to absorb the excess oil.
- Step: Garnish with fresh parsley and serve with your favorite side dish or make a chicken sandwich and enjoy.
Essential frying techniques
Maintaining oil temperature for a perfect crust
The success of this fried chicken relies heavily on the oil temperature staying at 350 degrees F. If the oil is too cold, the chicken will absorb excessive grease and become soggy rather than crispy. Conversely, if the temperature spikes too high, the exterior will darken or burn before the inside has finished cooking.
The importance of the wire rack
After removing the chicken from the hot oil, placing it on a wire rack rather than a flat plate is a simple but effective technique. A rack allows air to circulate underneath the chicken, which prevents the bottom side from steaming and losing its crunch. This simple adjustment ensures the entire piece of chicken stays evenly crispy until you are ready to serve.
Understanding the seasoning profile
Why white pepper is a secret weapon
White pepper is a staple in professional kitchens for fried poultry because it offers a distinct, earthy warmth without the visible specks or the harsh bite of black pepper. It blends seamlessly into the flour coating, providing a sophisticated depth that rounds out the stronger notes of granulated garlic and paprika. If you only have black pepper, it can be used, but you will notice a sharper, more aggressive heat that changes the overall experience of the dish.
Balancing the salt levels
Since this recipe uses salt in both the marinade and the dry breading, it is important to taste your spice mix if you are unsure about your preference. The buttermilk marinade works to soften the impact of the salt, while the flour mixture ensures the outer crust is flavorful. Always start with the recommended amounts, but feel free to adjust the ratios if you prefer a less savory crust.
Practical storage and reheating
How to store leftovers correctly
If you have leftover fried chicken, let it cool completely to room temperature before packing it away to avoid condensation. Place the chicken in an airtight container or wrap it tightly in foil and keep it in the refrigerator for up to three days. For longer storage, you can freeze the cooked chicken for up to two weeks, though keep in mind the texture of the breading may change slightly once thawed.
Restoring the crunch when reheating
To bring the chicken back to life after refrigeration, avoid the microwave, which will ruin the crispiness of the crust. Instead, preheat your oven or toaster oven to 375 degrees F and place the chicken on a baking sheet. Reheat for about 10 to 15 minutes, or until the exterior is hot and crispy and the internal temperature is thoroughly warmed. Using a wire rack inside the baking sheet during this process will help heat circulate evenly.
Common cooking questions
How many pieces can I fry at once?
It is best to fry only one or two pieces of chicken at a time, depending on the size of your pot. Adding too many cold chicken breasts to the oil at once causes the temperature to drop drastically, which prevents the crust from setting properly. Always wait for the oil to return to 350 degrees F before adding the next batch.
Can I prepare the chicken in advance?
You can certainly marinate the chicken longer than an hour, but keep it in the refrigerator for no more than 24 hours. Anything longer than that can cause the buttermilk to break down the chicken texture too much, making the meat mushy. The seasoning mixture can be prepared days in advance and stored in a dry, sealed jar until you are ready to use it.
What if the chicken is burning on the outside?
If you notice the outside of the chicken browning too quickly while the middle is still raw, your oil is likely too hot. Reduce the heat immediately and use your thermometer to monitor the temperature. If the breast is very thick, you can also finish cooking it in a 350-degree oven for a few minutes once the crust has reached your desired color.
Variations and serving suggestions
Exploring different spice blends
While the provided spice blend is a classic, you can easily customize the flavor profile to match your preferences. Consider adding a pinch of cayenne pepper if you want a deeper, lingering heat, or incorporate dried oregano or thyme for a more herbaceous finish. These small adjustments in the flour mix allow you to create a signature flavor that makes this recipe truly your own.
Serving the chicken in a sandwich
To assemble a professional-style chicken sandwich, start with a toasted brioche bun and add a generous layer of creamy coleslaw or spicy mayonnaise. The crunch of the chicken pairs perfectly with the acidity of pickles or fresh lettuce. Adding a slice of melted mild cheese can also bring a creamy element that complements the saltiness of the fried crust.
Pairing with traditional sides
This buttermilk fried chicken is remarkably versatile and pairs beautifully with traditional comfort foods. Serve it alongside creamy mashed potatoes with a savory gravy, or go with classic sides like corn on the cob, roasted carrots, or a crisp garden salad. Because the chicken is quite rich, choosing a side with a bit of brightness or acidity helps balance the entire meal.
Print
Classic Golden Buttermilk Fried Chicken Breast
- Total Time: 90 minutes
- Yield: 4 servings 1x
- Diet: Non-Vegetarian
Description
Buttermilk fried chicken breast is brined in a buttermilk marinade before being coated in seasoned flour and deep fried to golden and crispy perfection. Serve in a sandwich or topped with gravy and potatoes on the side.
Ingredients
- 1.5 lbs chicken breast (boneless, skinless)
- 1 cup buttermilk
- 1 egg
- 1 tbsp hot sauce
- 3 tsp salt
- 1 cup flour
- 3 tsp salt
- 1/2 tsp celery salt
- 2 tsp granulated garlic
- 2 tsp paprika powder
- 1 tsp ground white pepper
- oil (for frying)
- fresh parsley (for garnishing)
Instructions
- Step: In a bowl, whisk together the buttermilk, egg, salt and hot sauce.
- Step: Transfer the chicken breasts to the buttermilk marinade and cover. Refrigerate for a minimum of 1 hour.
- Step: Add at least 2 inches of oil to a large pot and heat to 350 degrees F.
- Step: In a bowl, whisk together the flour, salt, white pepper, celery salt, granulated garlic and paprika powder.
- Step: Remove the chicken breast from the buttermilk marinade allowing the excess to drip off before transferring to the seasoned flour.
- Step: Coat each chicken breast completely with the flour then transfer to the hot oil and deep fry for 15-20 minutes, flipping the chicken throughout the process. Don’t over crowd the pan.
- Step: The fried chicken is ready once a kitchen thermometer inserted into the thickest part of the breast reads at least 165 degrees F.
- Step: Transfer the chicken to a plate or wire rack and blot with a paper towel to absorb the excess oil.
- Step: Garnish with fresh parsley and serve with your favorite side dish or make a chicken sandwich and enjoy.
Notes
Use a deep frying thermometer to ensure the oil reaches a temperature of 350 degrees F before frying the chicken. Don’t over crowd the pan, otherwise the oil temperature will drop. The recommended seasoning measurements should be adjusted according to personal taste. I find my chicken to be extra crispy if I blot the excess oil using a paper towel after it’s done cooking.
- Prep Time: 75 minutes
- Cook Time: 15 minutes
- Category: Entree
- Method: Deep Fried
- Cuisine: American
Nutrition
- Serving Size: 1 breast
- Calories: 367 kcal
- Sugar: 3 g
- Sodium: 4142 mg
- Fat: 8 g
- Saturated Fat: 3 g
- Unsaturated Fat: 4 g
- Trans Fat: 0 g
- Carbohydrates: 28 g
- Fiber: 1 g
- Protein: 43 g
- Cholesterol: 156 mg
Keywords: buttermilk brine for chicken breast, buttermilk marinated chicken, deep fried chicken breast, buttermilk fried chicken breast, fried chicken breast