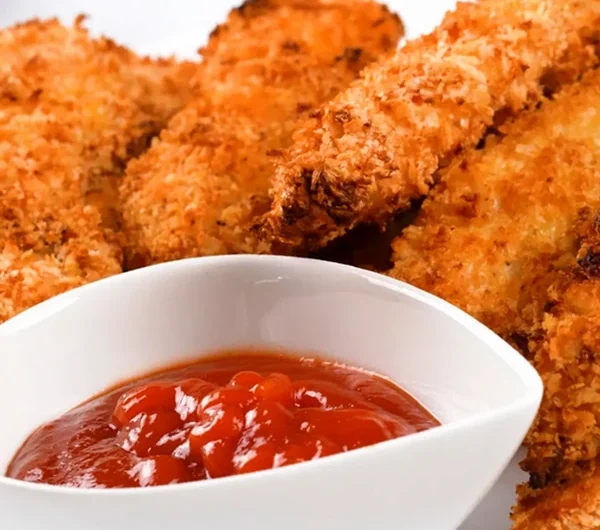
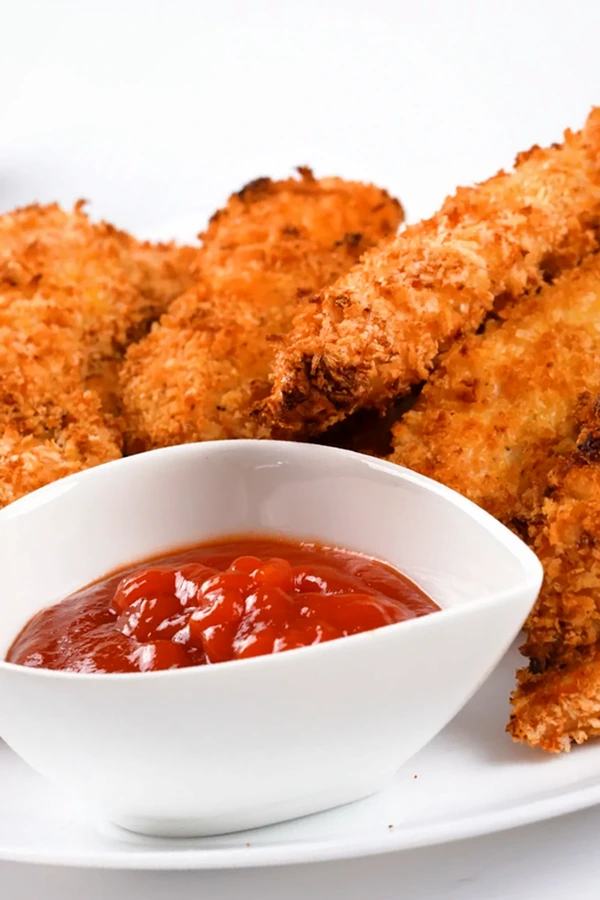
Enjoy the satisfying crunch of restaurant-style chicken tenders without the need for deep frying. This oven-baked method produces golden, flavorful strips that remain incredibly juicy inside, making them a perfect choice for healthy family dinners. With simple ingredients and minimal prep, these crispy bites are destined to become a regular feature on your weekly menu rotation.
List of ingredients
- 1 lb chicken breasts or chicken tenders (cut into strips)
- 2 large eggs (beaten)
- 1 cup panko breadcrumbs (or regular breadcrumbs)
- 1/2 cup grated Parmesan cheese (optional for extra flavor)
- 1 tsp garlic powder
- 1 tsp paprika
- 1/2 tsp onion powder
- 1/2 tsp salt
- 1/4 tsp black pepper
- Olive oil spray (for coating)
step-by-step instructions
- Prep the Chicken: If using chicken breasts, cut them into strips (about 1-inch wide). If using chicken tenders, you can skip this step.
- Prepare the Breading Stations: In one bowl, beat the eggs until smooth. In another bowl, combine the panko breadcrumbs, Parmesan cheese (if using), garlic powder, paprika, onion powder, salt, and black pepper.
- Season the Chicken: Season the chicken tenders with a pinch of salt and pepper.
- Bread the Chicken: Dip each chicken strip first into the beaten egg, allowing any excess to drip off. Then, coat the chicken strip in the breadcrumb mixture, pressing lightly to ensure the crumbs stick. For an extra crunchy coating, you can repeat the egg and breadcrumb dipping process.
- Prepare the Baking Sheet: Line a baking sheet with parchment paper or a silicone baking mat for easy cleanup. If you have a wire rack, place it on top of the baking sheet.
- Arrange the Chicken on the Baking Sheet: Place the breaded chicken tenders on the prepared baking sheet (or wire rack), leaving space between each tender for even cooking.
- Bake the Chicken Tenders: Preheat the oven to 400°F (200°C). Spray the chicken tenders lightly with olive oil spray. Bake for 20-25 minutes, flipping halfway through, until golden brown and the internal temperature reaches 165°F (74°C).
- Serve and Enjoy: Remove from the oven, let rest for a few minutes, and serve with your favorite dipping sauces.
Essential Baking Techniques for Texture
Utilizing a Wire Rack for Airflow
Using a wire rack placed inside your baking sheet is the most effective way to mimic the texture of frying. Because the hot air circulates underneath the chicken, the bottom of the breading stays crisp rather than steaming against the bottom of the pan. If you do not have a rack, simply flipping the chicken halfway through the cooking time is a necessary adjustment to ensure even browning on both sides.
The Role of Panko Breadcrumbs
Panko crumbs are larger and coarser than traditional breadcrumbs, which creates more surface area to trap hot air and oil. This characteristic is precisely what creates the signature “shatter-crisp” bite that makes these tenders so addictive. If you find your local store is out of stock, you can pulse dry toasted bread in a food processor, though it will result in a slightly finer, less airy finish.
Ensuring Adhesion of the Coating
Pressing the breadcrumbs firmly into the chicken is a common but crucial step for professional results. When the crumbs are loosely applied, they tend to fall off during the flip or while being transferred to a plate. Taking three extra seconds to pat the coating onto the moist egg-washed surface ensures every bite has a thick, consistent crunch.
Refining Your Flavor Profile
Incorporating Dried Herbs
While the standard seasoning mix relies on garlic and paprika, you can easily introduce dried herbs for a different aromatic quality. Dried oregano, thyme, or Italian seasoning blends work beautifully in the breadcrumb mix. Add about half a teaspoon of your preferred herb to the bowl to complement the Parmesan cheese and garlic without overpowering the delicate chicken flavor.
Managing the Salt Content
Because Parmesan cheese can be naturally salty, taste your breadcrumb mixture before applying it to the chicken. If you use a high-sodium variety of cheese, you may want to slightly reduce the added salt in your dry mix. Keeping the salt levels balanced prevents the breading from becoming too harsh, allowing the savory Parmesan notes to shine through the garlic and onion base.
Customizing the Heat Level
If you prefer a gentle heat in your tenders, consider adding a pinch of ground cayenne pepper or red pepper flakes to your dry ingredients. The heat from these spices will deepen as it cooks in the oven, creating a warming sensation that pairs perfectly with cooling dipping sauces like ranch or yogurt-based dips. Start with a small amount, as dried spices can intensify during high-heat baking.
Practical Serving and Storage
Maintaining Crispness When Reheating
The biggest challenge with leftovers is maintaining that initial crunch. To restore the texture, always reheat your tenders in a hot oven or toaster oven set to 350°F instead of using a microwave, which will soften the coating. Place them on a metal tray for about ten minutes, or until they are heated through and the breading has regained its snap.
Strategic Meal Prep Applications
These tenders are excellent for meal preparation because they hold their structure well over several days. You can bake a large batch and store them in an airtight container for up to three days in the refrigerator. When packing them for work lunches, keep them separate from damp items like lettuce or tomatoes to ensure they remain as crisp as possible until you are ready to eat.
Freezer Storage Considerations
If you prefer to keep a stash for busy weeknights, you can bread the raw chicken and freeze it on a baking sheet before transferring the hardened pieces to a zip-top freezer bag. When you are ready to cook, bake them directly from frozen by simply adding five to seven minutes to your total cooking time. This method saves you from having to prepare the breading station every time you need a quick protein-rich snack.
Addressing Common Cooking Issues
Avoiding Soggy Breadcrumbs
If you find that the underside of your tenders is consistently soft, you are likely overcrowding the pan. When chicken strips are placed too close together, they release moisture that gets trapped underneath the breading, turning it mushy instead of crispy. Always use two baking sheets if necessary to ensure that every single piece has at least an inch of space around it for the hot oven air to flow.
Interpreting Internal Temperature
Checking the internal temperature with a digital probe thermometer is the only way to be certain your chicken is cooked perfectly. Aim for an internal reading of 165°F at the thickest part of the largest piece. Overcooking beyond this point can lead to a dry, stringy texture that ruins the tender experience, so start checking your strips at the eighteen-minute mark if your oven runs particularly hot.
Troubleshooting Lack of Color
If your chicken is cooked through but still looks pale, the lack of fat or heat is usually the culprit. Always ensure you are using an oil spray, as a dry breading will not turn golden brown regardless of how long it stays in the oven. If your oven temperature is slightly off, you can switch to the broiler for the final sixty seconds of cooking to brown the top crust, but watch it closely so the spices do not burn.
Why Eggs are Necessary
Eggs act as the glue between the chicken surface and the dry coating. If you happen to be out of eggs, you can use a small amount of mayonnaise or plain Greek yogurt as a binder. These alternatives add extra moisture to the chicken and help the breadcrumbs adhere firmly, though they will slightly change the final flavor profile by adding a subtle tanginess to the coating.
Print
Crispy Baked Chicken Tenders
- Total Time: PT30M
- Yield: 4 servings 1x
- Diet: High Protein
Description
Homemade baked chicken tenders are a delicious, healthier alternative to the deep-fried version. This easy recipe features tender, juicy chicken strips coated in a crispy, golden breadcrumb coating. Perfect for a quick weeknight dinner, meal prepping, or a fun family meal, these chicken tenders are both simple and satisfying.
Ingredients
- 1 lb chicken breasts or chicken tenders (cut into strips)
- 2 large eggs (beaten)
- 1 cup panko breadcrumbs (or regular breadcrumbs)
- 1/2 cup grated Parmesan cheese (optional for extra flavor)
- 1 tsp garlic powder
- 1 tsp paprika
- 1/2 tsp onion powder
- 1/2 tsp salt
- 1/4 tsp black pepper
- Olive oil spray (for coating)
Instructions
- Prep the Chicken: If using chicken breasts, cut them into strips (about 1-inch wide). If using chicken tenders, you can skip this step.
- Prepare the Breading Stations: In one bowl, beat the eggs until smooth. In another bowl, combine the panko breadcrumbs, Parmesan cheese (if using), garlic powder, paprika, onion powder, salt, and black pepper.
- Season the Chicken: Season the chicken tenders with a pinch of salt and pepper.
- Bread the Chicken: Dip each chicken strip first into the beaten egg, allowing any excess to drip off. Then, coat the chicken strip in the breadcrumb mixture, pressing lightly to ensure the crumbs stick. For an extra crunchy coating, you can repeat the egg and breadcrumb dipping process.
- Prepare the Baking Sheet: Line a baking sheet with parchment paper or a silicone baking mat for easy cleanup. If you have a wire rack, place it on top of the baking sheet.
- Arrange the Chicken on the Baking Sheet: Place the breaded chicken tenders on the prepared baking sheet (or wire rack), leaving space between each tender for even cooking.
- Bake the Chicken Tenders: Preheat the oven to 400°F (200°C). Spray the chicken tenders lightly with olive oil spray. Bake for 20-25 minutes, flipping halfway through, until golden brown and the internal temperature reaches 165°F (74°C).
- Serve and Enjoy: Remove from the oven, let rest for a few minutes, and serve with your favorite dipping sauces.
Notes
Made this recipe? Drop a photo in the comments below and get featured in the “Made By You” gallery on this post!
- Prep Time: PT10M
- Cook Time: PT20M
- Category: Main Course
- Method: Baking
- Cuisine: American
Nutrition
- Serving Size: 1 serving
- Calories: 375 kcal
- Sugar: 1 g
- Sodium: 650 mg
- Fat: 12 g
- Saturated Fat: 4 g
- Unsaturated Fat: 7 g
- Trans Fat: 0 g
- Carbohydrates: 22 g
- Fiber: 1 g
- Protein: 42 g
- Cholesterol: 145 mg
Keywords: Homemade, Baked, Chicken, Tenders, 30 minute