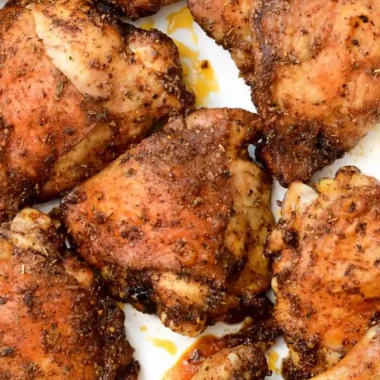
These perfectly golden, crispy baked chicken thighs and legs are a simple, delicious solution for any weeknight dinner. By utilizing a unique blend of cornstarch and baking powder, you can achieve an incredible crunch that rivals deep-fried alternatives without the extra hassle. This recipe is naturally gluten-free and requires minimal effort to prepare, making it a reliable staple for your home kitchen rotation.
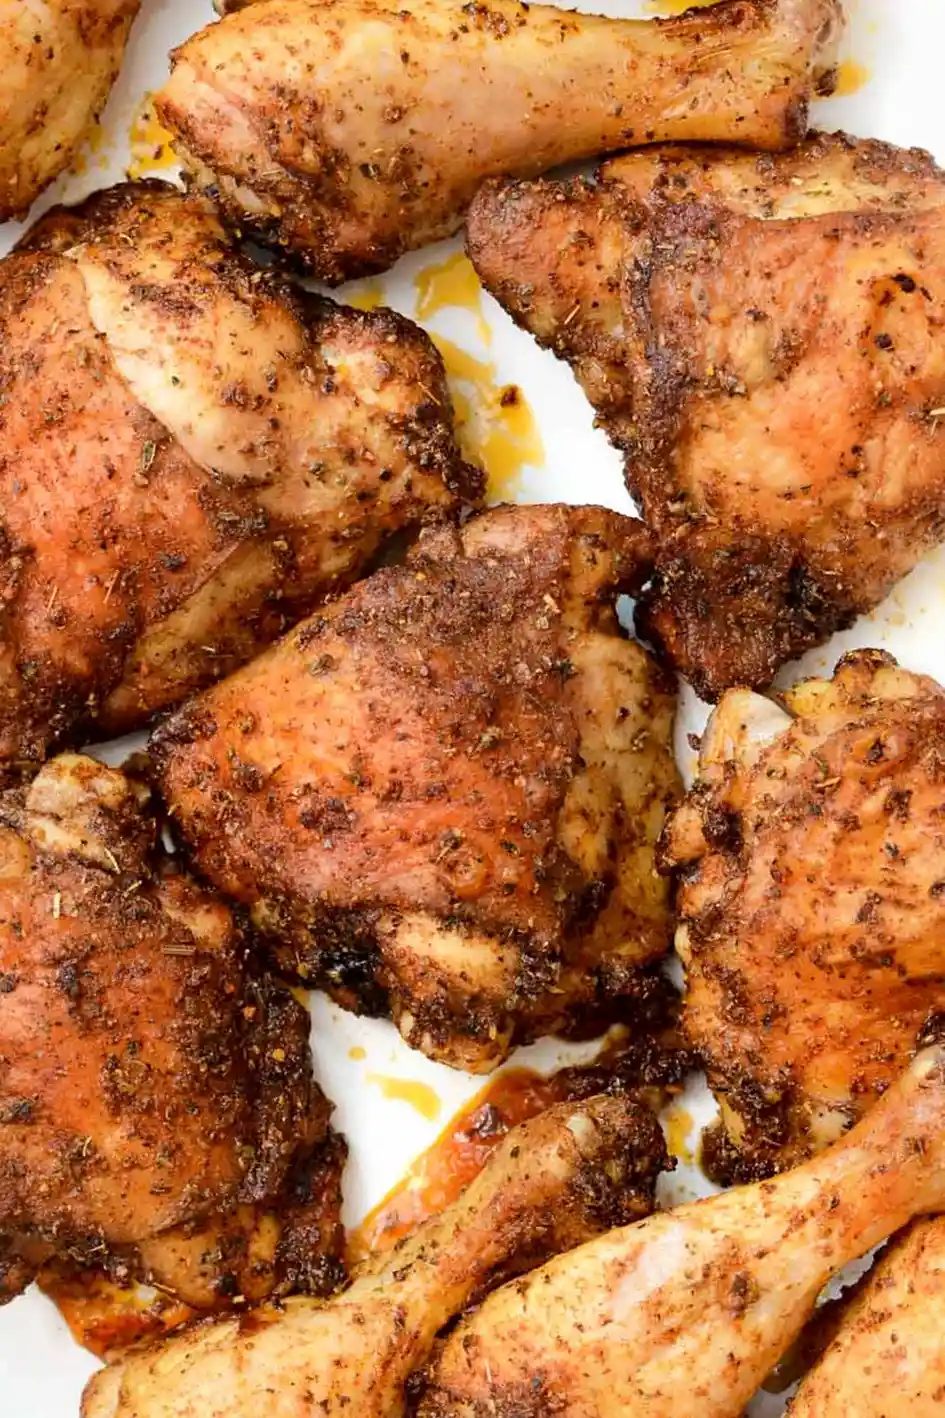
List of ingredients
- ¼ cup olive oil
- 4 teaspoons Italian seasoning
- 1 tablespoon cornstarch
- 2 teaspoons paprika
- 1 ½ teaspoons garlic powder
- ¾ teaspoon salt
- ½ teaspoon pepper
- ½ teaspoon baking powder
- 3-4 lbs chicken thighs and legs
step-by-step instructions
- Step: Place the oven rack in the middle of the oven. Preheat the oven to 400°. Prepare a rimmed baking pan by drizzling a tablespoon of olive oil in the pan.
- Step: Mix the dry ingredients with olive oil in a large bowl. Take a paper towel and pat dry the chicken pieces, and place them in the oil mixture.
- Step: Use your hands and mix the thighs and legs into the oil mixture, making sure they are completely covered.
- Step: Place the thighs and legs onto the baking pan with the skin side up. Bake for 40 minutes. Use a meat thermometer to check the internal temperature that it’s 165° or make a cut into the thickest part of a thigh so that the juices run clear.
- Step: Let the chicken rest for 10 minutes before serving, and don’t cut any other pieces. This will help keep the juices in the chicken.
Keys to achieving maximum crispiness
Why drying the chicken surface matters
Before you even begin applying the seasoning, patting the chicken completely dry with paper towels is the most critical step. Moisture on the skin creates steam rather than the Maillard reaction, which is necessary for a golden-brown, crispy result. Ensuring the surface is bone-dry allows the oil and spice mixture to adhere directly to the skin.
How cornstarch and baking powder interact
The combination of cornstarch and baking powder is a culinary secret for crispy oven-baked results. The cornstarch helps to absorb excess surface moisture, creating a light crust, while the baking powder slightly raises the pH level of the skin. This scientific reaction weakens the peptide bonds in the skin, resulting in an exceptionally thin and crunchy layer that stays crisp even after cooling.
Selecting the right baking surface
Always use a heavy-duty, rimmed baking sheet for this recipe to catch the rendered chicken fat. If the pan is too thin, it may warp under the heat of the oven, leading to uneven cooking. A rimmed edge also ensures that the seasoning and oils stay in contact with the chicken rather than leaking into the oven floor.
Managing internal moisture
Monitoring for doneness correctly
The best way to ensure the meat stays juicy is to avoid overcooking it, which is why a digital meat thermometer is essential. Always insert the probe into the thickest part of the chicken thigh or leg, being careful not to touch the bone, as the bone conducts heat differently than the meat. Pulling the chicken out once it hits 165 degrees Fahrenheit ensures it remains tender.
The importance of the resting period
Never bypass the mandatory ten-minute resting period after the timer goes off. During the high-heat cooking process, the juices migrate toward the center of the meat; resting allows these juices to redistribute back throughout the muscle fibers. Cutting into the meat too soon will cause the flavorful liquid to pour out onto the plate, leaving the final dish feeling dry.
Versatile serving suggestions
Creating a balanced dinner plate
Because this chicken features bold, savory Italian-inspired flavors, it pairs beautifully with mild vegetable side dishes. Roasted asparagus with a squeeze of lemon or steamed broccoli florets provide a nice textural contrast to the crispy skin. If you prefer starchier sides, consider mashed potatoes or a simple quinoa salad dressed with olive oil and fresh herbs.
Dipping sauces for extra flair
While the chicken is flavorful enough to stand on its own, it also acts as a perfect vessel for various dips. A simple garlic-infused herb dip or a cool, creamy dressing made with Greek yogurt can balance the spice profile. Avoid overly acidic sauces like heavy balsamic glazes, as they can soften the crispy skin you worked hard to achieve.
Storing and cooling guidelines
Handling leftover chicken pieces
To store leftovers, allow the chicken to cool completely at room temperature, but do not leave it out for more than two hours to ensure food safety. Place the cooled pieces in an airtight glass or plastic container to keep them from drying out in the refrigerator. Properly stored chicken will maintain its quality for up to three days, though the skin will naturally lose some of its crispness over time.
Effective reheating techniques
To revive the texture of the skin after refrigeration, avoid using a microwave, which will turn the skin rubbery. Instead, place the chicken in an oven preheated to 350 degrees Fahrenheit on a wire rack over a baking sheet for about 10 to 15 minutes. This process allows heat to circulate around the entire piece, crisping the skin while gently warming the interior.
Common cooking inquiries
Can I use chicken breasts instead of thighs?
You can certainly use chicken breasts, but you must adjust the cooking time significantly to avoid drying out the meat. Breasts are much leaner and will cook through faster, so aim for a check at 20 to 25 minutes depending on the size of the pieces. If using bone-in breasts, the timing may be closer to 30 minutes, but always rely on a thermometer rather than the clock.
Is it necessary to remove the skin?
Removing the skin would defeat the purpose of this recipe, which focuses on achieving a crispy texture through the skin-oil-starch reaction. If you prefer to eat skinless chicken, this specific method for creating crunch will not function as intended. If you are concerned about fat content, you can scrape away some of the excess subcutaneous fat from the underside of the skin before coating it in oil.
Can this recipe be prepared ahead of time?
You can prepare the spice rub and coat the chicken several hours in advance, but do not let the chicken sit in the oil for too long or the skin may become soggy. The best approach for make-ahead cooking is to measure out all your dry ingredients into a small jar. When you are ready to cook, simply toss the chicken with the oil and spices immediately before transferring it to the oven.
Why did the seasoning burn in the pan?
If you notice the seasoning turning dark too quickly, it is likely that the oven temperature is spiking or the spices were not fully incorporated into the oil. Ensure your oven is calibrated correctly, as some ovens run hotter than the dial suggests. Additionally, adding a touch more oil to the pan can help prevent the spices from making direct, scorched contact with the metal surface.
Print
Crispy Baked Chicken Thighs and Legs
- Total Time: 50 minutes
- Yield: 5 servings 1x
- Diet: Gluten Free
Description
These are the most juiciest and crispy baked chicken thighs and legs ever!
Ingredients
- ¼ cup olive oil
- 4 teaspoons Italian seasoning
- 1 tablespoon cornstarch
- 2 teaspoons paprika
- 1 ½ teaspoons garlic powder
- ¾ teaspoon salt
- ½ teaspoon pepper
- ½ teaspoon baking powder
- 3–4 lbs chicken thighs and legs
Instructions
- Step: Place the oven rack in the middle of the oven. Preheat the oven to 400°. Prepare a rimmed baking pan by drizzling a tablespoon of olive oil in the pan.
- Step: Mix the dry ingredients with olive oil in a large bowl. Take a paper towel and pat dry the chicken pieces, and place them in the oil mixture.
- Step: Use your hands and mix the thighs and legs into the oil mixture, making sure they are completely covered.
- Step: Place the thighs and legs onto the baking pan with the skin side up. Bake for 40 minutes. Use a meat thermometer to check the internal temperature that it’s 165° or make a cut into the thickest part of a thigh so that the juices run clear.
- Step: Let the chicken rest for 10 minutes before serving, and don’t cut any other pieces. This will help keep the juices in the chicken.
Notes
Ensure the seasoning blend used is certified gluten-free if required for dietary needs. The combination of cornstarch and baking powder is essential for achieving a crispy skin texture.
- Prep Time: 10 minutes
- Cook Time: 40 minutes
- Category: Main Course
- Method: Oven
- Cuisine: American
Nutrition
- Serving Size: 1 piece
- Calories: 380 kcal
- Sugar: 0.5 g
- Sodium: 450 mg
- Fat: 22 g
- Saturated Fat: 5 g
- Unsaturated Fat: 14 g
- Trans Fat: 0 g
- Carbohydrates: 3 g
- Fiber: 0.5 g
- Protein: 35 g
- Cholesterol: 110 mg
Keywords: crispy baked chicken, baked chicken thighs, baked chicken legs, gluten-free chicken, easy chicken dinner