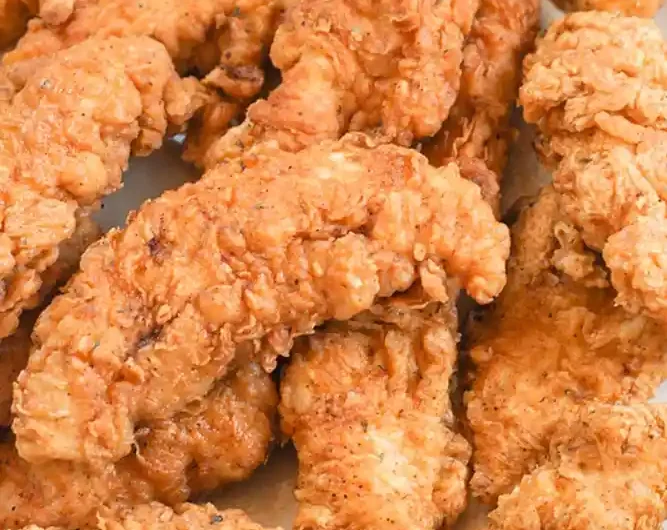
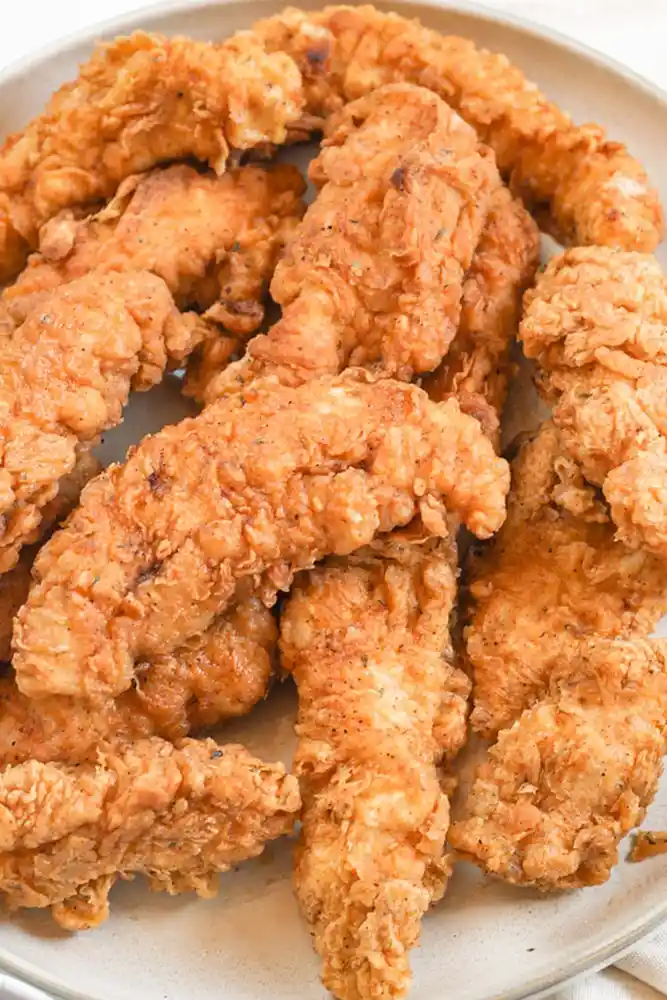
This recipe delivers exceptionally crunchy chicken strips that remain juicy on the inside without using any dairy. By using a double-coating technique, you can achieve a professional fry-house texture at home using a simple cast iron skillet.
List of ingredients
- 2 boneless skinless chicken breasts cut into 1-inch strips or 2lbs chicken tenders – ensure uniform size for even cooking.
- 1 ¼ teaspoon salt – used for seasoning the raw meat directly.
- 3 eggs (beaten) – serves as the binding agent for the breading.
- 2 cup all-purpose flour – the base for the crispy outer shell.
- 1 teaspoon ground black pepper – adds a subtle spicy depth to the flour.
- ¼ teaspoon salt – additional seasoning for the breading mixture.
- ¼ teaspoon cayenne pepper – provides a mild kick of heat.
- 2 teaspoon ground paprika – adds color and a mild sweetness.
- 1 teaspoon dried thyme – adds an earthy herbal note.
- ¼ teaspoon dried oregano – complements the thyme for a savory profile.
- 1 teaspoon onion powder – provides a concentrated savory flavor.
- Vegetable oil for frying – avocado oil is recommended for its high smoke point.
- Carrot – used as a temperature indicator and to keep oil clean.
- Sauces for dipping – ketchup, barbecue sauce, or honey mustard.
step-by-step instructions
- Prepare the stations: Set up your drenching area before starting. Place beaten eggs in a shallow bowl and prepare two sheet pans with wire racks, one for raw coated chicken and one for the finished pieces.
- Prepare the chicken: Rinse the chicken breasts and pat them completely dry with paper towels. Cut them into 1-inch strips, using a meat mallet to pound any pieces thicker than 1 inch to ensure they cook quickly and evenly. Place the strips in a large bowl, sprinkle with 1 ¼ teaspoon of salt, and mix to coat.
- Mix the breading: In a separate large bowl, combine the flour, black pepper, ¼ teaspoon salt, cayenne pepper, paprika, dried thyme, dried oregano, and onion powder. Stir well until the spices are evenly distributed throughout the flour.
- Coat the chicken: Using tongs or gloves, dip a piece of chicken into the seasoned flour and coat completely. Dip the floured piece into the beaten eggs, then return it to the flour mixture for a final coating before placing it on the wire rack.
- Finish breading: Repeat the flour-egg-flour process for all remaining chicken strips until every piece is fully coated.
- Heat the oil: Heat a large cast iron skillet or Dutch oven over medium-high heat and add 2 to 3 inches of vegetable oil. Add a piece of carrot to the oil; once the carrot sizzles vigorously, the oil is ready.
- Fry the tenders: Carefully place the chicken strips into the hot oil, adding them away from your body to prevent splatters. Fill the pan as much as possible without overlapping the pieces.
- Cook to golden brown: Fry the tenders for approximately 3 minutes per side. Flip halfway through to ensure a consistent golden brown crust all around.
- Drain and serve: Use a slotted spoon or fork to move the cooked chicken to a wire rack to drain excess oil. Serve immediately with your preferred dipping sauces.
Essential Cooking Equipment
Benefits of Using Cast Iron
Cast iron skillets provide superior heat retention compared to stainless steel or non-stick pans. This prevents the oil temperature from dropping too sharply when the cold chicken is added. A steady temperature ensures the crust crisps immediately without absorbing excess grease.
Using Wire Racks for Drainage
Placing fried chicken on a wire rack instead of paper towels prevents the bottom from becoming soggy. Paper towels trap steam against the meat, which can re-moisturize the breading. A rack allows air to circulate around the entire piece, maintaining the crunch.
Hygiene with Separate Tongs
Using two sets of tongs—one for dry flour and one for the wet egg wash—prevents cross-contamination. This keeps your flour station clean and prevents clumps of egg from forming in the dry mix. It also reduces the amount of batter that builds up on your hands.
The Role of the Meat Mallet
Pounding thicker chicken strips ensures a uniform thickness across all pieces. When strips are the same size, they reach the safe internal temperature of 165°F at the same time. This prevents some pieces from overcooking while others remain raw in the center.
Frying Techniques for Maximum Crunch
Testing Oil Temperature with a Carrot
Adding a chunk of carrot to the oil serves as a practical thermometer. When the carrot begins to sizzle and bubble rapidly, the oil has reached the optimal frying temperature. This method is safer and faster than using a separate thermometer for every batch.
Managing Batch Sizes
Avoid overcrowding the skillet to keep the oil temperature stable. If too many tenders are added at once, the oil temperature drops, leading to a greasy texture. Cook in smaller batches to ensure the crust sears instantly upon contact.
Preventing Oil Splatter
Always slide the chicken strips into the oil away from your body. This ensures that any initial popping or splattering moves away from your skin and clothing. Using tongs to gently lower the meat further reduces the risk of splashes.
The Double-Dredging Process
Coating the chicken in flour, then egg, and then flour again creates a thick, durable barrier. The first layer of flour helps the egg adhere to the meat. The second layer of flour creates the craggy, textured surface that becomes extra crispy when fried.
Ingredient Substitutions and Variations
Choosing the Right Frying Oil
Avocado oil is ideal due to its very high smoke point, which prevents the oil from burning. Peanut oil is another excellent alternative for a classic fried taste. Avoid using extra virgin olive oil, as its low smoke point can produce a burnt flavor at frying temperatures.
Adjusting the Heat Level
To increase the spiciness, you can double the amount of cayenne pepper or add a pinch of crushed red pepper flakes. For a milder version, omit the cayenne entirely. The paprika provides color and flavor without adding significant heat.
Egg-Free Binding Alternatives
If you need an egg-free option, a mixture of cornstarch and water or a plant-based milk alternative can be used. While the egg provides the best structural bond, a cornstarch slurry can still create a crisp shell. Ensure the liquid is thin enough to coat without becoming a heavy batter.
Herb Variations for the Breading
Dried thyme and oregano provide a Mediterranean flair to the chicken. You can substitute these with dried sage or rosemary for a more autumnal flavor profile. Ensure the herbs are finely ground to prevent large leaves from burning in the hot oil.
Serving and Pairing Suggestions
Complementary Dipping Sauces
Honey mustard provides a sweet and tangy contrast to the savory breading. Barbecue sauce adds a smoky depth that pairs well with the paprika in the recipe. For a classic experience, a simple mixture of mayonnaise and sriracha offers a creamy heat.
Ideal Side Dish Pairings
Homemade french fries or potato wedges complement the crunch of the chicken tenders. A fresh garden salad with a vinaigrette helps cut through the richness of the fried coating. Creamy coleslaw is another traditional pairing that adds a cool, crisp texture to the meal.
Plating for Freshness
Serve the tenders immediately after they have drained for 1-2 minutes. Plating them on a warmed platter helps keep them hot while serving. Avoid stacking them too high, as the weight and steam can soften the bottom layers.
Storage and Reheating Guide
Refrigeration Guidelines
Allow the chicken to cool completely on a wire rack before storing to prevent condensation. Place the tenders in an airtight container and store them in the refrigerator for up to 5 days. Cooling them properly ensures they don’t become soggy in the container.
Freezer Storage Methods
For long-term storage, flash-freeze the tenders on a baking sheet for one hour before transferring them to a freezer-safe bag. This prevents the pieces from sticking together. They can be kept in the freezer for several weeks without losing quality.
Oven Reheating for Crispiness
Reheat the tenders in an oven preheated to 400°F for 5 to 10 minutes. This temperature is high enough to evaporate surface moisture and recrisp the breading. Avoid the microwave, as it steams the coating and makes it rubbery.
Using an Air Fryer to Reheat
An air fryer is the most efficient way to restore the original crunch. Heat the tenders at 375°F for about 3 to 5 minutes. The rapid air circulation removes excess oil and restores the golden-brown texture quickly.
Troubleshooting Common Issues
Fixing Breading Separation
If the breading peels away from the chicken, it is often because the meat was too wet. Always pat the chicken strips completely dry with paper towels before the first flour dip. This allows the flour to bond directly to the protein.
Handling Oil Temperature Drops
If the chicken looks pale and feels greasy, the oil temperature has likely dropped. Remove the chicken and allow the oil to return to a sizzle before adding the next batch. This ensures the Maillard reaction occurs quickly for a brown crust.
Preventing Overcooked Meat
Chicken tenders cook very quickly due to their small size. Use a meat thermometer to ensure they reach 165°F without exceeding it. Overcooking leads to dry, stringy meat despite the crispy exterior.
Frequently Asked Questions
Can I use eggs instead of buttermilk for fried chicken?
Yes, eggs are a highly effective alternative to buttermilk. They act as a binder that keeps the chicken moist while providing a sturdy base for the flour to cling to, resulting in a great crunch without the need for dairy.
What tenderizes chicken besides buttermilk?
Pounding the chicken with a meat mallet is a mechanical way to tenderize the meat. It breaks down the tough muscle fibers, allowing the chicken to cook faster and stay more tender during the frying process.
Why dip the chicken in flour before the egg?
The initial flour coating absorbs surface moisture and creates a dry surface. This prevents the egg wash from sliding off the meat during the frying process, ensuring the breading stays attached to the chicken.
Can I use a different type of flour?
All-purpose flour is standard, but you can replace a small portion with cornstarch for an even crispier result. A 3:1 ratio of flour to cornstarch often creates a harder, more durable crust that stays crunchy longer.
Print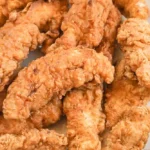
Crispy Fried Chicken Tenders Without Buttermilk
- Total Time: 50 minutes
- Yield: 17 strips 1x
- Diet: Dairy-Free
Description
These homemade fried chicken tenders are unbelievably crispy and juicy, coated in a seasoned flour mixture and fried in a cast iron skillet for a perfectly crunchy exterior and tender interior.
Ingredients
- 2 boneless skinless chicken breasts cut into 1-inch strips or 2 lbs chicken tenders
- 1 ¼ teaspoon salt
- 3 eggs, beaten
- 2 cups all-purpose flour
- 1 teaspoon ground black pepper
- ¼ teaspoon salt
- ¼ teaspoon cayenne pepper
- 2 teaspoons ground paprika
- 1 teaspoon dried thyme
- ¼ teaspoon dried oregano
- 1 teaspoon onion powder
- Vegetable oil for frying
- 1 carrot (to keep oil clean and test temperature)
- Dipping sauces such as ketchup, barbecue sauce, or honey mustard
Instructions
- Step: Set up drenching stations with eggs whisked in a shallow bowl and sheet pans with wire racks.
- Step: Rinse and pat chicken dry, cut into 1-inch strips, pound with a meat mallet if necessary, and mix with salt to coat.
- Step: In a large bowl, combine flour, ground black pepper, salt, cayenne pepper, ground paprika, dried thyme, dried oregano, and onion powder.
- Step: Dip one piece of chicken into the flour mixture, then the egg mixture, and finally back into the flour mixture, then set on a wire rack.
- Step: Repeat the process for all remaining chicken strips.
- Step: Heat 2-3 inches of vegetable oil in a large cast iron skillet or Dutch oven; add a carrot and wait until it sizzles before carefully adding the tenders.
- Step: Fry tenders for 3 minutes per side or until the crust is golden brown.
- Step: Remove cooked chicken with a slotted spoon to a wire rack to drain.
- Step: Serve and enjoy with your favorite dipping sauces.
Notes
Storing: Store in an airtight container in the refrigerator for up to 5 days or in the freezer for several weeks. Reheating: Reheat at 400°F for 5–10 minutes or until heated through.
- Prep Time: 30 minutes
- Cook Time: 20 minutes
- Category: Dinner
- Method: Frying
- Cuisine: American
Nutrition
- Serving Size: 1 strip
- Calories: 97 kcal
- Sugar: 0.1 g
- Sodium: 248 mg
- Fat: 2 g
- Saturated Fat: 0.4 g
- Unsaturated Fat: 1.3 g
- Trans Fat: 0.01 g
- Carbohydrates: 12 g
- Fiber: 1 g
- Protein: 8 g
- Cholesterol: 46 mg
Keywords: fried chicken tenders, buttermilk-free, crispy chicken strips, dairy-free fried chicken, homemade chicken strips