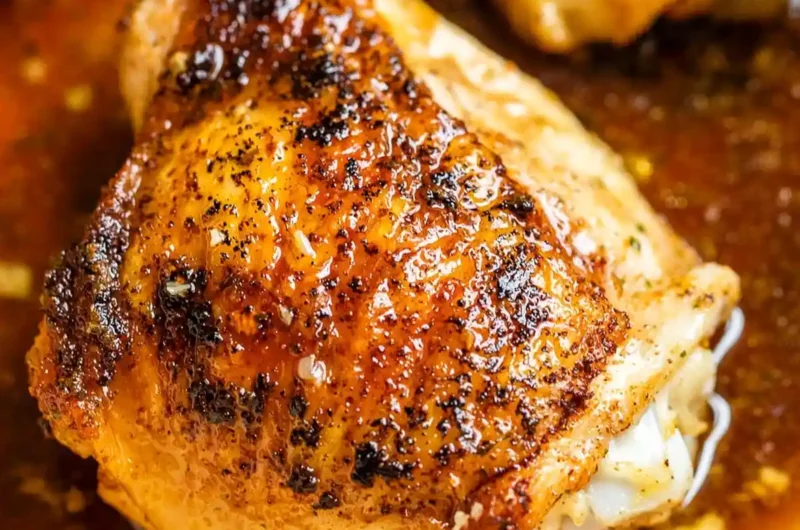
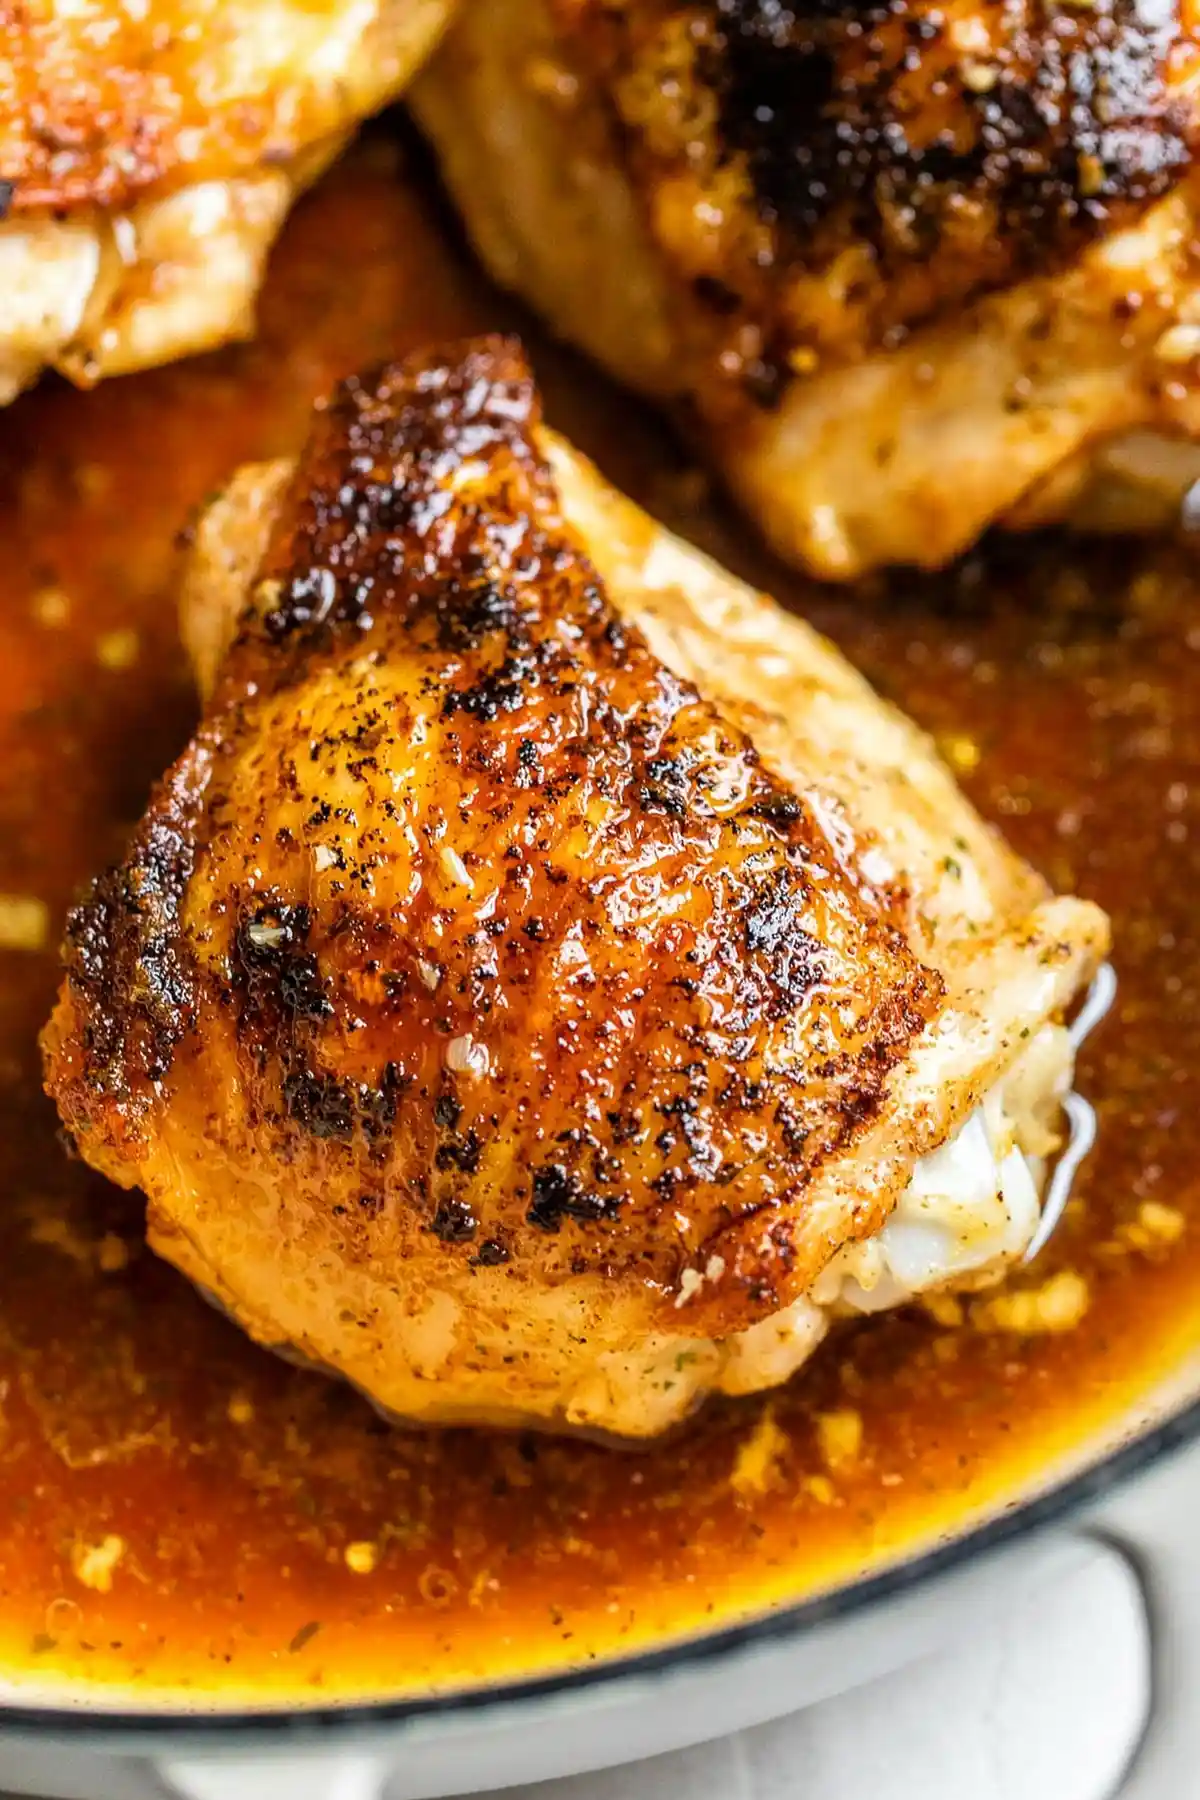
This recipe delivers perfectly crispy skin and juicy meat using a simple one-pan skillet method. It is an efficient weeknight meal that minimizes cleanup while maximizing flavor through a savory dry rub.
List of ingredients
- 2 lbs. chicken thighs (bone-in, with skin) – provides the best flavor and juiciness.
- 2 tbsp olive oil or ghee – used for searing and preventing sticking.
- 1 tsp salt – enhances all other seasonings.
- 1 tsp garlic powder – adds a concentrated savory depth.
- 1/2 tsp smoked paprika – provides a woody, smoky undertone.
- 1/2 tsp onion powder – adds a subtle sweetness and aroma.
- 1/4 tsp parsley – introduces a light herbal note.
- 1/4 tsp oregano – adds an earthy, Mediterranean flavor.
- 1/4 tsp black pepper – provides a mild heat.
- 3 garlic cloves (minced) – used for the finishing pan sauce.
- 2/3 cup chicken broth – used to deglaze the pan and create a sauce.
- fresh parsley for garnish (chopped, optional) – adds a fresh pop of color.
step-by-step instructions
- Heat the Pan: Add olive oil or ghee to a large, heavy-bottomed skillet, cast iron pan, or dutch oven and heat over medium heat until the oil is shimmering.
- Prepare the Chicken: Combine salt, garlic powder, smoked paprika, onion powder, parsley, oregano, and black pepper in a small bowl. Pat the chicken thighs completely dry with paper towels and rub the seasoning mixture over all sides until they are fully coated.
- Sear and Cook: Place the chicken thighs skin side down in the hot skillet and cover with a lid. Cook for 7 minutes, then flip the thighs over, replace the lid, and cook for another 8-12 minutes or until the internal temperature reaches 165°F.
- Finish the Sauce: Reduce the heat to medium-low, add minced garlic, and sauté for 1 minute. Pour in the chicken broth, scraping the bottom of the pan to release the browned bits, then spoon the sauce over the chicken and garnish with fresh parsley.
Professional Searing Techniques
Dry the Surface Thoroughly
Use heavy-duty paper towels to remove every bit of moisture from the chicken skin before applying the rub. Excess water creates steam in the pan, which prevents the skin from achieving a golden-brown crisp. Dry skin ensures a direct sear and a crunchier texture.
Avoid Overcrowding the Skillet
Ensure there is at least an inch of space between each chicken thigh in the pan. If the thighs are touching, they will release moisture that traps steam around the meat. Proper spacing allows heat to circulate and ensures the skin fries rather than boils.
Maintain Consistent Medium Heat
Keep the burner on a steady medium heat to avoid scorching the dry rub spices. If the heat is too high, the paprika and garlic powder will burn and become bitter before the meat is cooked. If the pan begins to smoke excessively, lower the temperature slightly.
Utilize Heavy-Bottomed Cookware
Use a cast iron skillet or a thick stainless steel pan for the most even heat distribution. Thin pans often develop hot spots that can overcook sections of the chicken while leaving others raw. Heavy cookware retains heat better, which is critical for a consistent sear.
Ingredient Modifications and Substitutions
Using Boneless Skinless Chicken Thighs
You can substitute boneless thighs, but you must reduce the total cooking time. Cook the boneless thighs for 5 minutes on the first side and 6-7 minutes on the second side. Ensure the internal temperature still reaches 165°F before removing them from the heat.
Substituting Cooking Fats
While olive oil and ghee work best, avocado oil is an excellent alternative due to its high smoke point. Unsalted butter can be used but should be combined with a splash of oil to prevent the milk solids from burning. Avoid using extra-virgin olive oil on very high heat to prevent flavor degradation.
Replacing Chicken Broth with Vegetable Stock
Vegetable broth is a suitable replacement if you prefer a different flavor profile or have dietary restrictions. Ensure the vegetable broth is low-sodium to maintain control over the salt levels in the final sauce. The deglazing process remains identical regardless of the broth used.
Adjusting the Spice Blend for Heat
To increase the spice level, replace the smoked paprika with a mix of smoked paprika and a pinch of cayenne pepper. You can also add a small amount of red pepper flakes to the garlic sauté step. This adds a sharp heat that cuts through the richness of the chicken skin.
Serving and Pairing Recommendations
Low-Carb Vegetable Side Dishes
Pair these thighs with roasted asparagus or sautéed spinach to keep the meal light. Roasted cauliflower with lemon and garlic also complements the smoky notes of the rub. These options provide a nutritional balance without adding heavy carbohydrates.
Hearty Grain and Starch Options
Serve the chicken over a bed of fluffy quinoa or mashed potatoes to soak up the garlic-broth sauce. Wild rice or farro adds a nutty texture that pairs well with the earthy oregano. These starches make the meal more filling for larger appetites.
Complementary Sauce Pairings
While the pan sauce is delicious, a side of garlic aioli or a lemon-herb butter can add extra richness. A drizzle of honey-mustard can provide a sweet contrast to the savory paprika rub. Keep sauces on the side to preserve the crispiness of the chicken skin.
Fresh Salad Combinations
A crisp arugula salad with a lemon vinaigrette helps cut through the fat of the chicken thighs. A classic Caesar salad with shaved parmesan is another traditional pairing that works well. The acidity in these salads cleanses the palate between bites.
Storage and Reheating Guide
Refrigeration Best Practices
Store leftover chicken in an airtight glass or plastic container once it has cooled to room temperature. Keep the pan sauce in a separate small container to prevent the skin from becoming soggy. The chicken will remain safe to eat for up to 3 days in the refrigerator.
Optimal Oven Reheating Method
Place the chicken in a baking dish and add a tablespoon of chicken broth to the bottom to maintain moisture. Heat in the oven at 350°F until the meat is warmed through. This method is superior to the microwave as it helps preserve the skin’s texture.
Freezing for Long-Term Storage
Allow the cooked chicken to cool completely and wrap each thigh individually in foil before placing them in a freezer bag. This prevents freezer burn and allows you to thaw only what you need. Cooked chicken thighs can be frozen for up to 3 months.
Avoiding Microwave Sogginess
If you must use a microwave, heat the chicken on a medium power setting and cover it loosely with a damp paper towel. Avoid overcooking, as the microwave can make the meat rubbery and the skin soft. Let the meat rest for one minute after heating.
Common Cooking Troubleshooting
Handling Chicken That Sticks to the Pan
If the chicken feels stuck when you try to flip it, leave it alone for another minute. The meat will naturally release from the pan once a proper crust has formed. Forcing the chicken to flip too early will tear the skin and ruin the sear.
Preventing Burnt Garlic in the Sauce
Add the minced garlic only after the heat has been reduced to medium-low. Garlic burns quickly and becomes bitter if it hits a pan that is too hot. Sautéing for just one minute is enough to release the aromatics without scorching.
Fixing Overcooked or Dry Meat
If the chicken is slightly overcooked, increase the amount of broth used during the deglazing step. Spooning extra sauce over the meat helps reintroduce moisture. Letting the meat rest for 5 minutes before serving also allows juices to redistribute.
Balancing Excess Saltiness
If the rub was too heavy on the salt, add a squeeze of fresh lemon juice to the pan sauce. The acidity of the lemon neutralizes the perceived saltiness and brightens the overall flavor. You can also serve the chicken with an unsalted side dish.
Frequently Asked Questions
Can I use chicken breasts instead of thighs?
You can use breasts, but they cook much faster and dry out easily. Reduce the cooking time significantly and use a meat thermometer to pull them at 165°F. Note that breasts lack the fat of thighs, so the skin will not be as crispy.
Why is the lid necessary during searing?
The lid traps heat and steam, which ensures the thick bone-in thighs cook through to the center without burning the outside. It creates an oven-like environment in the skillet. Without the lid, the exterior might char before the internal temperature is safe.
Do I really need to pat the chicken dry?
Yes, surface moisture is the enemy of a good sear. When water hits the hot oil, it turns to steam, which prevents the chicken from reaching the temperature needed for the Maillard reaction. Dry skin leads to a professional, golden-brown finish.
Is ghee a better choice than olive oil?
Ghee has a higher smoke point than most olive oils, making it safer for high-heat searing. It also adds a rich, buttery flavor to the skin that olive oil does not provide. Both are acceptable, but ghee offers a slightly more indulgent taste.
How do I know when the chicken is fully cooked?
The most reliable method is using an instant-read meat thermometer in the thickest part of the thigh. The chicken is safe and juicy when it reaches 165°F. If you do not have a thermometer, ensure the juices run clear when pierced with a fork.
Advanced Flavor Variations
Adding a Citrus Twist
Stir in the zest of one lemon and a tablespoon of fresh lemon juice when adding the broth. This adds a bright, acidic layer that complements the smoked paprika. Citrus notes are particularly effective if you are serving the chicken with seafood-style sides.
Incorporating Spicy Chili Elements
Add a teaspoon of chipotle powder to the dry rub for a deeper, spicier heat. Alternatively, sauté sliced jalapeños with the garlic before adding the broth. This creates a spicy base that infuses into the meat during the final basting step.
Enhancing the Herbal Profile
Substitute the dried parsley and oregano with a mixture of dried thyme and rosemary. These woody herbs pair exceptionally well with bone-in chicken and ghee. For a fresher taste, stir in chopped fresh rosemary at the very end of the process.
Creating a Creamy Pan Sauce
Whisk in a tablespoon of heavy cream or a dollop of sour cream after adding the broth. This transforms the thin pan sauce into a rich, velvety gravy. This variation is best paired with mashed potatoes or thick-cut toasted bread.
Applying a Honey-Glaze Finish
Whisk a teaspoon of honey into the chicken broth before pouring it into the pan. The sugar in the honey will caramelize slightly, giving the chicken a glossy, sweet-and-savory glaze. Be careful not to add the honey too early, as it can burn.
Print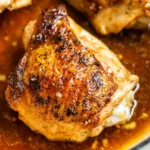
Crispy Pan-Seared Chicken Thighs
- Total Time: 25 minutes
- Yield: 4 servings 1x
- Diet: General
Description
You’re going to love these Pan-Seared Chicken Thighs! They’re seasoned with dry rub, then completely cooked in a skillet, making them crispy on the outside but juicy on the inside. This is an easy weeknight dinner recipe that comes together in about 25 minutes total!
Ingredients
- 2 lbs. chicken thighs (bone-in, with skin)
- 2 tbsp olive oil or ghee
- 1 tsp salt
- 1 tsp garlic powder
- 1/2 tsp smoked paprika
- 1/2 tsp onion powder
- 1/4 tsp parsley
- 1/4 tsp oregano
- 1/4 tsp black pepper
- 3 garlic cloves (minced)
- 2/3 cup chicken broth
- fresh parsley for garnish (chopped, optional)
Instructions
- Heat Oil: Add oil or ghee to a large, heavy-bottomed skillet/cast iron/dutch oven and heat over medium heat.
- Prepare Rub: Combine salt, garlic powder, smoked paprika, onion powder, parsley, oregano, and pepper in a bowl. Pat the chicken thighs dry, then rub the dry rub over them until they’re completely coated.
- Sear Chicken: Place chicken skin side down in the skillet, then cover with a lid. Cook chicken for 7 minutes, then flip over, place the lid back on and cook for an additional 8-12 minutes or until the internal temperature reaches 165°.
- Deglaze and Finish: Reduce heat to medium-low, then add the garlic and sauté for 1 minute before pouring in the chicken broth to remove any brown bits from the skillet. Top with chopped fresh parsley (optional), and spoon the chicken broth/garlic mixture over the chicken.
Notes
To make with boneless, skinless chicken thighs, reduce the cook time: cook for 5 minutes on the first side and 6-7 minutes on the second until the internal temperature reaches 165°. Store leftovers in a sealed container in the refrigerator for up to 3 days.
- Prep Time: 5 minutes
- Cook Time: 27 minutes
- Category: Dinner
- Method: Pan-Searing
- Cuisine: American
Nutrition
- Serving Size: 1 serving
- Calories: 507 kcal
- Sugar: 1 g
- Sodium: 901 mg
- Fat: 38 g
- Saturated Fat: 10 g
- Unsaturated Fat: 28 g
- Trans Fat: 0 g
- Carbohydrates: 3 g
- Fiber: 1 g
- Protein: 37 g
- Cholesterol: 222 mg
Keywords: pan-seared chicken thighs, crispy chicken, easy weeknight dinner, skillet chicken