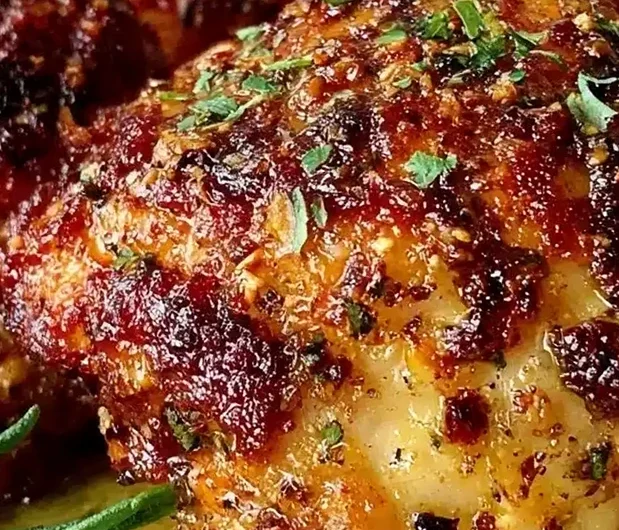
Achieving restaurant-quality chicken thighs at home is easier than you think when you use the powerful circulation of an air fryer. This method focuses on drying the skin and precise temperature control to create a golden, audible crunch while keeping the dark meat inside exceptionally moist and succulent. By finishing the dish with a homemade garlic herb butter, you elevate a simple weeknight meal into a gourmet experience that is ready in under thirty minutes.
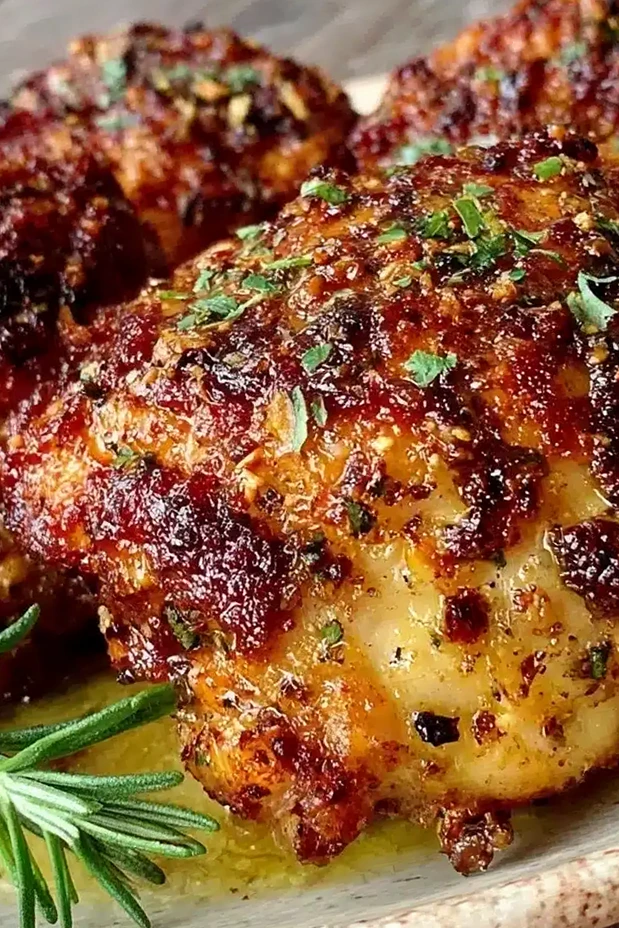
List of ingredients
- 4 bone-in, skin-on chicken thighs
- 1 tablespoon olive oil
- 1 teaspoon salt (kosher salt preferred)
- ½ teaspoon freshly ground black pepper
- 1 teaspoon garlic powder
- 3 tablespoons butter
- 3 cloves fresh garlic, minced
- 2 tablespoons fresh herbs (chopped parsley and thyme)
step-by-step instructions
- Step: Pat the chicken thighs dry with paper towels to remove moisture.
- Step: Rub olive oil all over each thigh, coating evenly but not dripping.
- Step: Season generously with salt, black pepper, and garlic powder on both sides.
- Step: Preheat the air fryer to 400°F (200°C) for 5 minutes.
- Step: Place chicken thighs skin-side down in the air fryer basket without overcrowding. Cook for 12 minutes.
- Step: Flip the thighs skin-side up and cook for another 10-12 minutes until skin is golden brown and crispy. Add 2-3 more minutes if needed, watching closely.
- Step: While chicken cooks, melt butter in a small saucepan over low heat. Add minced garlic and chopped herbs, stirring for about 2 minutes until fragrant but not browned.
- Step: Transfer cooked chicken to a plate and brush generously with the garlic herb butter.
- Step: Let the chicken rest for 5 minutes before serving to retain juices and crispiness.
Refining Your Air Fryer Technique
Achieving Maximum Crispiness
The secret to that elusive deep-fried texture in an air fryer lies in the management of humidity. If you find your chicken is steaming rather than roasting, it is almost always due to surface moisture on the skin. Aside from paper towels, you can leave the chicken uncovered in the refrigerator for thirty minutes before cooking to further dehydrate the skin. This extra step significantly improves the structural integrity of the skin during the air frying process.
The Role of Air Circulation
Air fryers operate by pushing extremely hot air at high speeds around the food. If you pack the basket too tightly, you block these pathways, which leads to uneven cooking and soft spots on your chicken skin. If you are cooking for a family of four or more, consider working in batches to maintain proper airflow. You want to see at least half an inch of space between each thigh to ensure heat reaches every angle of the skin.
Utilizing the Right Cooking Surface
While the air fryer rack is generally non-stick, chicken thighs can sometimes adhere if the skin is damaged. If you struggle with sticking, place a small piece of parchment paper designed for air fryers underneath the thighs. Ensure it is weighted down by the meat so it does not fly up into the heating element. This also makes cleaning the basket significantly faster since the rendered fat collects on the paper rather than the basket mesh.
Refining the Flavor Profile
Balancing Fresh and Dried Aromatics
Using both garlic powder and fresh garlic is a calculated culinary choice. Garlic powder contains dehydrated solids that adhere directly to the skin and meat, providing a consistent baseline of flavor. Fresh garlic added to the butter at the end provides a vibrant, volatile aromatic experience that hits the palate immediately upon the first bite. Never add the raw garlic to the air fryer at the beginning of the cook cycle, as it will burn and become bitter at high temperatures.
Selecting the Best Herbs
Parsley and thyme are standard, but the profile of the butter can be shifted depending on your pantry availability. For a bolder, more pine-like flavor, fresh rosemary works exceptionally well when finely minced. If you prefer a lighter, more citrusy note, try adding a half-teaspoon of lemon zest into the melting butter. This acidity balances the heaviness of the butter and enhances the natural savoriness of the poultry.
Practical Considerations for Home Cooks
Understanding Internal Temperatures
Bone-in chicken thighs are quite forgiving because of their higher fat content, but they are most tender when cooked to 170°F rather than the basic food safety minimum of 165°F. At this slightly higher temperature, the collagen within the thigh begins to break down, resulting in a texture that is pull-apart tender. Use an instant-read thermometer by inserting it into the thickest part of the meat without touching the bone, which can provide an inaccurate reading.
Managing Rendering Fat
Chicken thighs produce a significant amount of liquid fat during the high-heat cooking process. If you notice a great deal of smoke, it is likely the rendered fat hitting the heating element at the bottom of the unit. You can mitigate this by placing a tablespoon of water or a small slice of bread at the very bottom of the basket, beneath the tray, to soak up or contain the grease. Always clean the bottom drawer thoroughly after each use to prevent old grease from smoking during your next meal.
Questions Often Asked About This Recipe
Can I use dried herbs instead of fresh?
Yes, you can substitute fresh herbs with dried versions, but you should use much less since the flavor is more concentrated. Use one teaspoon of dried herbs for every tablespoon of fresh herbs called for in the recipe. Rub the dried herbs between your palms before adding them to the melted butter to wake up the essential oils and improve the fragrance.
Is it possible to reheat these without losing the crust?
The microwave is the enemy of crispy skin, so avoid it entirely if you want to maintain that signature crunch. The most effective way to reheat these thighs is in the air fryer at 350°F for about four to six minutes. This allows the heat to penetrate the meat while simultaneously dehydrating any moisture the skin may have absorbed while sitting in the refrigerator.
How do I stop the butter from running off the chicken?
If you brush the butter on while the chicken is too cold, it will slide right off. The key is to brush it on while the chicken is fresh out of the air fryer and still radiating heat. The high surface temperature helps the butter permeate the pores of the skin and settle into the meat, ensuring that the flavor profile remains consistent throughout the serving.
Why does the skin shrink during cooking?
The skin on chicken thighs contains a network of protein fibers that naturally contract when exposed to dry, intense heat. This is a normal part of the process, but you can minimize excessive shrinkage by tucking the skin firmly underneath the thighs before placing them in the basket. Over time, the fat renders out and the skin stretches back over the meat, resulting in a uniform, professional appearance.
Side Dish Pairings
Incorporating Roasted Root Vegetables
Because the air fryer is occupied by the chicken, roasted vegetables are best prepared in your standard oven at the same temperature. Carrots and parsnips seasoned with olive oil and a dash of sea salt provide a sweet contrast to the savory garlic butter on the chicken. The earthiness of these root vegetables complements the thyme notes in the butter perfectly, creating a balanced plate of textures.
Selecting Fresh Green Components
If you prefer a lighter accompaniment, a crisp green salad or blanched green beans tossed with toasted almonds offers a refreshing change of pace. The acidity of a simple vinaigrette made with apple cider vinegar can cut through the richness of the chicken skin, keeping your palate ready for the next bite. Avoid creamy side dishes as they may clash with the buttery finish of the chicken, making the meal feel overly heavy.
Advanced Troubleshooting for Success
Handling Smoke in the Kitchen
If your air fryer begins to produce smoke, it is almost exclusively due to the rendering fat. If this becomes a recurring issue, you may want to decrease the cooking temperature by 25 degrees and increase the cooking time by five to ten minutes. This lower-and-slower approach still renders the fat effectively but prevents the smoking point of the poultry fat from being breached.
Ensuring Even Browning
Sometimes the top of the air fryer is hotter than the bottom, leading to uneven browning even if the chicken is properly spaced. Halfway through the cooking process, feel free to rotate the position of the chicken thighs in the basket. This ensures that even if there are hot spots in your specific air fryer model, all four pieces of chicken receive the same intensity of heat, leading to a consistent color across the entire batch.
Print
Extra-Crispy Air Fryer Chicken Thighs with Garlic Herb Butter
- Total Time: 30 minutes
- Yield: 4 servings 1x
- Diet: Gluten-free
Description
This recipe delivers super crispy skin and juicy, flavorful chicken thighs using an air fryer and a garlic herb butter finish. Perfect for easy weeknight dinners in about 30 minutes.
Ingredients
- 4 bone-in, skin-on chicken thighs
- 1 tablespoon olive oil
- 1 teaspoon salt (kosher salt preferred)
- ½ teaspoon freshly ground black pepper
- 1 teaspoon garlic powder
- 3 tablespoons butter
- 3 cloves fresh garlic, minced
- 2 tablespoons fresh herbs (chopped parsley and thyme)
Instructions
- Step: Pat the chicken thighs dry with paper towels to remove moisture.
- Step: Rub olive oil all over each thigh, coating evenly but not dripping.
- Step: Season generously with salt, black pepper, and garlic powder on both sides.
- Step: Preheat the air fryer to 400°F (200°C) for 5 minutes.
- Step: Place chicken thighs skin-side down in the air fryer basket without overcrowding. Cook for 12 minutes.
- Step: Flip the thighs skin-side up and cook for another 10-12 minutes until skin is golden brown and crispy. Add 2-3 more minutes if needed, watching closely.
- Step: While chicken cooks, melt butter in a small saucepan over low heat. Add minced garlic and chopped herbs, stirring for about 2 minutes until fragrant but not browned.
- Step: Transfer cooked chicken to a plate and brush generously with the garlic herb butter.
- Step: Let the chicken rest for 5 minutes before serving to retain juices and crispiness.
Notes
Always pat the chicken skin dry to ensure crispiness. Do not overcrowd the air fryer basket to allow proper air circulation. Use a meat thermometer to check for doneness (165°F minimum, 170°F preferred). Brush garlic herb butter after cooking to avoid burning the garlic. For extra crispiness, sprinkle a pinch of baking powder on the skin with salt before cooking. Leftovers can be stored in the fridge for up to 3 days and reheated in the air fryer at 350°F for 5 minutes.
- Prep Time: 10 minutes
- Cook Time: 20 minutes
- Category: Main Course
- Method: Air Fryer
- Cuisine: American
Nutrition
- Serving Size: 1 chicken thigh
- Calories: 320 kcal
- Sugar: 0 g
- Sodium: 600 mg
- Fat: 22 g
- Saturated Fat: 9 g
- Unsaturated Fat: 11 g
- Trans Fat: 0 g
- Carbohydrates: 1 g
- Fiber: 0 g
- Protein: 28 g
- Cholesterol: 115 mg
Keywords: air fryer chicken thighs, crispy chicken, garlic herb butter, easy weeknight dinner, chicken recipe, healthy chicken, air fryer recipe