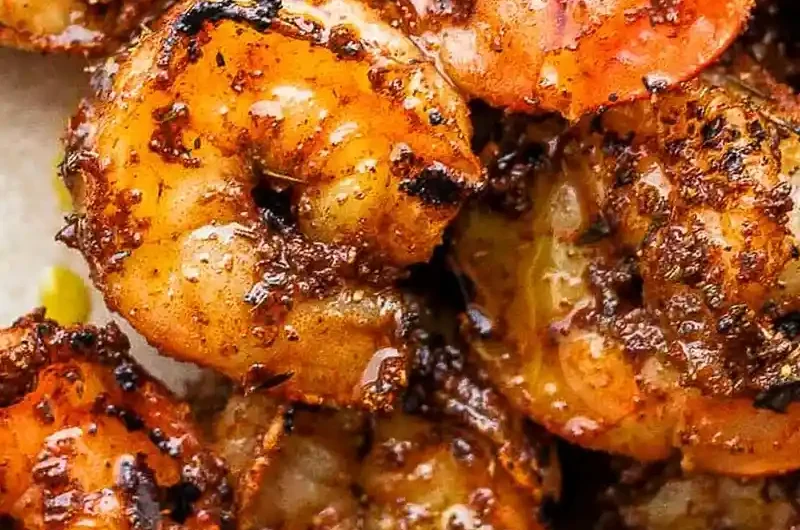
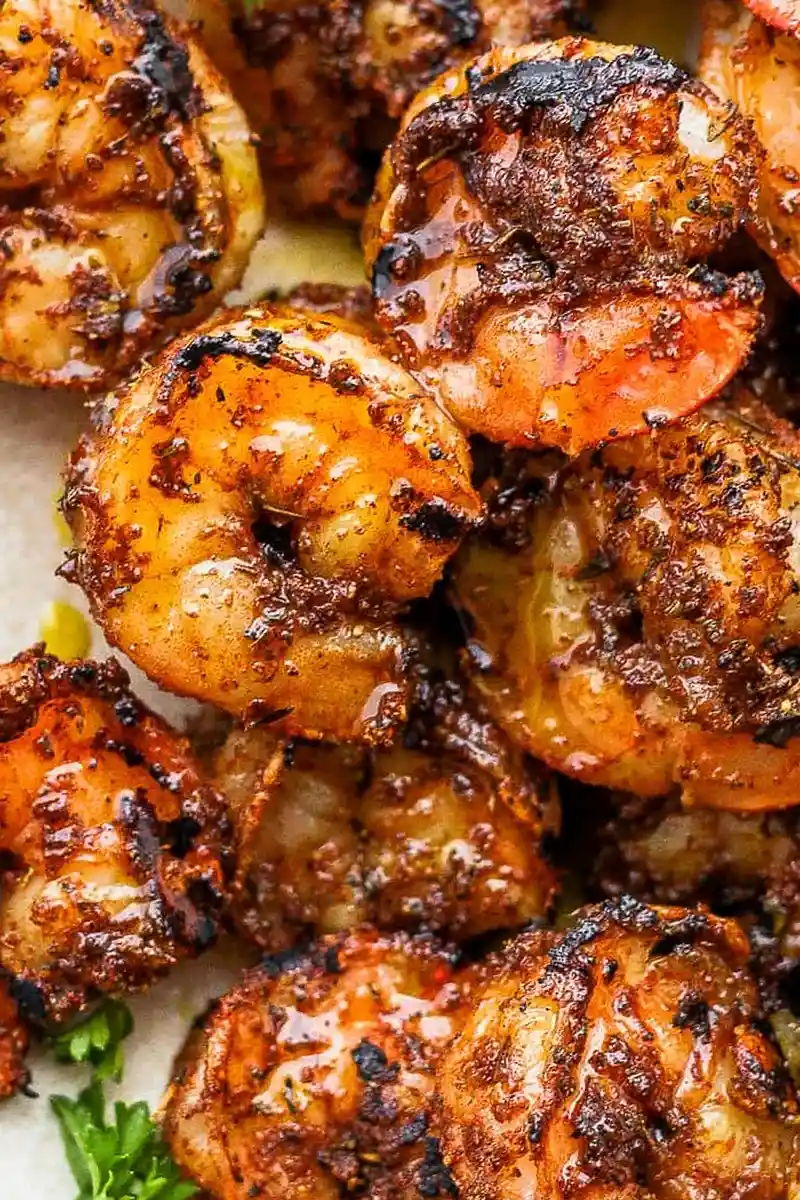
Prepare these bold and smoky grilled skewers in just ten minutes. This recipe is an excellent way to add high-protein, flavor-packed shrimp to your favorite salads or pastas.
List of ingredients
- 1 tablespoon paprika – provides the base color and mild warmth.
- 2 teaspoons onion powder – adds a concentrated savory depth.
- 2 teaspoons garlic powder – contributes a classic pungent aroma.
- 1 teaspoon dried oregano leaves – adds an earthy, herbal note.
- 1 teaspoon dried thyme leaves – provides a subtle woody flavor.
- 1 teaspoon kosher salt – enhances all the other spices.
- ½ teaspoon cayenne pepper – delivers the primary spicy kick.
- ½ teaspoon ground black pepper – adds a sharp, biting heat.
- ¼ teaspoon chipotle pepper – introduces a smoky, deep pepper flavor.
- 1 pound large shrimp – deveined and shelled; ensure they are fully thawed if frozen.
step-by-step instructions
- Prepare the Grill: Clean the grill grates thoroughly and preheat the grill to medium-high heat, aiming for approximately 400-450°F.
- Mix the Seasoning: Combine 1 tablespoon paprika, 2 teaspoons onion powder, 2 teaspoons garlic powder, 1 teaspoon dried oregano, 1 teaspoon dried thyme, 1 teaspoon kosher salt, ½ teaspoon cayenne pepper, ½ teaspoon black pepper, and ¼ teaspoon chipotle pepper in a small mixing bowl. Stir until the spices are evenly distributed.
- Season and Skewer: Pat the 1 pound of shrimp dry with paper towels to remove excess moisture. Coat the shrimp generously with the spice mix until they are fully covered. Use a metal skewer to pierce each shrimp through the tail and then through the thickest part, sliding them all the way to the bottom.
- Grill the Shrimp: Lightly spray the hot grill grates with non-stick cooking spray. Place the skewers on the greased grates and cook over direct heat for 2 minutes. Flip the skewers and cook for another 1-2 minutes until the shrimp are pink and no longer translucent.
- Rest and Serve: Remove the skewers from the grill and let them rest for 5 minutes. Serve immediately as a main dish or as a topping for other meals.
Customizing the Spice Blend
Using Smoked Paprika for Deeper Flavor
Replacing standard paprika with smoked paprika adds a more pronounced campfire aroma to the shrimp. This variation complements the grilled char and enhances the chipotle pepper’s smokiness. It is an easy way to increase the complexity of the seasoning without adding more ingredients.
Adjusting the Heat Level
To make the shrimp spicier, increase the amounts of cayenne and chipotle pepper by ¼ teaspoon each. For those who prefer a milder flavor, reduce the cayenne pepper to a pinch. The balance of heat depends on the potency of your specific spice brands.
Reducing Sodium Content
You can replace kosher salt with a salt-free seasoning blend or omit it entirely if you are monitoring sodium intake. Since the shrimp are coated in a heavy spice rub, the absence of salt is often offset by the strong aromatic flavors. Consider adding a squeeze of fresh lemon juice at the end to brighten the taste.
Essential Grilling Equipment
Metal Versus Wooden Skewers
Metal skewers are recommended because they do not burn or char during the high-heat grilling process. They also provide a more secure hold on the shrimp, preventing them from spinning when flipped. If you use wooden skewers, soak them in water for at least 30 minutes to prevent them from catching fire.
Maintaining the Correct Grill Temperature
A medium-high heat range of 400-450°F is critical for achieving the blackened effect without overcooking the interior. If the grill is too cool, the shrimp will steam rather than sear, resulting in a rubbery texture. Use a grill thermometer to ensure consistent heat across the cooking surface.
Using a Grill Basket for Loose Shrimp
If you prefer not to use skewers, a perforated grill basket is a practical alternative. It allows you to grill shrimp directly while preventing them from falling through the grates. This method is faster for preparation but makes flipping the shrimp slightly more chaotic.
Professional Shrimp Preparation
Proper Thawing Techniques
Frozen shrimp should be thawed slowly in the refrigerator overnight for the best texture. If you are short on time, place the frozen shrimp in a sealed bag and submerge them in a bowl of cold water, changing the water every 30 minutes. Never thaw shrimp in warm or hot water, as this can compromise the meat’s integrity.
The Importance of Patting Shrimp Dry
Moisture on the surface of the shrimp creates steam, which prevents the spices from adhering and stops the searing process. Use clean paper towels to pat each shrimp dry before applying the seasoning rub. This ensures a crusty, blackened exterior and a tender interior.
Deciding Between Tails On or Off
Leaving the tails on provides a convenient handle for guests when serving the skewers as an appetizer. However, removing the tails makes the shrimp easier to eat when they are served atop pasta or salads. Either method works equally well for the cooking process.
Serving Ideas and Pairings
Creating a Fresh Summer Salad
Place the grilled blackened shrimp over a bed of mixed greens, cherry tomatoes, and sliced cucumbers. Pair this with a creamy Green Goddess dressing or a light lemon vinaigrette. The coolness of the salad balances the heat of the blackened seasoning.
Building Blackened Shrimp Tacos
Toss the grilled shrimp into warm corn or flour tortillas with shredded cabbage and avocado. Top the tacos with a fresh mango pineapple salsa to provide a sweet contrast to the spicy shrimp. A drizzle of lime-infused sour cream or Greek yogurt adds a refreshing finish.
Incorporating Shrimp into Pasta Dishes
Serve the blackened shrimp on top of a rich Alfredo sauce or a simple garlic and olive oil pasta. Pair the dish with steamed broccoli or sautéed spinach for added nutrition. The bold spices of the shrimp cut through the richness of creamy pasta sauces.
Side Dish Recommendations
Serve the shrimp with a side of fluffy white rice or quinoa to absorb the flavorful juices. Grilled asparagus or corn on the cob are also excellent companions that complement the outdoor grilling theme. A side of homemade dill sauce can be used for dipping.
Storage and Reheating Guidelines
Refrigeration and Shelf Life
Store leftover grilled shrimp in an airtight container in the refrigerator for up to three days. Ensure the shrimp are completely cooled before sealing the container to prevent condensation. This helps maintain the texture of the spice crust.
Freezing Cooked Shrimp
Cooked blackened shrimp can be frozen for up to two months if stored in a vacuum-sealed bag. When freezing, flash-freeze them on a tray first to prevent them from clumping together. This makes it easier to remove only the amount you need for a specific meal.
Best Methods for Reheating
To avoid overcooking, reheat shrimp briefly in a skillet over medium heat with a teaspoon of oil or butter. Alternatively, use an oven at 300°F for a few minutes until warmed through. Avoid using a microwave, as it often makes shrimp rubbery and tough.
Troubleshooting Common Issues
Preventing Shrimp from Sticking
Sticking usually occurs when the grill grates are not hot enough or are not properly greased. Ensure the grates are preheated and use a non-stick cooking spray or an oil-soaked paper towel just before adding the skewers. Avoid flipping the shrimp too early; they will naturally release from the grate once a sear has formed.
Identifying Overcooked Shrimp
Overcooked shrimp shrink in size and curl tightly into a small ‘O’ shape, becoming tough and rubbery. Perfectly cooked shrimp should form a loose ‘C’ shape and remain plump. Remove them from the heat the moment they turn opaque and pink.
Managing Grill Flare-ups
Flare-ups can happen when oil or seasoning drips onto the burners, causing flames to engulf the shrimp. If this occurs, move the skewers to a cooler part of the grill immediately. Keep a spray bottle of water nearby to dampen the flames if necessary.
Frequently Asked Questions
Can I grill blackened shrimp without skewers?
Yes, you can grill them directly, but you must use jumbo shrimp to prevent them from falling through the grates. A grill pan or a perforated grill basket is recommended if you are not using skewers.
How do I know when the shrimp are fully cooked?
The shrimp are done when the meat changes from translucent to a solid pinkish-white color. They should be plump and have a slight spring to them when pressed.
Can I use frozen shrimp directly on the grill?
No, you should never grill frozen shrimp. They will cook unevenly, resulting in a burnt exterior and a raw, cold interior. Always thaw them completely and pat them dry before seasoning.
What is the best way to store the leftover seasoning?
Keep any unused spice mix in a small airtight jar in a cool, dark pantry. The seasoning will remain fresh for several months and can be used on fish, chicken, or tofu.
Print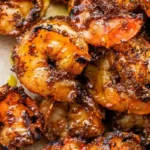
Grilled Blackened Shrimp Recipe
- Total Time: 10 minutes
- Yield: 6 servings 1x
- Diet: Whole30, Paleo, Dairy-Free, Gluten-Free
Description
Make this simple, easy Blackened Shrimp with only 10 real, simple ingredients on the grill in 10 minutes! Perfect for salads, pasta, etc!
Ingredients
- 1 tablespoon paprika
- 2 teaspoons onion powder
- 2 teaspoons garlic powder
- 1 teaspoon dried oregano leaves
- 1 teaspoon dried thyme leaves
- 1 teaspoon kosher salt
- ½ teaspoon cayenne pepper
- ½ teaspoon ground black pepper
- ¼ teaspoon chipotle pepper
- 1 pound large shrimp (deveined and shelled)
Instructions
- Prep: Ensure grill grates are clean and preheat grill to medium-high heat (Approx. 400-450℉).
- Make Seasoning: In a small bowl, add 1 tablespoon paprika, 2 teaspoons onion powder, 2 teaspoons garlic powder, 1 teaspoon dried oregano leaves, 1 teaspoon dried thyme leaves, 1 teaspoon kosher salt, ½ teaspoon cayenne pepper, ½ teaspoon ground black pepper, and ¼ teaspoon chipotle pepper. Mix to combine.
- Season + Skewer: Pat 1 pound large shrimp dry with a clean paper towel and season generously with Blackened Seasoning (shrimp should be fully coated). Taking a metal skewer, pierce the shrimp through the tail and then again through the thickest part and slide all the way to the bottom. Continue until all the shrimp are skewered.
- Grill: Give the hot grates a quick spray with non-stick cooking spray. Place the shrimp skewers directly on the greased, hot grates and cook over direct heat for 2 minutes. Flip and let cook for an additional 1-2 minutes. Shrimp is done cooking when the meat is pink and no longer translucent.
- Rest + Serve: Remove from grill and let rest 5 minutes. Serve and enjoy – we love using these in our Grilled Shrimp Salad!
Notes
Leaving tails on is optional. Use metal skewers or soak wooden skewers for 30 minutes to reduce charring. Fresh or frozen shrimp both work; fully thaw frozen shrimp in cold water before patting dry.
- Prep Time: 5 minutes
- Cook Time: 5 minutes
- Category: Dinner/Entree
- Method: Grill
- Cuisine: American
Nutrition
- Serving Size: 1 serving
- Calories: 66 kcal
- Sugar: 0.3 g
- Sodium: 818 mg
- Fat: 1 g
- Saturated Fat: 0.1 g
- Unsaturated Fat: 0.3 g
- Trans Fat: 0.01 g
- Carbohydrates: 3 g
- Fiber: 1 g
- Protein: 11 g
- Cholesterol: 95 mg
Keywords: blackened shrimp, grilled shrimp, seafood, Whole30, Paleo, dairy-free, gluten-free