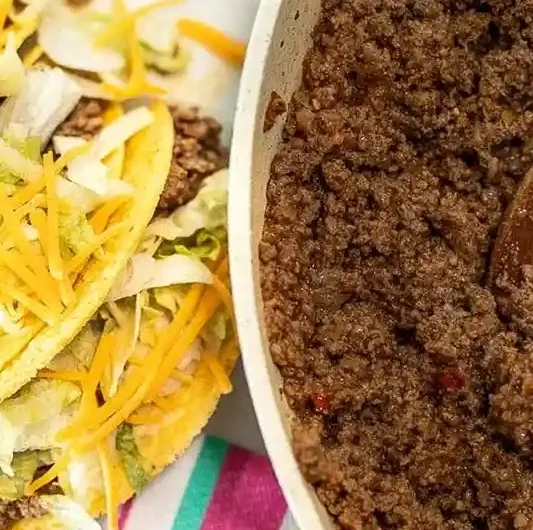
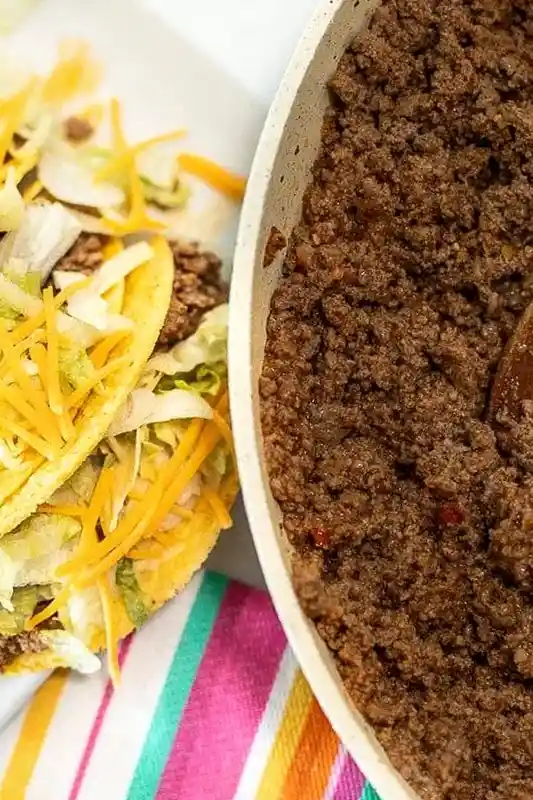
Recreate the iconic taste and unique texture of fast-food taco meat right in your own kitchen. This method ensures a smooth, non-crumbly consistency that clings perfectly to your taco shells. It is a simple way to elevate your taco night with a cleaner version of the restaurant favorite.
List of ingredients
- 2 pounds ground beef (85% lean 15% fat) – provides the ideal balance of flavor and structure.
- 2 1/3 cups water or beef broth (divided) – used for mixing the batter and simmering.
- 5 tablespoons taco seasoning (homemade or store-bought) – adjust to your preferred spice level.
- 2 tablespoons cornstarch – acts as the thickening agent for the signature texture.
- 1 teaspoon unsweetened dark cocoa powder (optional) – added primarily for a deep, rich brown color.
- salt – add to taste at the end of cooking.
step-by-step instructions
- Prepare the mixture: Combine the ground beef, 1 2/3 cups of the water or broth, taco seasoning, cornstarch, and cocoa powder in a mixing bowl. Mix by hand or with a mixer until all ingredients are fully incorporated into a sticky, thick batter.
- Initial sear: Grease a large nonstick skillet or Dutch oven with cooking oil. Add the meat mixture to the pan and pour in the remaining 2/3 cup of water.
- Cook and break: Cover the pan and cook on medium-high heat for 5 minutes. Use a spatula to break the meat apart completely during this time.
- Simmer and thicken: Remove the cover and allow the mixture to simmer on low heat. Stir occasionally until the water evaporates and the meat thickens, which usually takes 20-30 minutes.
- Final seasoning: Taste the beef and add salt if necessary. Serve immediately in hard or soft shells.
Pro Tips for Perfect Texture
Use a Potato Masher for Uniformity
To achieve the very fine, consistent grain found in restaurant tacos, use a potato masher. Press down firmly on the meat while it is simmering to break up any remaining clumps. This ensures there are no large chunks of beef in your tacos.
The Importance of the Mixing Stage
Do not skip mixing the cornstarch and water directly into the raw beef. This creates a slurry that coats every particle of meat, allowing the sauce to bind properly. If you add the thickener later, you may end up with a grainy or uneven consistency.
Controlling the Simmer Temperature
Keep the heat on low once the initial sear is complete. High heat can cause the cornstarch to clump or the beef to brown too quickly and become dry. A slow simmer allows the liquid to reduce gradually, concentrating the flavors.
Ingredient Deep Dive
Choosing the Right Beef Fat Ratio
Using 85% lean ground beef is recommended because the 15% fat content provides essential moisture. Leaner meats, such as 93% lean, can result in a dry texture that doesn’t hold the sauce well. The fat helps the cornstarch create that creamy, cohesive mouthfeel.
The Role of Cornstarch in Binding
Cornstarch is the secret to the non-crumbly nature of this beef. It creates a light gel that suspends the spices and fat around the meat. This prevents the filling from falling out of the shell when you take a bite.
Using Cocoa Powder for Visual Appeal
The dark cocoa powder does not make the meat taste like chocolate. Instead, it adds a deep mahogany color that mimics the appearance of beef that has been cooked for hours. It provides a subtle earthy depth that complements the cumin and chili powder.
Customizing Your Taco Seasoning Blend
If making your own seasoning, focus on a base of chili powder, cumin, garlic powder, and onion powder. You can add smoked paprika for a wood-fired taste or a pinch of sugar to balance the acidity. Adjust the amount of seasoning based on how bold you want the flavor.
Nutritious Vegetable Variations
Blending in Shredded Carrots
Finely shredded carrots can be mixed into the raw beef before cooking. Once simmered, the carrots soften and blend in with the meat’s texture. This is an excellent way to add vitamins without changing the taste of the dish.
Adding Finely Grated Zucchini
Grated zucchini is another great addition that disappears into the beef. Squeeze the excess water out of the zucchini before adding it to the pan. This adds volume and nutrition while maintaining the signature thickness of the sauce.
Incorporating Sautéed Onions and Garlic
For a more homemade flavor, sauté finely diced onions and minced garlic before adding the meat mixture. Ensure the vegetables are diced very small so they do not disrupt the smooth texture. This adds a layer of aromatic sweetness to the seasoned beef.
Alternative Cooking Appliances
Using an Instant Pot for Speed
Place 2/3 cup of water in the Instant Pot and add the prepared meat mixture. Seal the lid and cook on high pressure for 7 minutes, followed by a 10-minute natural release. Switch to the sauté setting and stir until the liquid reduces and thickens.
Adapting for a Slow Cooker
Combine all ingredients in a slow cooker, but reduce the initial water by 1/2 cup to prevent it from becoming too soupy. Cook on low for 6 to 8 hours. Use a masher to break up the beef before serving to ensure the correct texture.
Air Fryer Taco Shell Preparation
To get the best crunch for your beef, place hard taco shells in the air fryer at 350°F for 2 to 3 minutes. This refreshes the oil in the shell and makes it more resistant to breaking. It also warms the shell, which helps melt the cheese on top of the meat.
Serving and Pairing Guide
Assembling a Traditional Crunchy Taco
Start with a warm hard shell and spoon in a generous portion of the seasoned beef. Top with a layer of shredded iceberg lettuce for crunch and a handful of sharp cheddar cheese. The contrast between the hot meat and cold lettuce is key.
Building a Supreme Style Taco
To upgrade to a supreme version, add diced fresh tomatoes and a dollop of sour cream. You can also add sliced black olives or pickled jalapeños for extra zing. These additions provide acidity that cuts through the richness of the beef.
Creating a Family Taco Bar
Place the meat in a slow cooker on the warm setting to keep it moist for guests. Set out bowls of shredded lettuce, diced onions, salsa, and guacamole. Providing a variety of soft flour tortillas and hard corn shells allows everyone to customize their meal.
Preservation and Storage
Best Practices for Refrigeration
Store leftover meat in an airtight glass container to maintain freshness. It will stay good in the refrigerator for up to 3 to 4 days. Ensure the meat is completely cooled before sealing the lid to prevent condensation.
Long-Term Freezer Storage Tips
This beef freezes exceptionally well for meal prep. Portion the meat into freezer-safe bags and press them flat to save space. Label the bags with the date and a description for easy identification.
Thawing Methods for Best Quality
For the best results, thaw the frozen meat in the refrigerator overnight. Avoid thawing at room temperature to prevent bacteria growth. If you are in a rush, use the defrost setting on your microwave, but stir frequently to avoid hot spots.
Reheating for Fresh Taste
Stovetop Reheating for Better Texture
Place the chilled meat in a skillet over medium-low heat. Add a tablespoon of water or beef broth to loosen the cornstarch binder. Stir constantly until heated through to restore the original creamy consistency.
Microwave Reheating and Moisture Control
Place the meat in a microwave-safe bowl and cover it with a damp paper towel. Heat in 30-second intervals, stirring between each session. This prevents the beef from drying out and ensures even heating throughout the batch.
Troubleshooting Common Issues
Solving Excess Liquid in the Pan
If the meat remains too watery after 30 minutes, increase the heat to medium. Continue to simmer without a lid to allow the moisture to evaporate. Do not add more cornstarch at this stage, as it can make the meat taste gluey.
Managing Overly Salty Seasoning
If the mixture is too salty, stir in a small amount of unsweetened tomato paste or a splash of water. Adding more unseasoned ground beef can also dilute the saltiness. Avoid adding sugar, as it can clash with the savory taco spices.
Preventing the Meat from Burning
If the meat begins to stick to the pan, add a small amount of water or beef broth. Ensure you are using a nonstick skillet or a well-greased Dutch oven. Stirring frequently during the final reduction stage prevents the bottom from scorching.
Frequently Asked Questions
Is this recipe gluten-free?
Yes, this recipe can be gluten-free as long as you use a certified gluten-free taco seasoning. Most cornstarch is naturally gluten-free, but always check the labels on your specific brands to be sure.
Can I use turkey instead of beef?
You can use ground turkey, but you may need to add a tablespoon of olive oil since turkey is leaner than beef. The texture will be slightly different, but the flavors will remain the same.
Can I omit the cocoa powder?
Yes, the cocoa powder is entirely optional and is used only for color. Omitting it will not affect the taste of the meat, though the color will be a lighter brown.
What is the best way to store the shells?
Keep taco shells in an airtight container or a zip-top bag in a cool, dry place. To prevent them from going stale, store them away from direct sunlight and moisture.
How do I make the meat spicier?
Add a pinch of cayenne pepper or a teaspoon of crushed red pepper flakes during the mixing stage. You can also stir in diced fresh habaneros or jalapeños while the meat is simmering.
Print
Homemade Taco Bell Style Seasoned Beef
- Total Time: 35 minutes
- Yield: 16 servings 1x
- Diet: General
Description
This Taco Bell meat recipe tastes just like the real deal. The texture and flavor is spot-on plus it’s SO easy to make!
Ingredients
- 2 pounds ground beef (85% lean 15% fat)
- 2 1/3 cups water or beef broth divided
- 5 tablespoons taco seasoning
- 2 tablespoons cornstarch
- 1 teaspoon unsweetened dark cocoa powder
- salt to taste
Instructions
- Combine: Combine ground beef, 1 ⅔ cups water, taco seasoning, cornstarch, and cocoa powder in a mixing bowl.
- Mix: Mix by hand or with a mixer until all the ingredients are fully incorporated.
- Cook: Grease a large nonstick skillet or Dutch oven with cooking oil. Add the meat mixture. Pour the remaining ⅔ cup water in, cover, and cook on medium-high heat for 5 minutes. Using a spatula to break up the meat completely.
- Simmer: Allow to simmer on low heat, uncovered, until the water evaporates and the meat mixture thickens, 20-30 minutes. Taste along the way and season with salt if needed.
- Serve: Serve with hard or soft taco shells, or use it to create your favorite Taco Bell item!
Notes
You can also easily cook the Taco Bell meat in a pressure cooker. Place 2/3 cup water in the pressure cooker and then add the meat mixture. Seal and cook on high pressure for 7 minutes, then allow for a 10-minute natural release. Release the rest of the pressure with a quick release and use a metal spatula to break up the meat. Switch the setting to saute and cook until the meat mixture thickens.
- Prep Time: 15 minutes
- Cook Time: 20 minutes
- Category: Dinner
- Method: Stovetop
- Cuisine: American
Nutrition
- Serving Size: 1 serving
- Calories: 149 kcal
- Sugar: 0.1 g
- Sodium: 103 mg
- Fat: 11 g
- Saturated Fat: 4 g
- Unsaturated Fat: 5.3 g
- Trans Fat: 1 g
- Carbohydrates: 1 g
- Fiber: 0.2 g
- Protein: 10 g
- Cholesterol: 40 mg
Keywords: taco bell meat, copycat taco beef, seasoned ground beef, taco filling