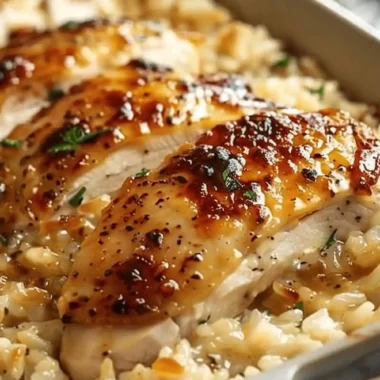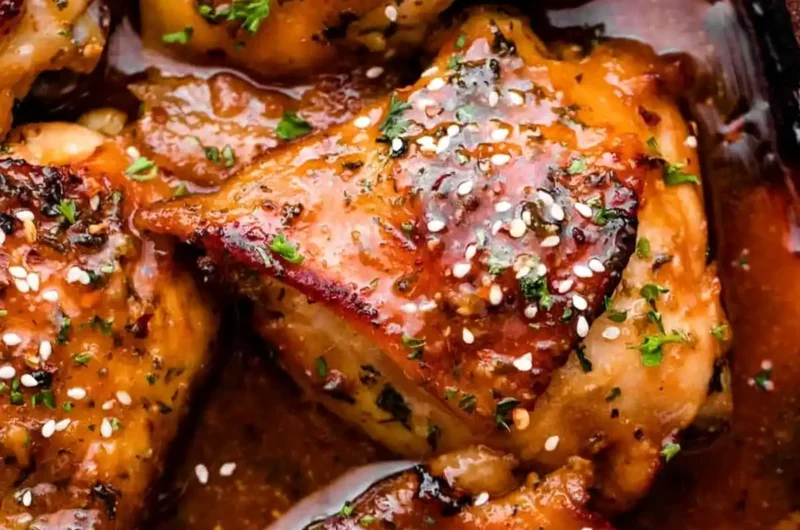
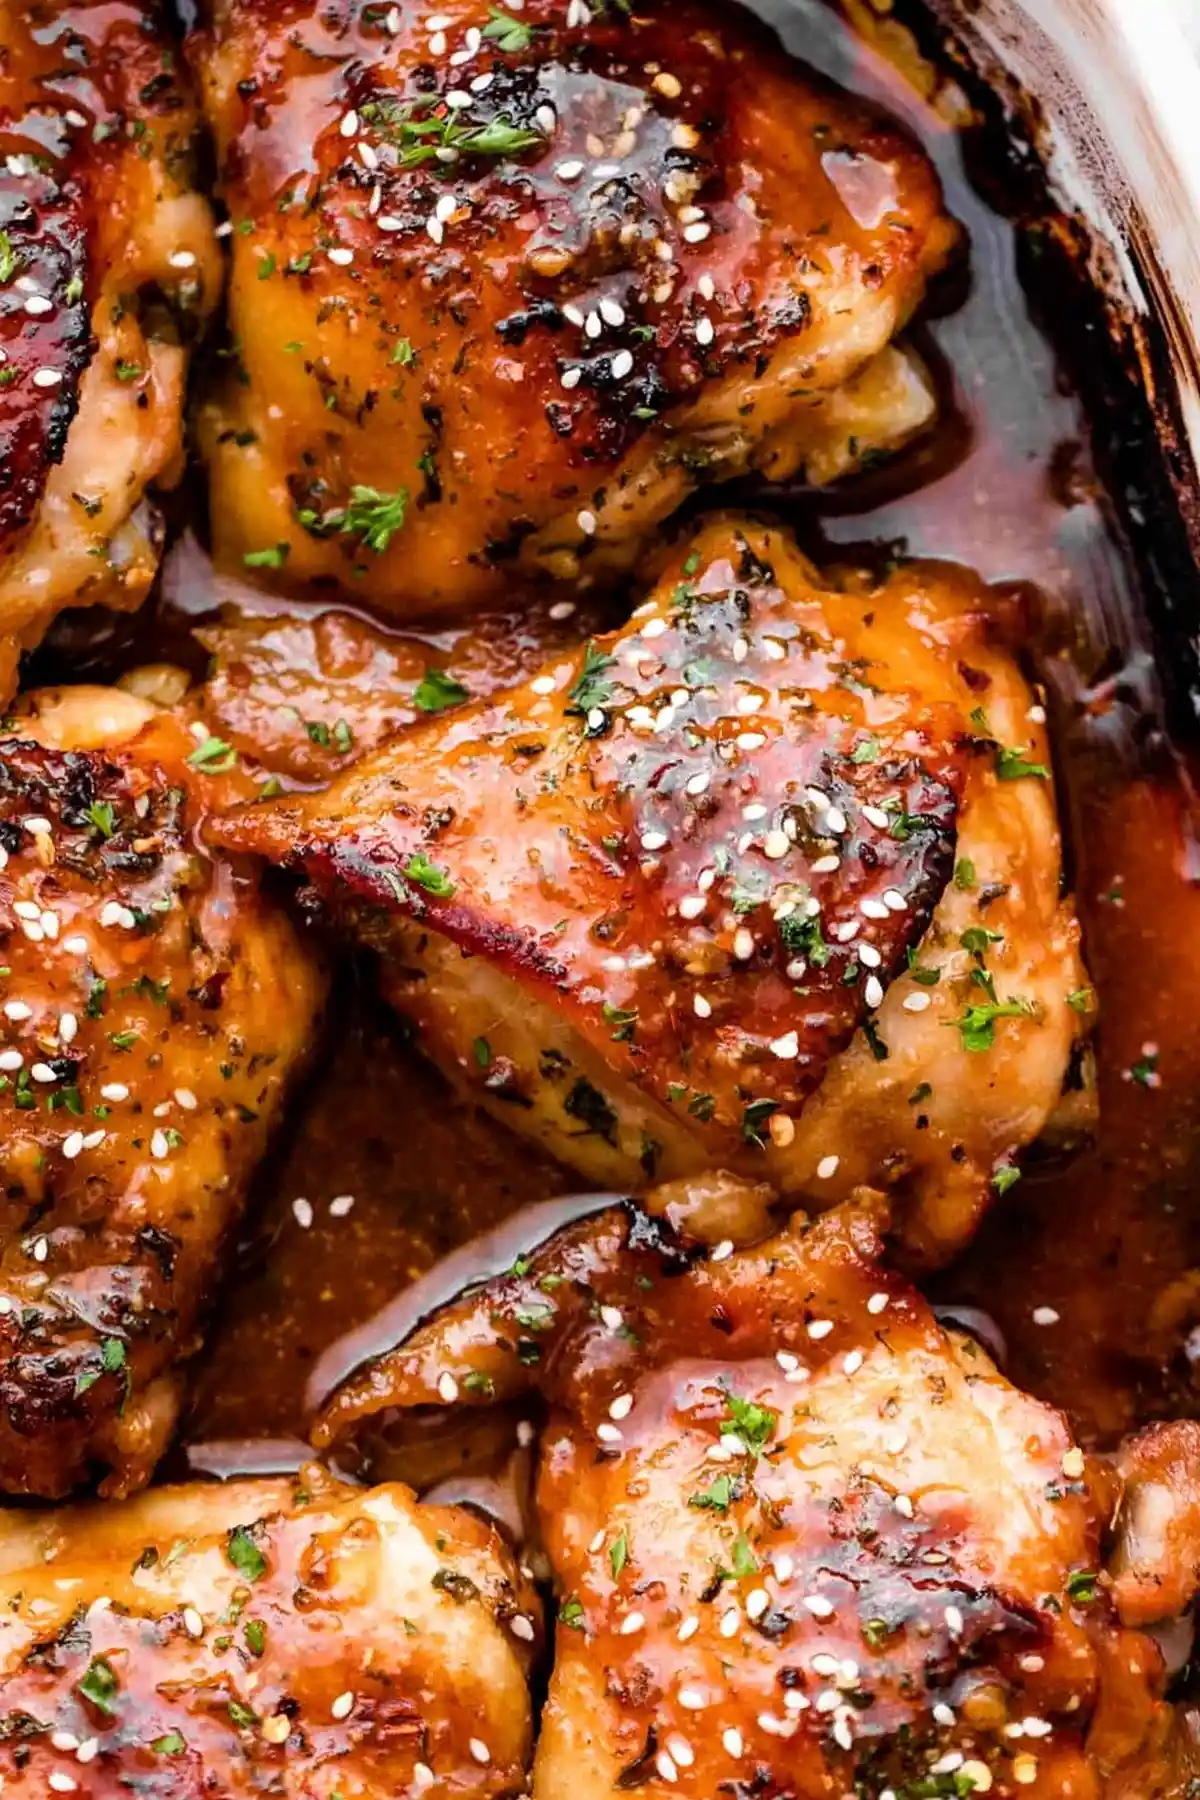
This recipe creates tender chicken thighs coated in a sweet and savory glaze with a sticky finish. It is an efficient meal option for busy weeknights that delivers high flavor with minimal effort.
List of ingredients
- 6 to 8 bone-in skin-on chicken thighs – ensures juiciness and flavor.
- ½ cup all-purpose flour – used for dredging to help the sauce adhere.
- 1 teaspoon dried oregano – adds a subtle herbal note.
- ½ teaspoon salt – adjust according to your taste preference.
- ¼ teaspoon fresh ground black pepper – provides a mild spicy base.
- ⅓ cup honey – provides the primary sweetness and sticky texture.
- ½ cup low sodium soy sauce – delivers the savory umami element.
- 4 to 6 cloves garlic, minced – provides a strong aromatic punch.
- 3 tablespoon chopped fresh parsley – adds color and a fresh taste.
- 1 tablespoon sesame seed oil – adds a nutty depth to the glaze.
- 1 teaspoon rice vinegar – balances the sweetness with acidity.
- ½ teaspoon hot sauce – adds a hint of heat; adjust to preference.
- toasted sesame seeds – used for the final garnish.
step-by-step instructions
- Prepare Equipment: Preheat your oven to 400°F. Lightly grease a 9×13 inch baking dish with cooking spray or oil and set it aside.
- Create the Coating: In a shallow plate or dish, combine the all-purpose flour, dried oregano, salt, and black pepper. Mix these ingredients thoroughly until evenly distributed.
- Dredge the Chicken: Use paper towels to pat the chicken thighs completely dry. Coat each thigh in the flour mixture, ensuring all sides are covered, then place them in the prepared baking dish in a single layer.
- Whisk the Glaze: In a small mixing bowl, combine the honey, low sodium soy sauce, minced garlic, chopped parsley, sesame seed oil, rice vinegar, and hot sauce. Whisk until the mixture is smooth.
- Apply Sauce: Pour the honey garlic sauce over the chicken thighs. Flip the chicken pieces to ensure both sides are evenly coated with the glaze.
- Bake: Place the dish in the oven uncovered. Bake for 30 to 35 minutes. The chicken is fully cooked when an internal meat thermometer registers 165°F in the thickest part of the meat.
- Rest the Meat: Remove the dish from the oven. Transfer the chicken to a serving plate and let it stand for 5 to 8 minutes to allow juices to redistribute.
- Garnish and Serve: Sprinkle the toasted sesame seeds over the top of the chicken and serve immediately.
Procedures for Maximum Success
Use an Instant-Read Meat Thermometer
The only guaranteed way to ensure the chicken is safe and juicy is by checking the internal temperature. Insert the probe into the thickest part of the thigh, making sure the tip does not touch the bone, as bone conducts heat differently. Aim for exactly 165°F to avoid drying out the meat.
Dry the Chicken Thoroughly
Moisture on the surface of the chicken prevents the flour from adhering properly and can steam the skin rather than crisping it. Use several paper towels to pat every piece of chicken dry before dredging. This ensures a better bond between the meat and the seasoned flour.
Avoid Overcrowding the Baking Dish
Place the chicken thighs in a single layer with a small amount of space between each piece. If the pan is too crowded, the chicken will release moisture that cannot evaporate, leading to boiled meat instead of baked meat. A 9×13 inch pan is ideal for 6 to 8 thighs.
Control the Oven Temperature
Baking at 400°F is recommended for achieving a caramelized exterior and a tender interior. If you prefer a slower cook, you can lower the temperature to 350°F, but be aware that the cooking time will increase significantly. Higher heat is generally better for rendering the fat in the skin.
Ingredient Substitutions and Adjustments
Gluten-Free Flour Alternatives
If you need a gluten-free version, replace the all-purpose flour with an equal amount of cornstarch. Cornstarch often creates a crispier exterior and helps thicken the sauce even more effectively. Ensure the rest of your ingredients are certified gluten-free.
Soy Sauce Replacements
For a gluten-free or soy-free alternative, use tamari or coconut aminos. Tamari provides a similar salty profile to soy sauce, while coconut aminos are slightly sweeter and lower in sodium. If using coconut aminos, you may want to reduce the honey slightly to maintain the balance.
Maple Syrup as a Honey Substitute
Pure maple syrup can be used in place of honey if you prefer a different kind of sweetness. Maple syrup has a thinner consistency, so the glaze may be slightly less sticky, but the flavor profile remains compatible. Use the same ⅓ cup measurement.
Adjusting the Heat Level
The current recipe uses a small amount of hot sauce for a mild kick. To make the dish spicier, replace the hot sauce with sriracha or add a teaspoon of crushed red pepper flakes to the sauce mixture. For a very mild version, omit the hot sauce entirely.
Alternative Meat Selection
Using Chicken Drumsticks
Drumsticks work very well with this glaze and cooking method. Since they are bone-in and skin-on, the cooking time remains similar to thighs. Ensure they are arranged in a single layer to allow the sauce to caramelize on all sides.
Using Boneless Chicken Thighs
Boneless thighs cook faster than bone-in versions. Reduce the baking time and start checking the internal temperature around the 20-minute mark. Boneless meat is more prone to overcooking, so the thermometer is essential here.
Cooking with Chicken Breasts
Chicken breasts can be used, but they require significantly less time in the oven. Because they lack the fat of the thighs, they can dry out quickly. Watch them closely and remove them as soon as they hit 165°F to maintain moisture.
Serving and Pairing Ideas
Pairing with Fragrant Rice
The sticky honey garlic sauce pairs perfectly with steamed white rice, brown rice, or jasmine rice. The rice acts as a neutral base that absorbs the extra glaze from the baking dish. For added flavor, stir in some butter or parmesan cheese to the rice.
Adding Sautéed Green Vegetables
Complement the sweetness of the chicken with savory green vegetables. Sautéed garlic butter green beans or roasted broccoli provide a nice textural contrast. The bitterness of the greens balances the sugary notes of the honey glaze.
Fresh Salad Pairings
A crisp garden salad with a light vinaigrette or a shredded cabbage slaw can refresh the palate between bites of rich chicken. Use a lemon-based dressing to cut through the density of the sesame oil and honey.
Storage and Preservation
Refrigeration Guidelines
Place cooled leftover chicken in airtight food storage containers or heavy-duty zip-top bags. Store them in the main part of the refrigerator, not the door, to maintain a consistent temperature. The chicken will remain safe to eat for 3 to 4 days.
Freezing Instructions
This dish freezes well for up to 3 months. Allow the chicken to cool completely before freezing to prevent ice crystals from forming inside the meat. Wrap each piece tightly in foil or use freezer-safe bags to prevent freezer burn.
Reheating Instructions
Oven Reheating for Texture
To maintain the best texture, place the chicken in an ovenproof dish and cover it with aluminum foil. Bake at 350°F until the meat is heated through. This method helps preserve the integrity of the sauce better than other methods.
Microwave Reheating for Speed
For a quicker option, place the chicken on a microwave-safe plate and cover it with a damp paper towel. Heat in short bursts of 1 to 2 minutes, checking often to avoid overcooking. Note that the skin will lose its crispiness when microwaved.
Common Cooking Troubleshooting
Sauce is Too Thin
If the sauce remains too liquid after baking, you can thicken it by transferring the pan juices to a small saucepan. Simmer the liquid over medium heat for 3 to 5 minutes until it reduces into a thick syrup, then pour it back over the chicken.
Chicken Skin is Not Crispy
If the skin isn’t as crispy as desired, it is often due to moisture or overcrowding. Ensure the chicken is patted dry and the oven is fully preheated to 400°F. You can also broil the chicken for the last 2 minutes of cooking, but watch it carefully to prevent the honey from burning.
Garlic Tastes Burnt
Burnt garlic occurs if the oven temperature is too high or the garlic pieces are minced too finely. Ensure the garlic is evenly distributed within the sauce rather than clumped on top of the chicken. If this happens, you can adjust the flavor by adding a bit more honey to the final glaze.
Frequently Asked Questions
Can I use a different baking dish?
Yes, any oven-safe dish will work, such as a roasting pan or a ceramic casserole. The key is to ensure the chicken is in a single layer with enough room for air to circulate around the pieces.
How do I prevent the honey from burning?
Honey has a high sugar content and can burn if exposed to extreme heat for too long. Stick to the 400°F temperature and the specified time. If you notice the sauce darkening too quickly, cover the dish loosely with foil for the final few minutes.
Can I make this in an Air Fryer?
Yes, this recipe can be adapted for an air fryer. Cook the chicken at 375°F for about 15 to 20 minutes, flipping halfway through and brushing on the sauce during the last 5 to 7 minutes to prevent the sugars from burning.
Print
Honey Garlic Baked Chicken Thighs
- Total Time: 40 minutes
- Yield: 4 servings 1x
- Diet: General
Description
With sesame oil, honey, and plenty of fresh garlic, this recipe for Honey Garlic Baked Chicken Thighs is unbelievably flavorful! If you like a sweet, sticky chicken with crispy skin, this recipe is for you!
Ingredients
- 6 to 8 bone-in skin-on chicken thighs
- ½ cup all-purpose flour
- 1 teaspoon dried oregano
- ½ teaspoon salt
- ¼ teaspoon fresh ground black pepper
- ⅓ cup honey
- ½ cup low sodium soy sauce
- 4 to 6 cloves garlic, minced
- 3 tablespoon chopped fresh parsley
- 1 tablespoon sesame seed oil
- 1 teaspoon rice vinegar
- ½ teaspoon hot sauce
- toasted sesame seeds, for garnish
Instructions
- Step 1: Preheat oven to 400˚F.
- Step 2: Lightly grease a 9×13 baking dish with cooking spray; set aside.
- Step 3: In a shallow plate combine the flour, oregano, salt, and pepper; mix to combine.
- Step 4: Pat dry the chicken thighs with paper towels. Coat each chicken thigh in the flour mixture, then transfer to the baking dish in one single layer. Set aside.
- Step 5: In a small mixing bowl whisk together the honey, soy sauce, garlic, parsley, sesame seed oil, rice vinegar, and hot sauce. Pour over the chicken thighs and coat them evenly with the honey garlic sauce. Flip them over to coat on both sides.
- Step 6: Bake, uncovered, for 30 to 35 minutes or until done. Chicken is cooked through when the internal temperature registers at 165˚F.
- Step 7: Remove from oven; transfer to a serving plate and let stand for 5 to 8 minutes.
- Step 8: Garnish with sesame seeds and serve.
Notes
Use cornstarch instead of flour for a gluten-free version. Maple syrup is a great alternative to honey. For a gluten-free dish, try tamari or coconut aminos instead of soy sauce.
- Prep Time: 10 minutes
- Cook Time: 30 minutes
- Category: Dinner
- Method: Baking
- Cuisine: American, Chinese
Nutrition
- Serving Size: 1 serving
- Calories: 677 kcal
- Sugar: 24 g
- Sodium: 1627 mg
- Fat: 40 g
- Saturated Fat: 10 g
- Unsaturated Fat: 25 g
- Trans Fat: 1 g
- Carbohydrates: 40 g
- Fiber: 1 g
- Protein: 40 g
- Cholesterol: 212 mg
Keywords: honey garlic chicken, baked chicken thighs, sticky chicken, crispy skin chicken, dinner