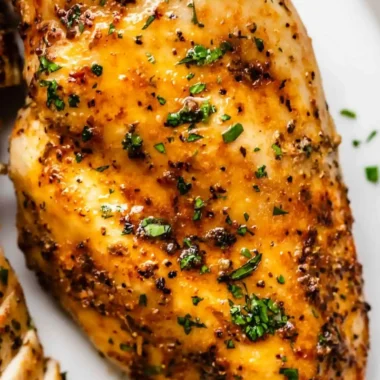
This method provides a fast way to prepare tender, flavor-packed chicken thighs for any weeknight dinner. By using a high roasting temperature and a precise spice blend, you get perfectly cooked meat without the risk of drying it out.
List of ingredients
- 2 pounds boneless, skinless chicken thighs (approximately 8 pieces) – ensure they are trimmed of excess fat.
- 1 tablespoon avocado oil – used for its high smoke point to prevent burning.
- 2 teaspoons garlic powder – provides a concentrated savory base.
- 2 teaspoons onion powder – adds depth and sweetness to the rub.
- 2 teaspoons Italian seasoning – a blend of herbs for a classic savory profile.
- 1 teaspoon cumin (or smoked paprika) – adds an earthy or smoky undertone.
- 1 teaspoon Kosher salt – used for balanced seasoning.
- 1/2 teaspoon black pepper – provides a mild, spicy bite.
step-by-step instructions
- Prepare the oven: Preheat your oven to 425°F and line a rimmed baking sheet with parchment paper to ensure easy cleanup and prevent sticking.
- Temper the meat: Remove the chicken thighs from the refrigerator at least twenty minutes before you plan to bake them to help them cook more evenly.
- Clean and dry: Using a sharp knife, carefully trim off any excess fat from the thighs and pat the meat completely dry using paper towels.
- Combine the rub: In a small mixing bowl, stir together the garlic powder, onion powder, Italian seasoning, cumin, salt, and black pepper.
- Season the chicken: Place the chicken thighs in a large bowl, drizzle with avocado oil, and sprinkle the prepared spice mixture over the meat.
- Coat thoroughly: Use your hands to rub the spices into every part of the chicken, then arrange the pieces in a single layer on the prepared baking sheet.
- Bake: Roast in the oven for 20 minutes, or until an instant-read thermometer shows an internal temperature of 165°F.
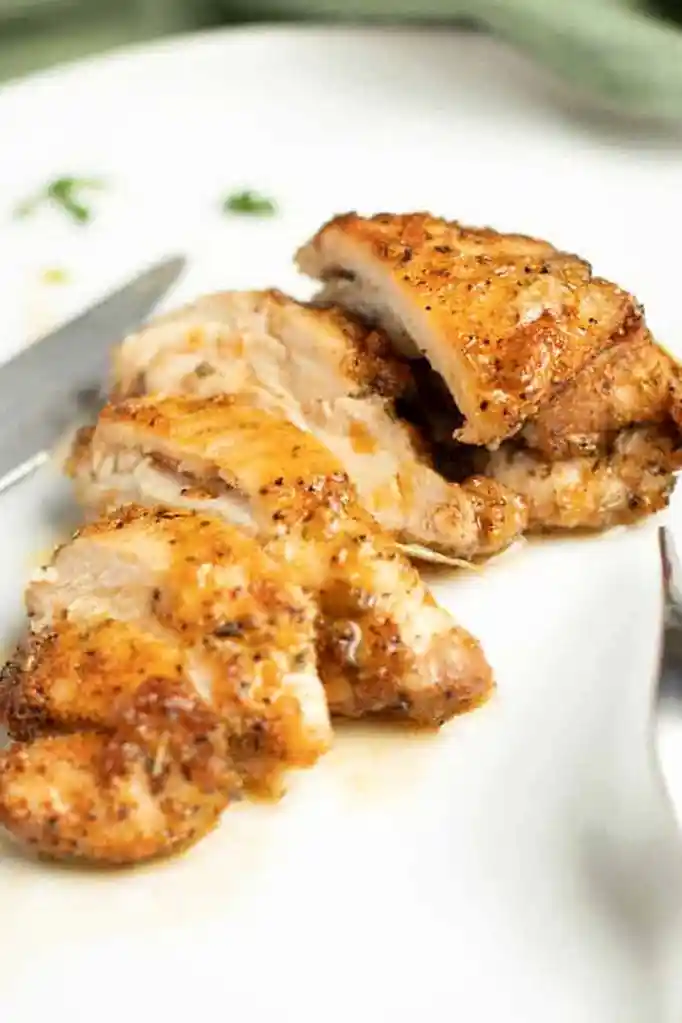
- Rest: Let the chicken rest on the pan for 5 minutes to allow the juices to redistribute before serving.
Expert Cooking Techniques for Better Results
Bringing Meat to Room Temperature
Taking the chicken out of the fridge 20 minutes early prevents the exterior from overcooking before the center reaches the safe temperature. This step ensures the meat cooks uniformly, reducing the chance of cold centers or charred edges. It is a simple way to improve the overall texture of the finished dish.
The Importance of Trimming Excess Fat
Removing large pieces of excess fat makes the final product lighter and cleaner in flavor. While fat adds flavor, too much of it can lead to uneven browning or a greasy texture when baking at high temperatures. A quick trim with a sharp knife ensures the spice rub adheres better to the meat.
Drying the Surface for Maximum Browning
Moisture on the surface of the chicken creates steam, which prevents the meat from browning. Patting the thighs dry with paper towels allows the oil and spices to sear against the heat. This results in a better crust and a more roasted flavor, even without the skin.
Using the Right Baking Sheet
A rimmed baking sheet is essential because it catches the drippings and prevents oil from leaking into the bottom of your oven. Lining it with parchment paper or foil prevents the chicken from sticking to the metal. This makes the cleanup process much faster and keeps the chicken from tearing when you remove it.
Using a Digital Meat Thermometer
Relying on time alone can be risky because oven temperatures vary. A digital instant-read thermometer allows you to verify that the chicken has reached exactly 165°F. This prevents overcooking, which is the primary cause of dry chicken.
Ingredient Substitutions and Modifications
Alternative Cooking Oils
Avocado oil is recommended due to its high smoke point, which is ideal for 425°F. If you do not have avocado oil, grapeseed oil or light olive oil are suitable alternatives. Avoid using extra virgin olive oil or butter, as they can burn at this high temperature and create a bitter taste.
Swapping Cumin for Smoked Paprika
Cumin provides an earthy, warm flavor, while smoked paprika offers a deeper, wood-fired taste. Both work equally well in this recipe depending on your preference. If you want a more traditional American roast flavor, smoked paprika is the better choice.
Modifying the Herb Blend
If you do not have a pre-mixed Italian seasoning, you can combine dried oregano, basil, and thyme. Using fresh herbs is possible, but they may burn at high heat. For the best results, stick to dried herbs for the initial rub and garnish with fresh herbs after baking.
Adjusting the Salt Type
This recipe calls for Kosher salt, which has larger grains than table salt. If you are using fine table salt, reduce the amount to 3/4 teaspoon to avoid over-salting the meat. Always taste a small piece of the cooked chicken to determine if more salt is needed.
Flavor Variation Ideas
Lemon Pepper Twist
For a brighter flavor, replace the Italian seasoning and cumin with 1 teaspoon of lemon pepper seasoning. Add a squeeze of fresh lemon juice over the chicken immediately after it comes out of the oven. This adds a citrusy zing that pairs well with the savory garlic and onion powders.
Spicy Chili Lime Profile
To add heat, include 1/2 teaspoon of cayenne pepper or chipotle powder in the spice rub. After the chicken has rested, drizzle it with a mixture of lime juice and a pinch of salt. This creates a zesty, spicy flavor profile that is excellent for tacos or bowls.
Honey Garlic Glaze Addition
If you prefer a sweeter finish, whisk together honey and minced garlic in a small bowl. Brush this glaze onto the chicken during the last 5 minutes of baking. The high heat will caramelize the honey, creating a sticky, sweet crust on the thighs.
Mediterranean Herb Style
Replace the cumin with extra dried oregano and a pinch of cinnamon. Serve the finished chicken with kalamata olives and crumbled feta cheese on the side. This variation transforms the dish into a Mediterranean-inspired meal with deep, aromatic notes.
Serving and Pairing Suggestions
Roasted Root Vegetables
Since the oven is already at 425°F, you can roast carrots, parsnips, or baby potatoes on a separate tray. Toss them in oil, salt, and pepper, and bake them for about 25-30 minutes. This creates a complete, one-oven meal with minimal extra effort.
Fresh Green Salads
The richness of chicken thighs pairs well with a crisp, acidic salad. A simple mix of arugula, cucumber, and cherry tomatoes with a lemon vinaigrette cuts through the savoriness of the meat. This keeps the meal balanced and refreshing.
Nutritious Grain Bowls
Slice the baked chicken thighs and place them over a bed of quinoa, brown rice, or farro. Add steamed spinach, avocado slices, and a dollop of hummus or tzatziki. This makes the recipe an excellent option for healthy, filling lunches.
Steamed or Roasted Broccoli
Broccoli is a perfect accompaniment that cooks quickly. You can steam it for a clean taste or roast it on the same pan as the chicken for the last 12 minutes. The broccoli florets soak up the savory chicken juices for extra flavor.
Storage and Preservation Tips
Refrigeration Guidelines
Store leftover chicken thighs in an airtight container in the refrigerator for up to 3 to 4 days. Ensure the chicken is cooled slightly before sealing the lid to prevent excess moisture from building up. This helps maintain the texture of the meat.
Freezing Instructions
Baked chicken thighs can be frozen for up to 3 months. Wrap each piece individually in foil or place them in a heavy-duty freezer bag with the air squeezed out. Thaw them in the refrigerator overnight before reheating to preserve the quality.
Using Glass Containers
Glass containers are preferable to plastic for storing cooked meats. Glass does not absorb odors and provides a better seal, which prevents the chicken from picking up other flavors in the fridge. It also makes reheating in the oven or microwave safer.
Reheating Methods for Maximum Juiciness
Oven Reheating
To keep the chicken from drying out, reheat it in the oven at 325°F for about 10 minutes. Place the pieces in a baking dish and add a tablespoon of water or broth to the bottom. Cover the dish with foil to trap the steam and keep the meat moist.
Microwave Reheating
If using a microwave, place the chicken on a microwave-safe plate and cover it with a damp paper towel. Heat in 30-second intervals at medium power until warmed through. This prevents the meat from becoming rubbery or overcooked.
Air Fryer Reheating
An air fryer is excellent for restoring a slight crispness to the exterior. Heat the chicken at 350°F for 3 to 5 minutes. This is the fastest method that still maintains a good texture without drying out the center.
Meal Prep and Make-Ahead Advice
Batch Cooking for the Week
Double or triple the recipe to have protein ready for several days. Bake multiple sheets of chicken at once, rotating the pans halfway through the cooking time. This saves energy and reduces the amount of time you spend in the kitchen during the week.
Pre-Seasoning the Meat
You can prepare the chicken and spice rub up to 24 hours in advance. Store the seasoned thighs in a sealed container or bag in the refrigerator. This allows the spices to penetrate deeper into the meat, enhancing the overall flavor.
Portioning for Easy Access
Divide the cooked and cooled chicken into individual meal prep containers with your chosen sides. This makes it easy to grab a complete meal on your way out the door. Label the containers with the date to ensure you use them within the safe storage window.
Common Cooking Issues and Troubleshooting
Chicken is Too Dry
Dry chicken is usually the result of overcooking. Ensure you are using a meat thermometer and removing the chicken as soon as it hits 165°F. Remember that carryover cooking will raise the temperature by another 5 degrees while resting.
Lack of Browning on the Surface
If the chicken looks pale, it may be because the oven temperature was too low or the meat was too wet. Ensure the oven is fully preheated to 425°F and that you pat the chicken completely dry before adding oil. You can also move the baking sheet to the top rack for the last 5 minutes.
Spices Clumping Together
Clumping happens when spices are not mixed thoroughly or if the oil is not distributed evenly. Stir the spice rub in a bowl first to break up any lumps. Use your hands to massage the rub into the meat to ensure full coverage.
Uneven Cooking Across the Pan
If some pieces are cooked and others are raw, you may have overcrowded the baking sheet. Ensure there is at least an inch of space between each thigh to allow hot air to circulate. If necessary, use two separate baking sheets.
Frequently Asked Questions
Can I use chicken breasts instead?
Yes, but you must reduce the cooking time. Chicken breasts are leaner and cook faster than thighs; they usually take 12-15 minutes at 425°F. Overcooking breasts will make them dry, so monitor the internal temperature closely.
Do I need to sear the chicken in a pan first?
No, searing is not necessary for this recipe. The high oven temperature of 425°F is sufficient to brown the meat and create a savory crust. Skipping the sear saves time and reduces the amount of oil needed.
What is the best thermometer to use?
An instant-read digital probe thermometer is the most accurate tool. Insert the probe into the thickest part of the thigh, avoiding the bone or the pan. This gives you an immediate and precise reading of the internal temperature.
Can I use a glass baking dish instead of a sheet?
You can, but a rimmed baking sheet is better for browning. Glass dishes have higher sides that can trap steam, which may lead to the chicken steaming rather than roasting. If using glass, ensure the chicken is not crowded.
Print
Juicy Oven-Baked Boneless Skinless Chicken Thighs
- Total Time: 30 minutes
- Yield: 8 servings 1x
- Diet: Dairy Free, Gluten Free, Paleo, Whole 30
Description
These easy chicken thighs make a great weeknight meal. Serve them alongside your favorite salad, roasted potatoes or a tray of roasted veggies for a delicious family-friendly meal.
Ingredients
- 2 pounds boneless, skinless chicken thighs (8)
- 1 tablespoon avocado oil
- 2 teaspoons garlic powder
- 2 teaspoons onion powder
- 2 teaspoons Italian seasoning
- 1 teaspoon cumin (or smoked paprika)
- 1 teaspoon Kosher salt
- 1/2 teaspoon black pepper
Instructions
- Step: Preheat oven to 425ºF and line a rimmed baking sheet with parchment paper.
- Step: Remove the chicken from the fridge at least twenty minutes before baking.
- Step: Using a sharp knife, carefully trim excess fat off the chicken thighs and pat them dry with a paper towel.
- Step: In a small bowl combine garlic powder, onion powder, Italian seasoning, cumin, salt and pepper.
- Step: Place chicken thighs in a large bowl, drizzle with avocado oil and sprinkle with spice mixture.
- Step: Use your hands to mix the spices into the chicken and then transfer the chicken onto the prepared baking sheet.
- Step: Bake for 20 minutes or until the chicken has reached an internal temperature of 165ºF.
- Step: Let the chicken rest for 5 minutes so the juices can redistribute and enjoy.
Notes
Change up the flavor of this chicken by swapping out the spices with three tablespoons of your favorite spice blend.
- Prep Time: 10 minutes
- Cook Time: 20 minutes
- Category: Dinner
- Method: Baking
- Cuisine: American
Nutrition
- Serving Size: 1 chicken thigh
- Calories: 157 kcal
- Sugar: 1 g
- Sodium: 393 mg
- Fat: 7 g
- Saturated Fat: 1 g
- Unsaturated Fat: 6 g
- Trans Fat: 0 g
- Carbohydrates: 1 g
- Fiber: 1 g
- Protein: 22 g
- Cholesterol: 108 mg
Keywords: Gluten Free, Low Carb, Keto, Meat, Chicken, Paleo, Whole 30