This recipe delivers a professional-grade crunch and a balanced sweet and spicy glaze in just 30 minutes. It is an efficient way to enjoy authentic Korean-style chicken without the need for takeout. Use these precise techniques to ensure the coating stays crispy even after saucing.

List of ingredients
- 2 pounds chicken breast – cut into 1-inch chunks
- 1 cup cornstarch – for a light, crisp coating
- 1/4 cup flour – all-purpose or gluten-free
- 1/2 teaspoon salt – basic seasoning
- 1/4 teaspoon ground black pepper – basic seasoning
- 2 eggs – beaten to act as a binder
- Canola oil – for deep frying
- 1/4 cup ketchup – for tang and sweetness
- 3 tablespoons gochujang paste – or chili sauce, adjusted for heat
- 1/4 cup honey – for stickiness and sweetness
- 3 tablespoons brown sugar – for depth of flavor
- 1/3 cup soy sauce – for umami and salt
- 1/2 cup water – to thin the sauce
- 3 cloves garlic – minced finely
- 1/4 teaspoon red pepper flakes – for extra spice
- 1 tablespoon cornstarch – for thickening the sauce
- 2 teaspoons sesame oil – for a toasted nutty finish
step-by-step instructions
- Prepare the sauce: In a medium bowl, combine all the SAUCE ingredients and set aside.
- Mix the dry coating: Whisk cornstarch, flour, salt, and black pepper in a large, shallow bowl.
- Prepare the binder: Add beaten eggs to another bowl.
- Heat the oil: Pour about 2 inches of canola oil into a deep frying pan and heat it over medium-high heat.
- First egg dip: Dip the chicken pieces into the beaten eggs.
- First flour coat: Add the chicken chunks to the cornstarch mixture and toss until well coated.
- Double coating: Take each piece and repeat the process; dip it again in the beaten eggs and toss it in the cornstarch mixture. Work in batches and arrange the pieces on a plate to rest for 10 minutes if time permits.
- Fry the chicken: Cook it in batches in the hot oil until golden and crispy.
- Drain: Remove to a plate and set aside.
- Sauce the chicken: Discard the oil, add the chicken back to the pan, and toss with the sauce.
- Garnish: Serve it with a sprinkling of green onion and sesame seeds if desired.
Mastering the Crunch
Maintain Precise Oil Temperature
The oil should be kept between 340 and 370 degrees Fahrenheit for optimal results. If the oil is too cool, the chicken will absorb too much fat and become greasy. If it is too hot, the outside will burn before the inside is fully cooked.
Prevent Pan Overcrowding
Fry the chicken in small batches to avoid dropping the oil temperature. Overcrowding the pan forces the temperature down, which leads to a soggy coating. This ensures every piece maintains a consistent, crispy texture.
Implement the Double Coating Method
Dipping the chicken in egg and cornstarch twice creates a thicker, more durable barrier. This double layer is essential for keeping the chicken crunchy after it is tossed in the sticky glaze. It prevents the sauce from soaking into the meat too quickly.
Allow the Battered Chicken to Rest
Letting the coated chicken pieces sit on a plate for 10 minutes allows the starches to hydrate. This creates a stronger bond between the breading and the meat. This step reduces the likelihood of the coating sliding off during the frying process.
Control Cooking Time for Breast Meat
Since chicken breast is lean, it can dry out quickly if overcooked. Fry the pieces only until they are golden brown, which usually takes a few minutes per side. Monitor the internal temperature to ensure the meat stays juicy while the outside is crisp.
Ingredient Alternatives and Swaps
Using Chicken Wings Instead of Breast
Chicken wings can be used as a substitute for breast chunks. They provide more natural fat and skin, which results in a different type of crispiness. Follow the same coating and frying steps for identical results.
Gluten-Free Flour Options
This recipe works well with gluten-free all-purpose flour blends. Rice flour is another excellent alternative that can increase the overall crispiness. Ensure the flour contains a thickening agent to maintain the structure of the coating.
Adjusting Heat with Chili Sauce
If gochujang is unavailable, a standard chili sauce can be used. Adjust the quantity based on your heat tolerance. You can increase the red pepper flakes for more spice or omit them for a milder version.
Honey Substitutes for Sweetness
Maple syrup or agave nectar can replace honey in the sauce. These alternatives provide the necessary viscosity and sweetness for the glaze. Note that maple syrup may add a slightly different flavor profile to the dish.
Managing Salt with Low-Sodium Soy Sauce
Using low-sodium soy sauce helps prevent the dish from becoming overly salty. This is especially important since the flour coating is also seasoned with salt. Low-sodium options allow the other flavors of the gochujang and garlic to shine through.
Flavor Modifications and Variations
Incorporating Toasted Nuts
Add 1/4 cup of chopped cashews or peanuts after tossing the chicken in the sauce. This adds a nutty flavor and an extra layer of texture. Nuts provide a contrast to the sticky glaze and tender chicken.
Exploring Different Glazes
The chicken can be prepared without the Korean sauce and topped with teriyaki or a homemade barbecue glaze. This changes the flavor profile while keeping the signature double-fried crunch. These alternatives are great for catering to different palate preferences.
Adding Fresh Garnishments
Chopped green onions and toasted sesame seeds are traditional toppings. For more variety, add thinly sliced red chilies or shredded carrots. These additions provide a fresh contrast to the rich, fried chicken.
Adapting for the Air Fryer
While deep frying is traditional, you can air fry the coated pieces. Spray them generously with oil to mimic the deep fry effect. Cook at 400 degrees Fahrenheit, flipping halfway through, until golden brown before saucing.
Complementary Side Dishes
Pairing with Pickled Radishes
Korean pickled radishes provide a cold, acidic contrast to the hot and sweet chicken. The vinegar helps cut through the richness of the fried coating. These are best prepared a day in advance for maximum flavor penetration.
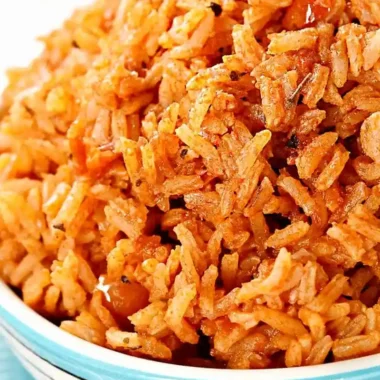
Serving with Coconut Rice
Substitute plain white rice with coconut rice for a richer meal. The creaminess of the coconut milk complements the spicy gochujang glaze. This adds a tropical element that balances the heat of the dish.
Combining with Spicy Cucumber Salad
A chilled cucumber salad with rice vinegar and sesame oil is a refreshing accompaniment. The crisp texture of the cucumbers mirrors the crunch of the chicken. It serves as a palate cleanser between bites of the heavy glaze.
Bed of Noodles Presentation
Serve the sauced chicken on top of a bed of steamed noodles or glass noodles. The noodles absorb the excess sauce from the chicken, ensuring none of the flavor is wasted. This transforms the recipe into a more substantial main course.
Preservation and Reheating
Refrigeration Methods
Store leftover chicken in an airtight container in the refrigerator for up to three days. Ensure the chicken is completely cooled before sealing the lid to prevent steam from making the coating soggy. Keep the sauce-coated pieces separated if possible.
Freezing Leftovers
Place cooked chicken in a heavy-duty freezer bag, removing as much air as possible. They can be frozen for up to three months. For easier portioning, freeze the pieces in single-serving bags.
Safe Defrosting Procedures
Thaw frozen chicken overnight in the refrigerator. This slow defrosting process helps preserve the integrity of the breading better than rapid thawing. Avoid thawing at room temperature to maintain food safety.
Oven Reheating for Crispiness
Reheat the chicken in the oven at 375 degrees Fahrenheit for approximately 15 minutes. Avoid using a microwave, as it traps moisture and makes the coating soft and rubbery. The oven allows the exterior to crisp up again.
Solving Common Problems
Why is my chicken tough?
Toughness usually results from overcooking the breast meat, which causes the fibers to tighten. Ensure the oil is hot enough so the chicken cooks quickly without drying out. Maintain a temperature around 350 degrees Fahrenheit to balance speed and tenderness.
Why is the chicken too salty?
Excess salt often comes from using regular soy sauce in combination with the salted flour coating. Switch to low-sodium soy sauce to mitigate this. If you prefer a very salty coating, omit the salt from the dry flour mixture.
Why is the coating sliding off?
The breading usually slides off if the oil is not hot enough or if the chicken was not patted dry before dipping. Ensure the oil reaches at least 340 degrees Fahrenheit before adding the meat. Following the double-dip method also helps lock the coating in place.
Frequently Asked Questions
Can I use a different oil for frying?
Yes, any neutral oil with a high smoke point will work. Peanut oil or vegetable oil are suitable alternatives to canola oil. Avoid using extra virgin olive oil, as its smoke point is too low for deep frying.
How long does the sauce last?
The sauce can be stored in a sealed jar in the refrigerator for up to one week. If the sauce thickens too much over time, simply whisk in a teaspoon of water before reheating. Warm it gently in a pan before tossing with the chicken.
Can I make the sauce in advance?
Preparing the sauce ahead of time allows the garlic and spices to meld. It can be made a day in advance and kept chilled. This streamlines the cooking process, allowing you to focus on the frying technique.
What is the best way to avoid oil splatter?
Ensure the chicken is not dripping with excess egg before placing it in the oil. Gently lower the pieces into the pan using tongs rather than dropping them. Keep a lid nearby to cover the pan if splatter becomes excessive.
Print
Korean Fried Chicken
- Total Time: 30 minutes
- Yield: 4 servings 1x
- Diet: General
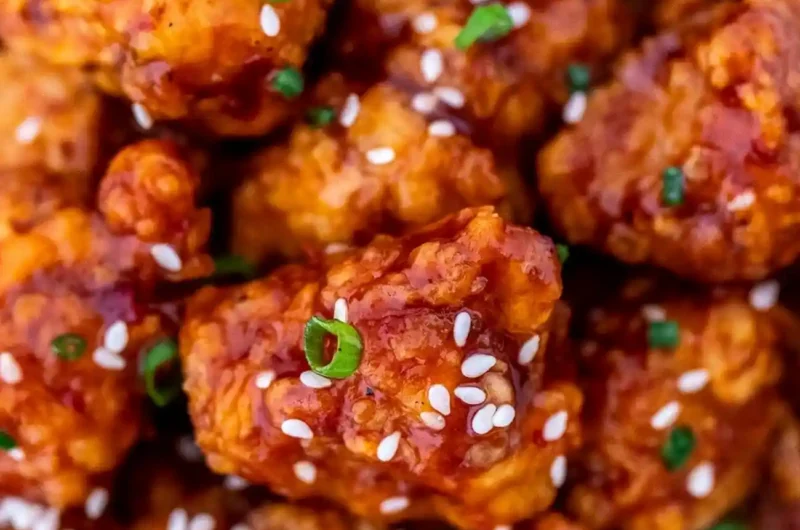
Description
Authentic and perfectly crispy Korean Fried Chicken with a signature crunch and a sweet, tangy, and spicy glaze, ready in just 30 minutes.
Ingredients
- 2 pounds chicken breast (cut into 1-inch chunks)
- 1 cup cornstarch
- 1/4 cup flour
- 1/2 teaspoon salt
- 1/4 teaspoon ground black pepper
- 2 eggs (beaten)
- Canola oil for frying
- 1/4 cup ketchup
- 3 tablespoons gochujang paste
- 1/4 cup honey
- 3 tablespoons brown sugar
- 1/3 cup soy sauce
- 1/2 cup water
- 3 cloves garlic (minced)
- 1/4 teaspoon red pepper flakes
- 1 tablespoon cornstarch
- 2 teaspoons sesame oil
Instructions
- Step: In a medium bowl, combine all the SAUCE ingredients and set aside.
- Step: Whisk cornstarch flour, salt, and black pepper in a large, shallow bowl.
- Step: Add beaten eggs to another bowl.
- Step: Pour about 2 inches of canola oil into a deep frying pan and heat it over medium-high heat.
- Step: Dip the chicken pieces into the beaten eggs.
- Step: Add the chicken chunks to the cornstarch mixture and toss until well coated.
- Step: Repeat the process: dip again in the beaten eggs and toss in the cornstarch mixture. Arrange on a plate and let rest for 10 minutes.
- Step: Cook in batches in the hot oil until golden and crispy.
- Step: Remove to a plate and set aside.
- Step: Discard the oil, add the chicken back to the pan, and toss with the sauce.
- Step: Serve with a sprinkling of green onion and sesame seeds.
Notes
Maintain oil temperature between 340 and 370 degrees F to ensure maximum crispiness and prevent the coating from sliding off. Avoid overcrowding the pan to keep oil temperature consistent.
- Prep Time: 15 minutes
- Cook Time: 15 minutes
- Category: Main Course
- Method: Frying
- Cuisine: Korean
Nutrition
- Serving Size: 1 serving
- Calories: 611 kcal
- Sugar: 31 g
- Sodium: 1961 mg
- Fat: 10 g
- Saturated Fat: 2 g
- Unsaturated Fat: 8 g
- Trans Fat: 0 g
- Carbohydrates: 70 g
- Fiber: 1 g
- Protein: 54 g
- Cholesterol: 226 mg
Keywords: Korean Fried Chicken, crispy chicken, Asian cuisine, spicy chicken