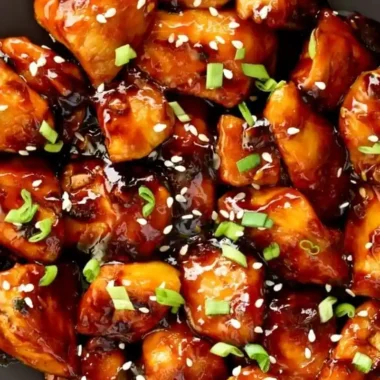
This fast honey garlic chicken is a perfect weeknight meal that comes together in just 15 minutes. The sticky, sweet sauce coats seared chicken tenders for a restaurant-quality dinner using simple pantry staples. It is an efficient recipe that balances savory garlic with a touch of heat.
List of ingredients
- 1 pound chicken tenderloins (or boneless skinless chicken breasts cut into strips) – use uniform sizes for even cooking.
- 3 tablespoons cornstarch – creates a light, crispy exterior.
- 1 teaspoon dried oregano – adds an earthy, herbal note.
- 1/2 teaspoon salt – enhances all the flavors.
- 1/4 teaspoon freshly ground black pepper – provides a subtle spicy undertone.
- 2 tablespoons butter, divided – adds richness and helps with browning.
- 1 tablespoon olive oil – prevents the butter from burning at high heat.
- 3 cloves garlic, minced – use fresh garlic for the best aromatic punch.
- 3 tablespoons honey – provides the signature sweetness and sticky texture.
- 2 tablespoons low sodium soy sauce – adds saltiness and deep umami flavor.
- 1 tablespoon rice vinegar – provides a bright acidity to balance the sugar.
- 1/2 tablespoon sriracha or hot chili sauce – adds a customizable level of heat.
- Chopped fresh parsley – used for a fresh, colorful garnish.
- Sesame seeds – adds a nutty finish and visual appeal.
step-by-step instructions
- Prepare the coating: Combine the cornstarch, oregano, salt, and pepper in a shallow plate. Pat the chicken tenders dry with paper towels and coat each piece thoroughly with the cornstarch mixture.
- Sear the chicken: Heat 1 tablespoon of butter and 1 tablespoon of olive oil in a large skillet over medium-high heat. Add the chicken tenders and cook for 5 minutes without moving them to develop a crust.
- Finish cooking: Flip the chicken tenders and add the remaining tablespoon of butter to the pan. Continue cooking for another 4 to 5 minutes or until the internal temperature reaches 165°F.
- Mix the sauce: While the chicken is searing, whisk together the minced garlic, honey, soy sauce, rice vinegar, and hot chili sauce in a small bowl. Add extra sriracha if you prefer a spicier glaze.
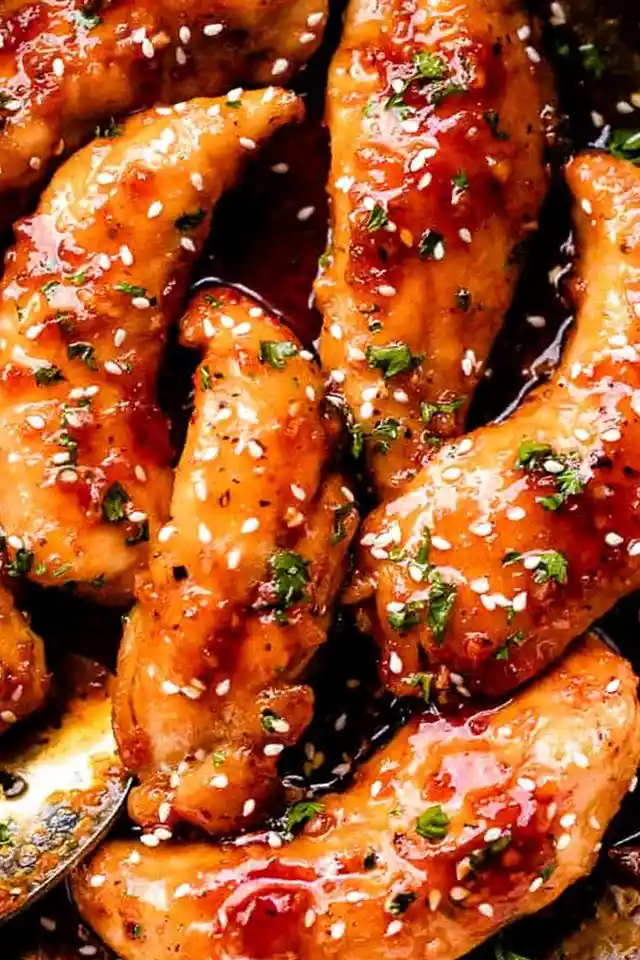
- Glaze and thicken: Lower the skillet heat to medium and pour the sauce over the chicken. Cook for 2 more minutes, turning the chicken frequently until the sauce thickens and coats the meat.
- Final touch: Remove the skillet from the heat. Garnish with fresh parsley and sesame seeds, then drizzle the remaining pan sauce over the tenders before serving.
Professional Searing Techniques
Pat the Chicken Dry for Better Browning
Excess moisture on the surface of the meat creates steam when it hits the hot oil, which prevents the chicken from searing. Use heavy-duty paper towels to pat every piece of chicken completely dry before applying any coating.
This ensures the cornstarch adheres better and allows the chicken to develop a golden-brown crust quickly. A dry surface is essential for achieving the desired texture in a short cooking window.
Optimize the Coating Adhesion
After dredging the chicken in the cornstarch mixture, let the pieces sit for about 10 minutes before frying. This allows the cornstarch to hydrate and bond more effectively to the meat.
When the coating is well-set, it is less likely to fall off in the pan. This results in a more consistent crust that helps the honey garlic sauce cling to the chicken better.
Manage Your Pan Temperature
Ensure the olive oil is shimmering and just starting to show a wisp of smoke before adding the chicken. If the oil is too cold, the chicken will absorb the fat and become soggy rather than crispy.
Avoid overcrowding the skillet, as adding too many pieces at once lowers the pan temperature. Cook in batches if necessary to maintain the high heat required for a proper sear.
Use an Instant-Read Thermometer
Cooking chicken tenders can be tricky because they vary in thickness. Use a digital meat thermometer to ensure the thickest part of the meat reaches exactly 165°F.
Pulling the chicken off the heat just as it hits this temperature prevents the meat from becoming dry or rubbery. Overcooking chicken breasts or tenders quickly degrades the texture.
Ingredient Substitutions and Swaps
Alternative Protein Choices
If you do not have tenderloins, boneless skinless chicken thighs are an excellent alternative. Thighs have a higher fat content, which makes them more forgiving and juicy during high-heat searing.
When using thighs, trim excess fat and cut them into uniform 1-inch strips. They may require an extra minute or two of cooking time compared to tenders.
Replacing Honey for Different Sweeteners
Maple syrup is a great substitute for honey and provides a slightly more robust, woody flavor. Agave nectar also works well and offers a neutral sweetness that lets the garlic shine.
Keep in mind that maple syrup is slightly thinner than honey. You may need to simmer the sauce for an additional minute to achieve the same sticky consistency.
Gluten-Free Sauce Options
To make this recipe gluten-free, replace the soy sauce with tamari or coconut aminos. Tamari provides a similar salt profile, while coconut aminos are slightly sweeter and less salty.
If using coconut aminos, you might want to slightly reduce the amount of honey to maintain the balance of flavors. Ensure your cornstarch is certified gluten-free if necessary.
Vinegar Alternatives for Acidity
While rice vinegar is preferred for its mildness, apple cider vinegar is a suitable replacement. It provides a similar tang but with a slightly fruitier undertone.
Avoid using heavy balsamic vinegar, as the strong flavor and dark color will overpower the honey and garlic. A light white distilled vinegar can work but is much sharper, so use slightly less.
Flavor Variations and Additions
Incorporating Fresh Ginger
Adding one teaspoon of freshly grated ginger to the sauce mixture adds a bright, zesty heat. Ginger complements the soy and honey perfectly, giving the dish a more traditional Asian-inspired profile.
Grate the ginger finely so it integrates smoothly into the sauce. Avoid using dried ginger powder, as it lacks the aromatic punch of the fresh root.
Adding Garden Vegetables
You can turn this into a full meal by adding sliced bell peppers, snap peas, or broccoli to the skillet. Sauté the vegetables first, remove them, then add them back when the sauce is thickening.
This method ensures the vegetables stay crisp and vibrant. The honey garlic sauce glazes the vegetables just as well as it does the chicken.
Increasing the Heat Level
For those who enjoy more spice, add a pinch of crushed red pepper flakes during the searing process. This infuses the oil with heat that penetrates the chicken.
You can also increase the sriracha amount or add a teaspoon of sambal oelek for a more complex chili flavor. Always taste the sauce before the final simmer to adjust the heat.
Citrus Infusion for Brightness
Adding a squeeze of fresh lemon or lime juice at the very end of cooking brightens the entire dish. The citrus cuts through the richness of the butter and the sweetness of the honey.
Zesting a bit of the lemon peel into the garnish also adds a fresh aroma. This is particularly effective if you are serving the chicken with a light summer salad.
Serving and Pairing Ideas
Traditional Grain Pairings
Fragrant Jasmine rice is the most classic pairing for this dish, as it absorbs the extra pan sauce beautifully. Basmati rice is another great option for a lighter, fluffier texture.
For a more nutrient-dense option, try quinoa or brown rice. These grains provide a nutty contrast to the sweet and sticky glaze.
Low-Carb Vegetable Bases
Serve the honey garlic chicken over cauliflower rice or sautéed zucchini noodles (zoodles) for a low-carb alternative. The sauce provides enough flavor to make these vegetables satisfying.
Steamed bok choy or sautéed spinach also work well as a bed for the chicken. The bitterness of the greens balances the sweetness of the honey.
Fresh Side Salad Suggestions
An Asian-style cucumber salad with rice vinegar and sesame oil provides a refreshing contrast to the rich chicken. The coolness of the cucumber cleanses the palate between bites.
A simple slaw made with shredded cabbage, carrots, and a lime dressing also complements the flavors. These sides add necessary crunch and acidity to the meal.
Appetizer Style Presentation
To serve this as a party appetizer, cut the finished tenders into smaller, two-bite pieces. Arrange them on a platter and secure each piece with a decorative toothpick.
Drizzle extra sauce over the platter and sprinkle with an abundance of sesame seeds and chopped cilantro. This transforms a dinner recipe into a crowd-pleasing finger food.
Storage and Reheating Guide
Refrigerator Storage Method
Store leftover chicken in an airtight glass container to keep the sauce from leaking and the meat from drying out. Ensure the chicken is completely cooled before sealing the lid to prevent condensation.
The chicken will stay fresh and flavorful in the refrigerator for 3 to 4 days. Spoon any remaining pan sauce over the meat before storing to maintain moisture.
Freezer Storage Instructions
For long-term storage, place the cooked chicken and sauce in a freezer-safe bag or container. Squeeze out as much air as possible to prevent freezer burn.
This dish can be frozen for up to 3 months. Note that the sauce may separate slightly during the freezing process, but it will come back together upon reheating.
Oven Reheating for Texture
To maintain the best texture, reheat the chicken in a baking dish at 300°F. This slow heating prevents the chicken from overcooking while warming the sauce through.
Cover the dish with foil to trap moisture and prevent the honey from burning. Heat until the internal temperature is warm, usually about 10 to 15 minutes.
Quick Microwave Reheating
For a faster option, use the microwave on medium power. Arrange the tenders on a microwave-safe plate and cover them with a damp paper towel to keep the meat tender.
Heat in 30-second intervals, stirring or flipping the chicken between each session. This ensures the sauce is evenly distributed and the chicken doesn’t become rubbery.
Troubleshooting and FAQs
Why is my sauce too thin?
If the sauce hasn’t thickened after two minutes, it may be because the pan temperature was too low or the honey variety was too liquid. Continue to simmer on medium heat for another minute while stirring.
If it remains thin, you can mix a tiny pinch of cornstarch with a teaspoon of water and stir it into the bubbling sauce. This will create an instant thicken effect.
Can I make this in an air fryer?
Yes, you can air fry the coated chicken tenders at 400°F for about 8 to 10 minutes, turning halfway through. However, you must still prepare the sauce in a pan on the stove.
Once the chicken is air-fried, toss it in the simmered sauce using a bowl or skillet. This gives you the crispiness of the air fryer with the flavor of the glaze.
How do I stop the garlic from burning?
Garlic burns quickly at high temperatures, which creates a bitter taste. In this recipe, the garlic is added as part of the sauce after the chicken is already seared.
If you choose to sauté the garlic first, add it only during the last 30 seconds of the searing process. This ensures the garlic becomes fragrant without turning brown or bitter.
Why did the chicken stick to the pan?
Sticking usually happens if the pan isn’t hot enough or if the chicken was moved too early. Wait for the chicken to naturally release from the pan once a crust has formed.
Using a heavy-bottomed stainless steel or non-stick skillet helps distribute heat more evenly. Ensure the butter and oil are fully melted and shimmering before adding the meat.
Print
Quick Honey Garlic Chicken Tenders
- Total Time: 20 minutes
- Yield: 4 servings 1x
- Diet: General
Description
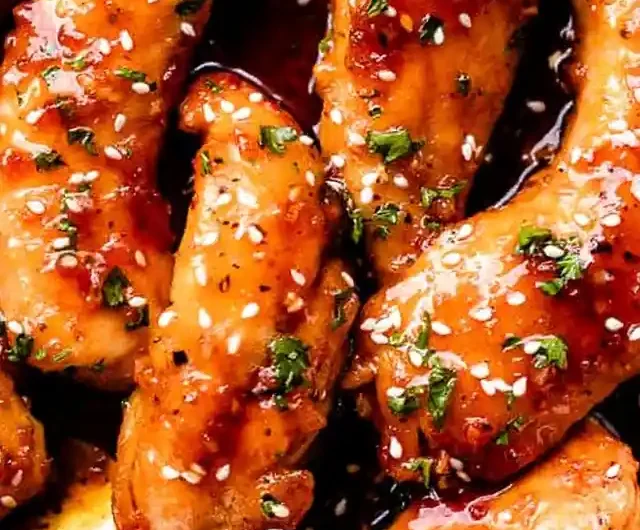
This Honey Garlic Chicken recipe features seared chicken tenders smothered in the most amazing honey garlic sauce! This family favorite is easy to make and ready in minutes.
Ingredients
- 1 pound chicken tenderloins (or boneless skinless chicken breasts cut into strips)
- 3 tablespoons cornstarch
- 1 teaspoon dried oregano
- ½ teaspoon salt
- ¼ teaspoon freshly ground black pepper
- 2 tablespoons butter, divided
- 1 tablespoon olive oil
- 3 cloves garlic, minced
- 3 tablespoons honey
- 2 tablespoons low sodium soy sauce
- 1 tablespoon apple cider vinegar
- ½ tablespoon sriracha or hot chili sauce
- chopped fresh parsley, for garnish
- sesame seeds, for garnish
Instructions
- Prep: Combine the cornstarch, oregano, salt, and pepper in a shallow plate. Pat dry the chicken tenders with paper towels and coat them with the cornstarch mixture.
- Pan-fry the chicken tenders: Heat 1 tablespoon butter and 1 tablespoon olive oil in a large skillet set over medium-high heat. Add the chicken tenders to the hot skillet and cook for 5 minutes. Flip over the chicken tenders, add the remaining butter to the skillet, and continue to cook for 4 to 5 more minutes or until the chicken is cooked through.
- Make the honey garlic sauce: In the meantime, combine the garlic, honey, soy sauce, apple cider vinegar, and hot chili sauce in a mixing bowl; whisk to combine. If you like more heat, add more hot chili sauce.
- Combine: Lower the heat to medium. Add the sauce to the chicken and continue to cook for 2 more minutes or until the sauce starts to thicken. Turn the chicken over to coat with the sauce.
- Serve: Remove the honey garlic chicken from the heat and garnish the chicken tenders with parsley and sesame seeds. Drizzle with the pan sauce and serve.
Notes
For crispier chicken, pat the pieces dry before coating and let them sit for 10-15 minutes. Ensure the oil in the skillet is shimmering before adding the chicken to prevent it from becoming soggy.
- Prep Time: 5 minutes
- Cook Time: 15 minutes
- Category: Dinner, Appetizer
- Method: Pan-frying
- Cuisine: American, Asian
Nutrition
- Serving Size: 1 serving
- Calories: 291 kcal
- Sugar: 13 g
- Sodium: 784 mg
- Fat: 12 g
- Saturated Fat: 5 g
- Unsaturated Fat: 7 g
- Trans Fat: 0 g
- Carbohydrates: 20 g
- Fiber: 1 g
- Protein: 25 g
- Cholesterol: 88 mg
Keywords: honey garlic chicken, chicken tenders, quick dinner, easy chicken recipe