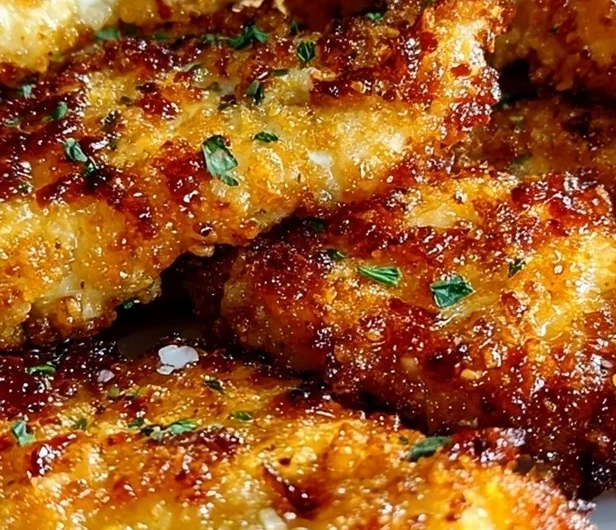
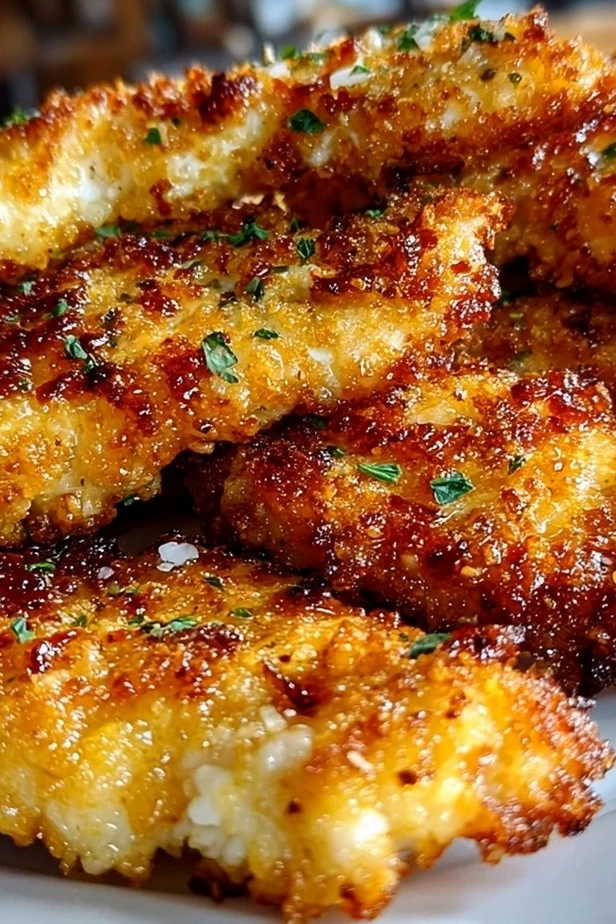
These gluten free chicken tenders offer a satisfying crunch and tender interior, making them a perfect choice for a quick weeknight dinner. With simple pantry staples, you can create a restaurant-quality meal that everyone at your table will enjoy. The preparation is straightforward, ensuring you get golden-brown results every single time.
List of ingredients
- 1 lb chicken tenders
- 1 cup gluten free all-purpose flour
- 1 tsp garlic powder
- 1 tsp paprika
- 1/2 tsp salt
- 1/2 tsp black pepper
- 2 large eggs
- 1 cup gluten free breadcrumbs
- Cooking oil for frying (such as avocado or vegetable oil)
step-by-step instructions
- Step: In a shallow bowl, combine gluten free flour, garlic powder, paprika, salt, and pepper.
- Step: In a separate bowl, beat the eggs until smooth.
- Step: Place gluten free breadcrumbs in a third bowl.
- Step: Dip each chicken tender first into the flour mixture, then into the beaten eggs, and finally coat with the breadcrumbs.
- Step: Heat oil in a skillet over medium heat.
- Step: Fry the chicken tenders for 3-4 minutes on each side or until golden brown and cooked through.
- Step: Place cooked tenders on a paper towel-lined plate to drain excess oil.
- Step: Serve hot with your favorite dipping sauce.
Refining your breading technique
Ensuring consistent adhesion
To prevent the breading from peeling away during the frying process, it is vital to ensure the chicken surface is dry before starting the flour coat. Moisture on the surface of the meat can steam the underside of the breading, creating a layer of separation. Always use a paper towel to remove surface dampness before moving to the flour dredging step.
Managing breadcrumb distribution
When you reach the breadcrumb coating phase, use your hands to press the crumbs firmly into the egg-washed chicken. Simply rolling the tenders in the crumbs is often insufficient for a uniform crust. Applying manual pressure ensures every crevice is covered, resulting in a more consistent crunch in every single bite.
Perfecting the frying environment
Maintaining proper oil temperature
The secret to non-greasy, crispy tenders is keeping the oil at a stable, medium-high temperature throughout the cooking process. If the oil is not hot enough, the breading will absorb the fat instead of crisping up, leading to a soggy texture. Use a kitchen thermometer to check the oil, ensuring it stays around 350°F for the most efficient heat transfer.
Avoiding crowded cooking surfaces
Never overcrowd your skillet, as this leads to a rapid drop in oil temperature and potential sticking. Cooking in batches allows the oil to maintain its heat and gives each piece of chicken enough space to develop an even, golden crust. Space your tenders out so that they are not touching, which promotes better airflow and browning.
Flavor variations and customization
Exploring spice alternatives
While garlic and paprika provide a classic profile, you can experiment with other seasonings to suit your preferences. Consider adding a pinch of dried oregano or thyme to the flour mixture for an earthy Mediterranean flair. Alternatively, a dash of onion powder can enhance the savory notes without adding unnecessary moisture.
Incorporating savory additions
For a richer crust, consider mixing finely grated hard cheese into your breadcrumb bowl. Parmesan cheese works exceptionally well in this role, adding a salty, nutty complexity that pairs beautifully with the fried chicken. Just ensure the cheese is finely grated so it incorporates smoothly into the crumb mixture.
Optimizing storage and reheating
Managing leftovers effectively
If you find yourself with extra tenders, allow them to cool completely before placing them in an airtight container. Refrigeration can soften the crust, so it is important to store them in a single layer if possible to prevent clumping. Properly stored, the chicken will remain fresh and safe to eat for up to three days.
Restoring crispness during reheating
Avoid the microwave when reheating your leftover chicken, as it will inevitably make the coating mushy and unappealing. Instead, preheat your oven to 400°F and place the tenders on a wire rack set over a baking sheet. Heat for approximately 8-10 minutes, which allows hot air to circulate under and around the chicken to revive that initial crunch.
Addressing common kitchen questions
How can I make this recipe for a larger group?
To scale this recipe, simply keep the ratio of ingredients consistent and prepare the chicken in multiple, smaller batches. If you are serving a crowd, you can keep finished batches warm in a low-temperature oven (around 200°F) while you finish frying the remaining pieces. This ensures everyone gets a hot, crispy portion at the same time.
What are the best dipping sauces for these tenders?
The neutral flavor of the chicken and the savory coating pair well with a wide variety of sauces. Creamy ranch, honey mustard, or a sweet and spicy barbecue sauce are traditional favorites that complement the crispy exterior perfectly. For a zestier option, consider a mild curry mayonnaise or a tangy lime-infused dip to brighten the flavor profile.
Is it possible to prepare these ahead of time?
You can certainly streamline your meal preparation by breading the chicken tenders in advance. Once they are coated in breadcrumbs, arrange them on a parchment-lined tray and refrigerate them for up to a few hours before you plan to fry them. This helps the coating set firmly, which can actually lead to better results during the cooking phase.
What is the benefit of using gluten free all-purpose flour?
Gluten free all-purpose flour provides the necessary structure to anchor the egg wash to the meat. Many blends include xanthan gum, which helps mimic the elasticity and binding properties of standard wheat flour. This addition is crucial for ensuring the coating remains intact throughout the frying process.
Can I replace the eggs if I have an allergy?
If you need an egg-free alternative, a mixture of cornstarch and water or a commercial gluten free egg replacer can often serve as an effective binder. These alternatives create a slightly different crust texture but still perform the essential job of holding the breadcrumbs in place. Always verify that your chosen substitute is compatible with high-heat frying.
How do I know when the chicken is fully cooked?
The most reliable way to check for doneness is to use an instant-read meat thermometer inserted into the thickest part of the tender. You are looking for an internal temperature of 165°F. This ensures the chicken is safe to consume while remaining succulent and moist inside the golden-brown crust.
Print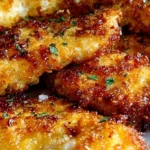
Crispy Gluten Free Chicken Tenders
- Total Time: 20 minutes
- Yield: 4 servings 1x
- Diet: Gluten-Free
Description
Crispy and tender gluten free chicken tenders perfect for a quick and healthy meal that the whole family will love.
Ingredients
- 1 lb chicken tenders
- 1 cup gluten free all-purpose flour
- 1 tsp garlic powder
- 1 tsp paprika
- 1/2 tsp salt
- 1/2 tsp black pepper
- 2 large eggs
- 1 cup gluten free breadcrumbs
- Cooking oil for frying (such as avocado or vegetable oil)
Instructions
- Step: In a shallow bowl, combine gluten free flour, garlic powder, paprika, salt, and pepper.
- Step: In a separate bowl, beat the eggs until smooth.
- Step: Place gluten free breadcrumbs in a third bowl.
- Step: Dip each chicken tender first into the flour mixture, then into the beaten eggs, and finally coat with the breadcrumbs.
- Step: Heat oil in a skillet over medium heat.
- Step: Fry the chicken tenders for 3-4 minutes on each side or until golden brown and cooked through.
- Step: Place cooked tenders on a paper towel-lined plate to drain excess oil.
- Step: Serve hot with your favorite dipping sauce.
Notes
For extra crispiness, bake the coated tenders at 400°F for 15-20 minutes, flipping halfway through.
- Prep Time: 10 minutes
- Cook Time: 10 minutes
- Category: Dinner
- Method: Fried
- Cuisine: American
Nutrition
- Serving Size: 1 serving
- Calories: 320 kcal
- Sugar: 1 g
- Sodium: 480 mg
- Fat: 12 g
- Saturated Fat: 2 g
- Unsaturated Fat: 8 g
- Trans Fat: 0 g
- Carbohydrates: 28 g
- Fiber: 2 g
- Protein: 26 g
- Cholesterol: 115 mg
Keywords: gluten free, chicken tenders, crispy chicken, dinner, family friendly