These crunchy cheese taco shells are an ideal low-carb substitute for corn or flour tortillas. They require only three simple ingredients and can be prepared in about 15 minutes.
List of ingredients
- 2 cup Cheddar cheese (shredded) – provides the main structure and flavor.
- 1/4 tsp Cumin – adds a warm, earthy aroma.
- 1/8 tsp Chili powder – introduces a mild, savory spice.
step-by-step instructions
- Prepare Oven: Preheat the oven to 375 degrees F (191 degrees C). Line either two jelly roll pans or one XL baking sheet with parchment paper to prevent sticking.
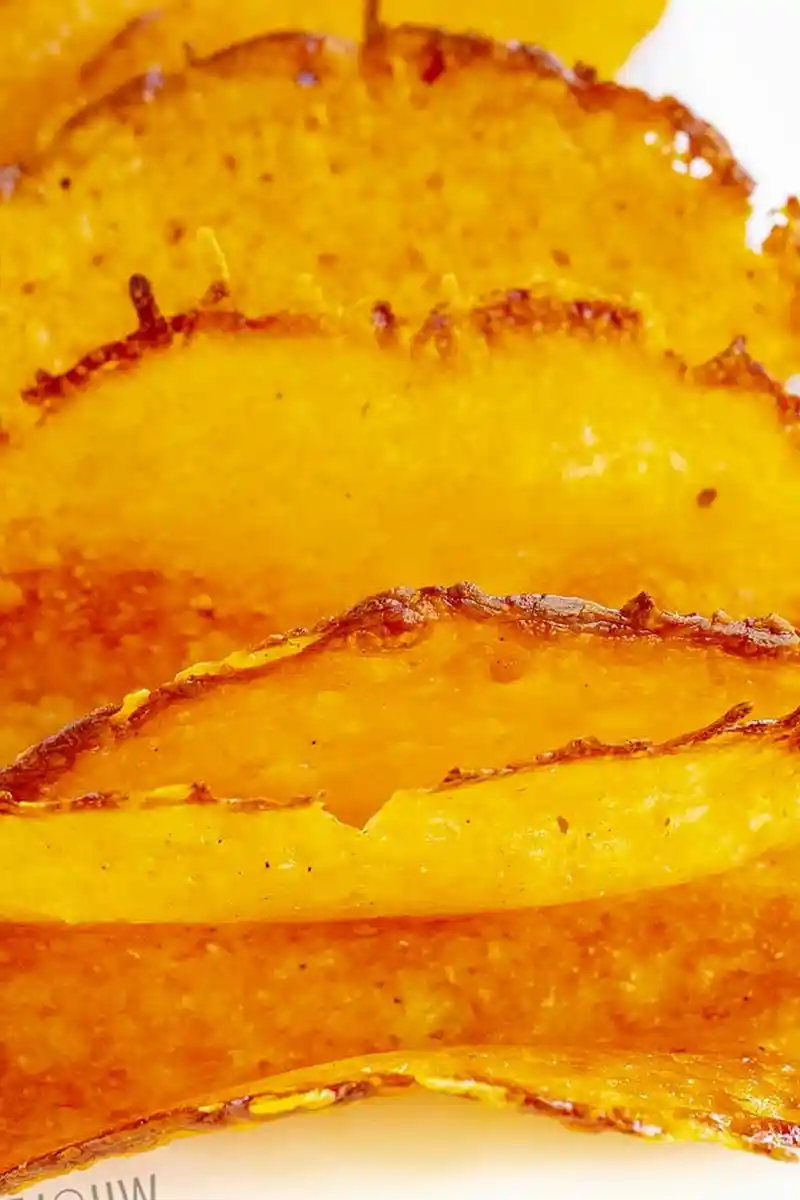
- Form Shells: Arrange the shredded cheese into circles on the baking sheet, ensuring the thickness is consistent throughout each circle. Sprinkle the cumin and chili powder evenly over the cheese.
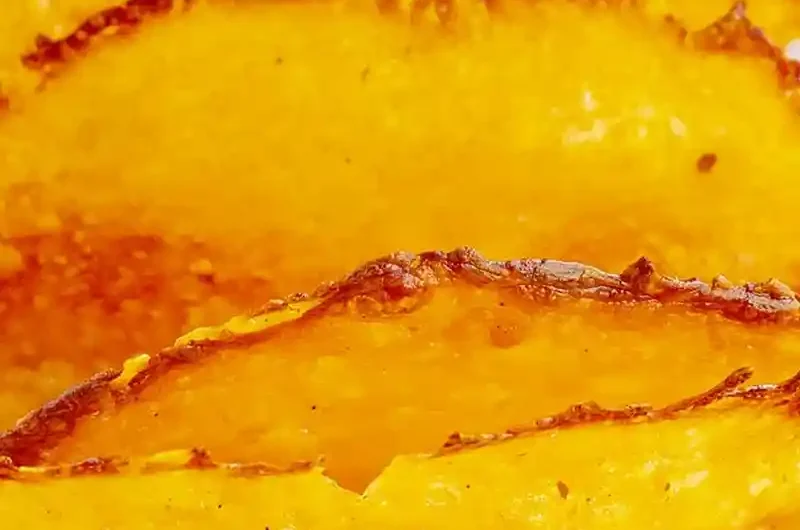
- Bake: Place the pans in the oven for 5-7 minutes. Remove them once the edges start to brown and bubbles form on the surface.
- Prepare Mold: While the cheese bakes, set up drying stations by placing wooden spoons horizontally across two overturned glasses.
- Initial Cool: Remove the pan from the oven and let the cheese circles rest undisturbed for approximately 1 minute.
- Shape and Set: Using a flat turner or spatula, carefully lift each cheese circle and drape it over a wooden spoon. Allow them to harden in this position for about 5 minutes.
Expert Tips for Perfect Crispness
Utilize High Quality Parchment Paper
Always use parchment paper rather than aluminum foil or ungreased metal pans. Cheese contains oils that may prevent some sticking, but the proteins can still bond to the pan. Parchment ensures a clean release without tearing the delicate shells.
Maintain Consistent Cheese Thickness
Use a spoon to spread the shredded cheese into an even disc. If the center is thicker than the edges, the outside will burn before the middle is fully cooked. Uniform thickness ensures the entire shell hardens at the same rate.
Monitor the Browning Process
Watch the oven closely during the final two minutes of baking. The shells are ready when the perimeter is a deep golden brown and the surface is bubbling. If you pull them out too early, they will lack the structural integrity to hold fillings.
Coordinate Your Timing
Set up your glasses and spoons before the cheese comes out of the oven. The window of pliability is very short, usually lasting only a few minutes. If you wait too long to shape them, the cheese will crack instead of bend.
Use a Solid Metal Spatula
Avoid using slotted turners or spatulas with holes. A solid metal turner provides full support under the softened cheese. This prevents the shell from sagging or breaking as you transfer it from the pan to the spoon.
Cheese Substitutions and Flavor Variations
Using Monterey Jack Cheese
Monterey Jack is a suitable alternative if you prefer a milder flavor and a slightly different melt. It still provides a good crunch when baked at high temperatures. You can also mix it with Cheddar for a balanced flavor profile.
Incorporating Garlic Powder
For an extra savory kick, add a pinch of garlic powder to the spice mix. This complements the cumin and chili powder well. Ensure the spices are sprinkled evenly to avoid concentrated pockets of flavor.
Adding Grated Parmesan
Mixing a small amount of finely grated Parmesan into the Cheddar can increase the overall crispness. Parmesan has less moisture than Cheddar, which helps the shell harden faster. Use a ratio of 4 parts Cheddar to 1 part Parmesan.
Avoiding Soft Cheeses
Do not use mozzarella, brie, or ricotta for this recipe. These cheeses have a higher moisture content and different protein structures that prevent them from becoming rigid. They will remain soft or become chewy rather than crispy.
Serving Suggestions and Filling Ideas
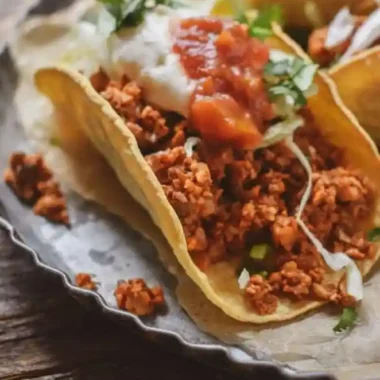
Hearty Beef Fillings
Fill the shells with seasoned ground beef or slow-cooked beef barbacoa. Ensure the meat is well-drained of excess grease to prevent the shell from softening too quickly. A dry-rubbed beef filling maintains the crunch of the cheese.
Shredded Chicken Options
Poached and shredded chicken breast mixed with a touch of lime juice and cumin works well. For a creamier version, use a small amount of cream cheese or Greek yogurt. Keep the filling temperature moderate to avoid melting the shell.
Fresh Vegetable Toppings
Layer the shells with shredded romaine lettuce, diced tomatoes, and sliced radishes. These cold ingredients provide a refreshing contrast to the rich cheese shell. Add thinly sliced jalapeños for an extra spicy element.
Creamy Avocado Sauces
Top the tacos with a thick guacamole or a blended avocado lime crema. The fat in the avocado complements the sharpness of the Cheddar. Apply the sauce in a thin layer to avoid overwhelming the shell.
Creating Larger Cheese Bowls
To make a taco bowl, increase the diameter of the cheese circles on the baking sheet. Instead of using a spoon, drape the hot cheese over the bottom of an overturned small bowl. This creates a sturdy vessel for taco salads.
Storage and Preservation
Short Term Refrigeration
Store leftover shells in an airtight container in the refrigerator. Place sheets of parchment paper between the shells to prevent them from sticking together. Note that refrigeration can introduce moisture, which reduces the crispness.
Maintaining Maximum Crunch
If the shells lose their crispness in the fridge, do not eat them cold. The fats in the cheese solidify, which changes the texture. A quick reheating process is necessary to restore the original snap.
Freezing for Future Use
Cheese shells can be frozen if wrapped individually in parchment and placed in a freezer bag. They will last for up to one month. Thaw them slightly at room temperature before reheating.
Reheating Methods
Using a Conventional Oven
Place the shells on a baking sheet at 350 degrees F (177 degrees C) for 2-3 minutes. This evaporates surface moisture and remelts the fats. Remove them as soon as they feel firm to avoid over-browning.
Air Fryer Quick Heat
Pop the shells into an air fryer at 350 degrees F (177 degrees C) for about 60 to 90 seconds. The rapid air circulation is highly effective at restoring the crunch. Monitor them closely as they can burn quickly.
Avoiding the Microwave
Do not reheat cheese shells in the microwave. The microwave heats the fats unevenly and often turns the cheese rubbery. This destroys the structural integrity of the taco shell.
Troubleshooting Common Issues
Shells Breaking During Shaping
If the shells crack when you bend them, they have likely cooled too much. Work faster or slightly increase the resting time to 30 seconds instead of a full minute. The cheese must be pliable yet not liquid.
Cheese Sticking to the Baking Sheet
Sticking usually occurs if the parchment paper is of low quality or if the cheese was removed too early. Ensure the edges are well-browned before attempting to lift. Use a sharp-edged spatula to get under the shell cleanly.
Shells Remaining Too Soft
Soft shells are typically the result of underbaking. Ensure the cheese is bubbling and the edges are a distinct brown color. If you are using a lower-fat cheese, you may need an extra minute of cook time.
Uneven Browning Patterns
Uneven color often happens if the oven has hot spots or if the cheese was not spread evenly. Rotate the pan halfway through the baking time. Ensure the cheese circles are the same thickness across the entire surface.
Frequently Asked Questions
Can I make these in an air fryer?
Yes, you can bake the cheese circles in an air fryer using a piece of perforated parchment paper. Cook at 375 degrees F for 3-5 minutes, then shape them over a spoon as usual.
Which cheese melts the best for shells?
Sharp Cheddar is the gold standard because it has a great balance of fat and protein. Pepper Jack is also an excellent choice for those who want built-in heat.
How many shells can I make at once?
Depending on your pan size, you can usually fit 6 to 8 shells on a large baking sheet. Avoid crowding the pan to ensure heat circulates evenly around each circle.
Do these shells hold up to heavy fillings?
Yes, once fully hardened, they are surprisingly strong. They can hold ground beef, beans, and vegetables easily, though they are more fragile than corn shells.
Print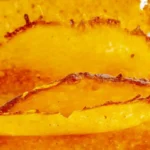
Crispy Keto Cheese Taco Shells
- Total Time: 15 minutes
- Yield: 6 cheese taco shells 1x
- Diet: Keto
Description
Learn how to make cheese taco shells perfectly every time, along with lots of tips for quick, easy, CRISPY low carb keto taco shells.
Ingredients
- 2 cup Cheddar cheese (shredded)
- 1/4 tsp Cumin
- 1/8 tsp Chili powder
Instructions
- Step: Preheat the oven to 375 degrees F (191 degrees C). Line either two jelly roll pans or one XL baking sheet with parchment paper.
- Step: Place cheese in circles on the baking sheet(s), with even thickness throughout. Sprinkle with cumin and chili powder.
- Step: Bake for 5-7 minutes, until the edges start to brown and bubbles start to form.
- Step: Meanwhile, setup wooden spoons sitting horizontally across two overturned glasses.
- Step: Remove the pan(s) from the oven and cool without disturbing for about 1 minute.
- Step: Use a flat turner or spatula to lift the cheese circles and hang them over the wooden spoons. Let them hang until hardened, about 5 minutes.
Notes
Use parchment paper for easier cleanup and to prevent sticking. Ensure edges are well-browned to achieve a crispy texture. Use a solid turner or spatula to avoid tearing the soft cheese.
- Prep Time: 10 minutes
- Cook Time: 5 minutes
- Category: Main Course
- Method: Baking
- Cuisine: Mexican
Nutrition
- Serving Size: 1 keto taco shell
- Calories: 152 kcal
- Sugar: 0 g
- Sodium: 260 mg
- Fat: 12 g
- Saturated Fat: 7 g
- Unsaturated Fat: 5 g
- Trans Fat: 0 g
- Carbohydrates: 0.4 g
- Fiber: 0 g
- Protein: 9 g
- Cholesterol: 45 mg
Keywords: low carb, keto, cheese taco shells, Mexican, crispy taco shells