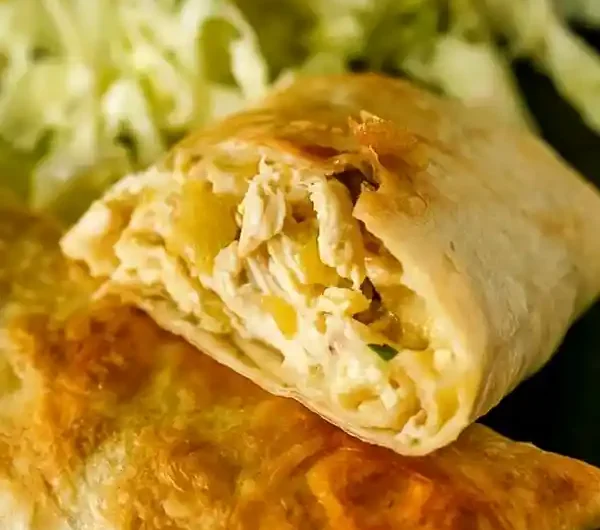
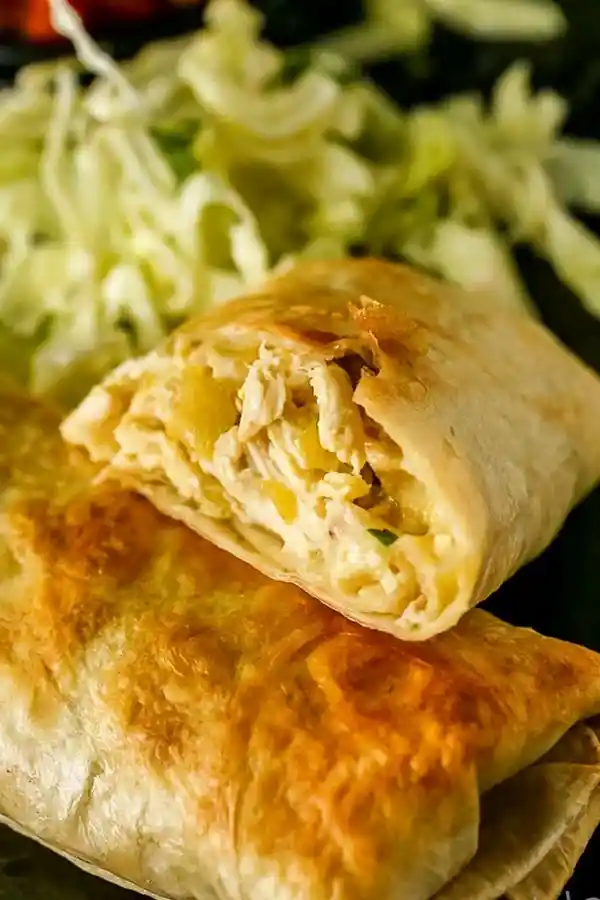
These oven-baked chicken chimichangas provide a crispy, cheesy meal without the need for deep frying. They are a fast-acting dinner solution that combines tender shredded chicken with a creamy sauce and melted cheese.
List of ingredients
- 2 boneless skinless chicken breasts – cooked and shredded.
- 1 cup Monterey Jack Cheese – freshly shredded for better melting.
- 4 oz. mild chiles – diced finely.
- 1/2 teaspoon ground cumin – adds an earthy warmth.
- Salt and pepper – adjusted to taste.
- 1 cup Mexican White Sauce – for a creamy binding.
- 6 flour tortillas – large burrito size.
- Butter – melted, for brushing the shells.
- Salsa – for serving as a dip.
step-by-step instructions
- Prepare the Oven and Chicken: Preheat your oven to 400F. Fill a large saucepan halfway with water and bring it to a boil. Add the chicken breasts and simmer on medium heat until fully cooked through and no longer pink inside. Drain the water and let the chicken cool slightly.
- Shred the Protein: Using your hands or two forks, tear the cooked chicken breasts into small, shredded pieces.
- Soften the Wraps: Warm the flour tortillas on top of a stove burner or in a dry skillet for a few seconds. This makes them soft and flexible to prevent tearing.
- Mix the Filling: In a mixing bowl, combine the shredded chicken, ground cumin, shredded cheese, diced chilies, Mexican White Sauce, salt, and pepper. Stir until the mixture is thoroughly combined.
- Assemble the Chimichangas: Place 1/2 cup of the chicken mixture in the center of each warmed tortilla. Fold in the sides, then fold the bottom side up to cover the filling, and roll tightly to create the chimichanga shape.
- Bake to Perfection: Place the rolls seam-side down on a baking sheet. Brush the tops of each chimichanga with melted butter. Bake for 15-20 minutes or until the tortillas reach a golden brown color.
- Serve: Plate the hot chimichangas and serve immediately with leftover Mexican White Sauce, guacamole, or a fresh cabbage salad.
Filling Preparation Techniques
Using Two Forks for Manual Shredding
Pull the chicken across the grain using two forks to create long, thin strands. This increases the surface area, allowing the Mexican White Sauce and cumin to coat every piece of meat evenly. Ensure the chicken is not boiling hot to avoid burning your hands during this process.
Combining Ingredients for Even Distribution
Start by mixing the dry spices and the white sauce together before adding the bulkier ingredients. This prevents pockets of cumin or salt from forming. Fold in the shredded cheese and chilies last to ensure they are distributed evenly throughout the chicken mixture.
Selecting the Right Melting Cheese
Monterey Jack is ideal because of its high moisture content and mild flavor, which melts smoothly into the sauce. If you prefer a sharper taste, a blend of Monterey Jack and sharp cheddar works well. Avoid using pre-shredded cheese if possible, as the cornstarch coating can prevent a perfectly smooth melt.
Tortilla Handling and Folding
Preventing Tortilla Tears
Heating tortillas is a critical step to relax the gluten in the flour. If a tortilla is too cold, it will crack when you attempt to fold the sides. A quick 10-second warm-up on a medium-heat skillet makes the wrap pliable and secure.
Mastering the Envelope Fold
Place the filling slightly off-center to allow room for the folds. Fold the left and right sides inward first to seal the ends of the burrito. Then, roll from the bottom up tightly, ensuring there are no gaps where the cheese could leak out during baking.
Choosing the Correct Tortilla Size
Use large burrito-sized flour tortillas rather than taco-sized ones. The larger surface area is necessary to contain a full half-cup of filling while still allowing for a complete seal. Thin, flexible tortillas generally produce a crispier shell than thick, heavy ones.
Baking for Maximum Crispiness
The Role of Melted Butter
Brushing the exterior with butter mimics the effect of frying by promoting the Maillard reaction. This creates a golden-brown color and a rich, savory flavor. Use a pastry brush to apply a thin, even layer to avoid pooling butter on the baking sheet.
Optimizing Oven Rack Position
Place the baking sheet on the center rack of the oven for balanced heat distribution. If the bottoms are not browning sufficiently, move the tray to the lower rack for the final five minutes. This ensures the base is as crispy as the top.
Preventing Shell Sogginess
Ensure the chimichangas are placed seam-side down on the tray to lock them in place. If you crowd the pan too closely, steam can build up between the rolls, leading to soft sides. Leave at least one inch of space between each chimichanga for proper airflow.
Serving and Pairing Ideas
Adding Fresh Textural Contrasts
Serve the baked rolls with a side of shredded cabbage tossed in lime juice and salt. The crunch and acidity of the cabbage cut through the richness of the melted cheese and butter. Diced raw onions or fresh cilantro also add a bright flavor profile.
Complementary Grain Sides
A bed of cilantro-lime rice or traditional Mexican red rice provides a hearty base for the meal. Placing the chimichangas on top of the rice allows any escaping sauce to be absorbed. This makes the dish more filling and visually appealing for guests.
Selecting the Best Dipping Sauces
While salsa is a classic choice, a creamy guacamole adds a cool temperature contrast to the hot baked shell. You can also serve an extra portion of warmed Mexican White Sauce for dipping. For those who prefer heat, a spicy chipotle crema is an excellent addition.
Storage and Make-Ahead Advice
Refrigeration and Shelf Life
Store cooked chimichangas in an airtight container or a sealed Ziploc bag in the refrigerator. They will remain fresh for up to three days. To prevent sticking, place a piece of parchment paper between layers if you are stacking them.
Freezing Unbaked Chimichangas
Wrap each assembled, unbaked chimichanga tightly in plastic wrap to prevent freezer burn. Place the wrapped rolls into a freezer-safe bag and store for up to one month. This is an effective meal prep strategy for busy weeknights.
Thawing and Baking from Frozen
Transfer frozen chimichangas to the refrigerator overnight to thaw completely before baking. Baking them while still frozen can result in a burnt exterior and a cold, unmelted interior. Once thawed, follow the standard brushing and baking instructions.
Reheating for Best Results
Avoid the microwave for reheating, as it can make the tortilla chewy and soggy. Instead, use an oven or air fryer at 350F for 5-10 minutes. This restores the crispiness of the butter-brushed shell and remelts the interior cheese.
Ingredient Substitutions
Alternative Protein Options
Rotisserie chicken is an excellent time-saver that eliminates the need for boiling. Leftover roasted turkey breast can also be used as a protein substitute. Ensure any substitute meat is shredded finely to match the original texture.
Switching the Cheese Variety
If Monterey Jack is unavailable, Pepper Jack is a great substitute for those who want an extra kick of heat. Queso Quesadilla is another authentic option that melts very well. Avoid hard cheeses like Parmesan, which will not create the creamy interior required.
Replacing Mild Chiles
For a different flavor profile, substitute the mild green chiles with diced pickled jalapeños for more tang and heat. Canned chipotle peppers in adobo sauce can be used for a smokier taste. Always drain canned chiles thoroughly to prevent the filling from becoming too watery.
Troubleshooting Common Issues
Fixing Leaking Fillings
If a chimichanga splits during assembly, use a small piece of a second tortilla as a patch over the hole. Alternatively, press the seam firmly against the baking sheet to seal it. Ensure you are not overfilling the tortilla beyond the 1/2 cup mark.
Preventing Burnt Tortillas
Keep a close eye on the oven after the 15-minute mark, as butter can brown quickly. If the edges are darkening too fast, tent the baking sheet loosely with aluminum foil. This protects the tops while allowing the centers to heat through.
Solving Texture Issues
If the interior feels too dry, increase the amount of Mexican White Sauce by two tablespoons. If the filling is too runny, simmer the sauce slightly before mixing or add a small amount of extra shredded cheese to thicken the consistency.
Frequently Asked Questions
Can I use rotisserie chicken for this recipe?
Yes, you can use pre-cooked rotisserie chicken to save time. Simply shred the meat and skip the boiling step, moving straight to mixing the filling.
How do I make the Mexican White Sauce?
The sauce is typically made by blending sour cream, cream cheese, diced mild chiles, a splash of hot sauce, salt, and pepper until smooth.
Can I use corn tortillas instead of flour?
Corn tortillas are not recommended for this baking method because they are more prone to cracking. They are better suited for deep-frying than oven-baking.
Do I have to brush them with butter?
While optional, the butter is what provides the golden color and crispy texture. Without it, the tortillas will bake but will have a drier, more matte finish.
Can I add beans to the filling?
Yes, adding a small amount of refried beans or black beans can add heartiness. Just be careful not to overfill the tortilla, as this increases the risk of splitting during baking.
Print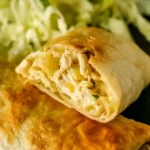
Crispy Oven-Baked Chicken Chimichangas
- Total Time: 30 minutes
- Yield: 6 servings 1x
- Diet: General
Description
Delicious baked chicken chimichangas stuffed with chicken, cheese, and mild chilies for a crispy, flavorful Tex-Mex comfort meal.
Ingredients
- 2 boneless skinless chicken breasts, cooked and shredded
- 1 cup Monterey Jack cheese, shredded
- 4 oz mild chiles, diced
- 1/2 teaspoon ground cumin
- salt and pepper to taste
- 1 cup Mexican white sauce
- 6 flour tortillas
- butter for brushing
- salsa for serving
Instructions
- Step 1: Preheat the oven to 400F, boil chicken in water until cooked through, drain, cool, and shred.
- Step 2: Warm tortillas on the stove for a few seconds to make them soft and flexible.
- Step 3: In a mixing bowl, combine the shredded chicken, ground cumin, cheese, chilies, Mexican white sauce, salt, and pepper.
- Step 4: Place 1/2 cup of the chicken mixture on the center of each tortilla, fold the sides and bottom, and roll to create chimichangas.
- Step 5: Brush each chimichanga with butter and bake for 15-20 minutes or until golden brown.
Notes
You can use leftover rotisserie chicken or turkey. For the best melt, grate the cheese fresh from a block.
- Prep Time: 15 minutes
- Cook Time: 15 minutes
- Category: Dinner
- Method: Baking
- Cuisine: Mexican
Nutrition
- Serving Size: 1 chimichanga
- Calories: 204 kcal
- Sugar: 1 g
- Sodium: 351 mg
- Fat: 9 g
- Saturated Fat: 4 g
- Unsaturated Fat: 5 g
- Trans Fat: 0 g
- Carbohydrates: 16 g
- Fiber: 1 g
- Protein: 15 g
- Cholesterol: 41 mg
Keywords: chicken chimichanga, baked burrito, Tex Mex, quick dinner, easy chicken recipe