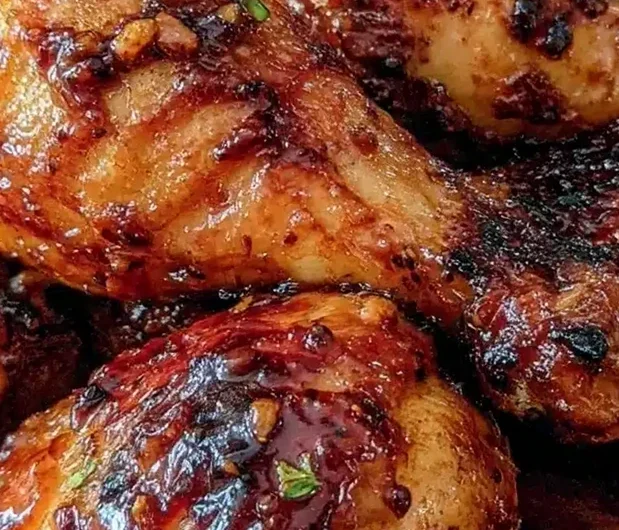
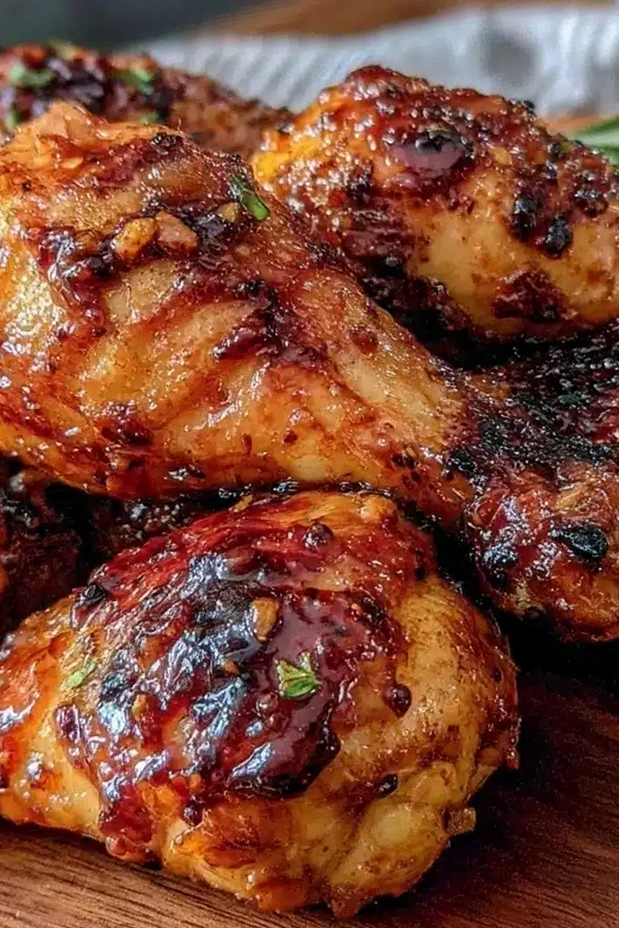
These oven-baked honey garlic chicken drumsticks offer a perfect balance of savory, sticky sweetness and crispy texture that makes them an ideal centerpiece for any meal. By utilizing high-heat roasting and a simple glaze, you can achieve professional-quality results with minimal effort in your own home kitchen. This preparation ensures that every bite is packed with aromatic garlic and caramelized honey goodness.
List of ingredients
- 8 chicken drumsticks, skin-on and bone-in
- 1/4 cup (85g) honey
- 4 cloves garlic, minced
- 3 tablespoons (45ml) soy sauce
- 1 tablespoon (15ml) apple cider vinegar
- 2 tablespoons (30ml) olive oil
- 1/2 teaspoon chili flakes
- Black pepper, freshly ground, to taste
- Salt, to taste
step-by-step instructions
- Step: Preheat the oven to 425°F (220°C). Line a baking sheet with foil and place a wire rack on top.
- Step: In a mixing bowl, whisk together honey, minced garlic, soy sauce, apple cider vinegar, olive oil, chili flakes, and freshly ground black pepper until smooth and shiny.
- Step: Pat the chicken drumsticks dry with paper towels and lightly season with salt on all sides.
- Step: Add the drumsticks to the bowl with the glaze and toss thoroughly to coat each piece evenly.
- Step: Place the coated drumsticks skin-side up on the wire rack, spacing them out for air circulation.
- Step: Bake in the preheated oven for about 30 minutes. At the 15-minute mark, baste the drumsticks with the glaze that has dripped onto the pan.
- Step: Optional: For extra crispiness, broil the drumsticks for 3-5 minutes at the end, watching carefully to avoid burning.
- Step: Remove from oven and let rest for 5 minutes before serving. Spoon any extra glaze from the pan over the top.
Refining Your Roasting Technique
Maximizing Airflow for Superior Crispiness
The secret to achieving that restaurant-style crunch lies entirely in the elevation of the meat. By utilizing a wire rack rather than placing the chicken directly onto a baking tray, you allow hot air to circulate underneath the drumsticks. This prevents the bottom of the chicken from steaming in its own juices, ensuring an even, golden-brown finish across the entire surface.
Managing Moisture Before the Glaze
Never skip the step of patting the chicken completely dry with paper towels before you begin the seasoning process. Surface moisture creates steam in the oven, which will inevitably lead to flabby skin rather than the desired crispy result. A dry surface allows the olive oil and honey glaze to adhere directly to the skin, facilitating a more effective searing process.
Effective Flavor Balancing
Choosing the Right Honey Consistency
While any honey can be used, using a lighter clover or wildflower honey often results in a more delicate, floral finish that balances the pungent kick of the fresh garlic. If your honey has begun to crystallize, gently warm it in a small glass jar placed in a bowl of hot water before whisking it into your glaze. This ensures that the ingredients mix perfectly and coat the chicken evenly without clumps.
Precision with Fresh Garlic
Always mince your garlic finely or use a microplane to create a paste-like consistency, as large chunks of garlic are prone to burning rapidly under high heat. A finer mince allows the flavor of the garlic to infuse the skin of the chicken throughout the entire baking process. Avoid using pre-minced jars, as these often contain preservatives that can alter the flavor profile of the honey glaze.
Variations and Dietary Adaptations
Creating a Balanced Umami Profile
If you find that your glaze is leaning too heavily toward the sweet side, increase the amount of freshly cracked black pepper or add a small amount of ginger paste. The introduction of fresh, grated ginger adds a bright, zesty note that complements the honey garlic combination beautifully. This adjustment can be made without altering the basic cooking times or temperature settings.
Adjusting for Specific Ingredient Needs
For those who need to avoid soy products, tamari or coconut aminos are excellent alternatives that provide the necessary salty, dark, and savory elements. These substitutions function identically to soy sauce during the baking process, meaning you will not need to adjust the quantities or the oven settings. These options are particularly useful for those managing sensitivities while maintaining the integrity of the sticky glaze.
Practical Serving and Storage
Maintaining Texture After Reheating
To preserve the crispy skin of any leftovers, avoid the microwave, which will turn the glaze soft and the skin rubbery. Instead, reheat your chicken drumsticks in an oven or a toaster oven set to 375°F (190°C) for about 10 to 12 minutes. Placing them back on a wire rack during this reheating process will help evaporate any excess moisture and restore the desired snap to the exterior.
Effective Cold Storage Strategies
If you anticipate having leftovers, store the drumsticks in an airtight glass container to prevent them from picking up odors from other items in the refrigerator. They will remain high-quality for up to three days, and the flavors often become more pronounced after resting in the marinade overnight. Ensure the container is fully sealed to keep the glaze from drying out or becoming tacky.
Addressing Common Cooking Questions
Why did my glaze darken so quickly in the oven?
Honey has a low burning point due to its natural sugar content, which is why the cooking temperature and the broiler time must be monitored closely. If you notice the edges of the glaze turning dark brown before the 30-minute mark, simply move your baking sheet to a lower rack position. Alternatively, a loose tent of foil over the top will deflect direct heat while still allowing the meat to finish cooking.
How can I ensure the meat is fully cooked at the bone?
The most accurate method is to insert a digital meat thermometer into the thickest part of the drumstick, away from the bone, until it reaches 165°F (74°C). If the chicken is still below this temperature, continue to bake in 5-minute increments until fully cooked. Drumsticks are a forgiving cut because of their higher fat content, so they remain juicy even if they slightly exceed the minimum internal temperature.
Can I add fresh herbs before putting them in the oven?
It is generally better to add fresh, delicate herbs like parsley or cilantro after the chicken has finished baking to maintain their color and flavor. Heartier woody herbs such as fresh thyme or rosemary can be added to the glaze before baking, as they are durable enough to withstand the oven heat without burning. These additions add an earthy dimension that pairs well with the sweetness of the honey.
What is the benefit of letting the chicken rest after baking?
Resting the meat for 5 minutes after it leaves the heat is essential for flavor and moisture retention. During this time, the internal juices stabilize rather than running out onto the serving platter the moment you take a bite. This simple pause also gives the glaze time to thicken slightly as it cools, resulting in a more cohesive and professional presentation on the plate.
Print
Crispy Oven-Baked Honey Garlic Chicken Drumsticks
- Total Time: 40 minutes
- Yield: 4 servings 1x
- Diet: Non-Vegetarian
Description
A quick and easy recipe for crispy, oven-baked chicken drumsticks coated in a sticky honey garlic glaze with a hint of spice. Perfect for busy weeknights or entertaining guests.
Ingredients
- 8 chicken drumsticks, skin-on and bone-in
- 1/4 cup (85g) honey
- 4 cloves garlic, minced
- 3 tablespoons (45ml) soy sauce
- 1 tablespoon (15ml) apple cider vinegar
- 2 tablespoons (30ml) olive oil
- 1/2 teaspoon chili flakes
- Black pepper, freshly ground, to taste
- Salt, to taste
Instructions
- Step: Preheat the oven to 425°F (220°C). Line a baking sheet with foil and place a wire rack on top.
- Step: In a mixing bowl, whisk together honey, minced garlic, soy sauce, apple cider vinegar, olive oil, chili flakes, and freshly ground black pepper until smooth and shiny.
- Step: Pat the chicken drumsticks dry with paper towels and lightly season with salt on all sides.
- Step: Add the drumsticks to the bowl with the glaze and toss thoroughly to coat each piece evenly.
- Step: Place the coated drumsticks skin-side up on the wire rack, spacing them out for air circulation.
- Step: Bake in the preheated oven for about 30 minutes. At the 15-minute mark, baste the drumsticks with the glaze that has dripped onto the pan.
- Step: Optional: For extra crispiness, broil the drumsticks for 3-5 minutes at the end, watching carefully to avoid burning.
- Step: Remove from oven and let rest for 5 minutes before serving. Spoon any extra glaze from the pan over the top.
Notes
If the glaze starts to burn before the chicken is cooked through, tent the drumsticks loosely with foil and continue baking until done. Internal temperature should reach 165°F (74°C). For gluten-free, substitute soy sauce with tamari or coconut aminos. Broiling at the end is optional but helps achieve extra crispiness—watch carefully to avoid burning. You can marinate the drumsticks in the glaze for up to 24 hours in the fridge for deeper flavor.
- Prep Time: 10 minutes
- Cook Time: 30 minutes
- Category: Main Course
- Method: Baking
- Cuisine: American
Nutrition
- Serving Size: 2 drumsticks
- Calories: 280 kcal
- Sugar: 11 g
- Sodium: 450 mg
- Fat: 16 g
- Saturated Fat: 3.5 g
- Unsaturated Fat: 11 g
- Trans Fat: 0 g
- Carbohydrates: 12 g
- Fiber: 0.5 g
- Protein: 18 g
- Cholesterol: 85 mg
Keywords: honey garlic chicken, oven-baked chicken, crispy chicken drumsticks, easy dinner, weeknight meal, honey glaze, garlic chicken