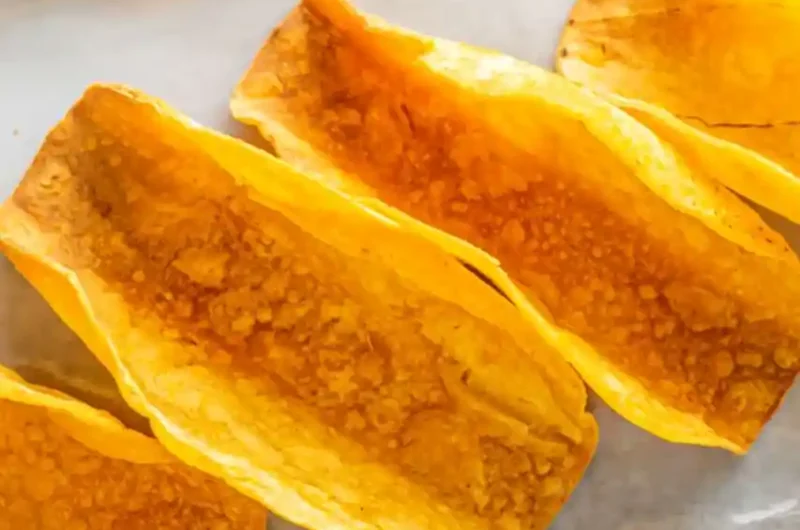
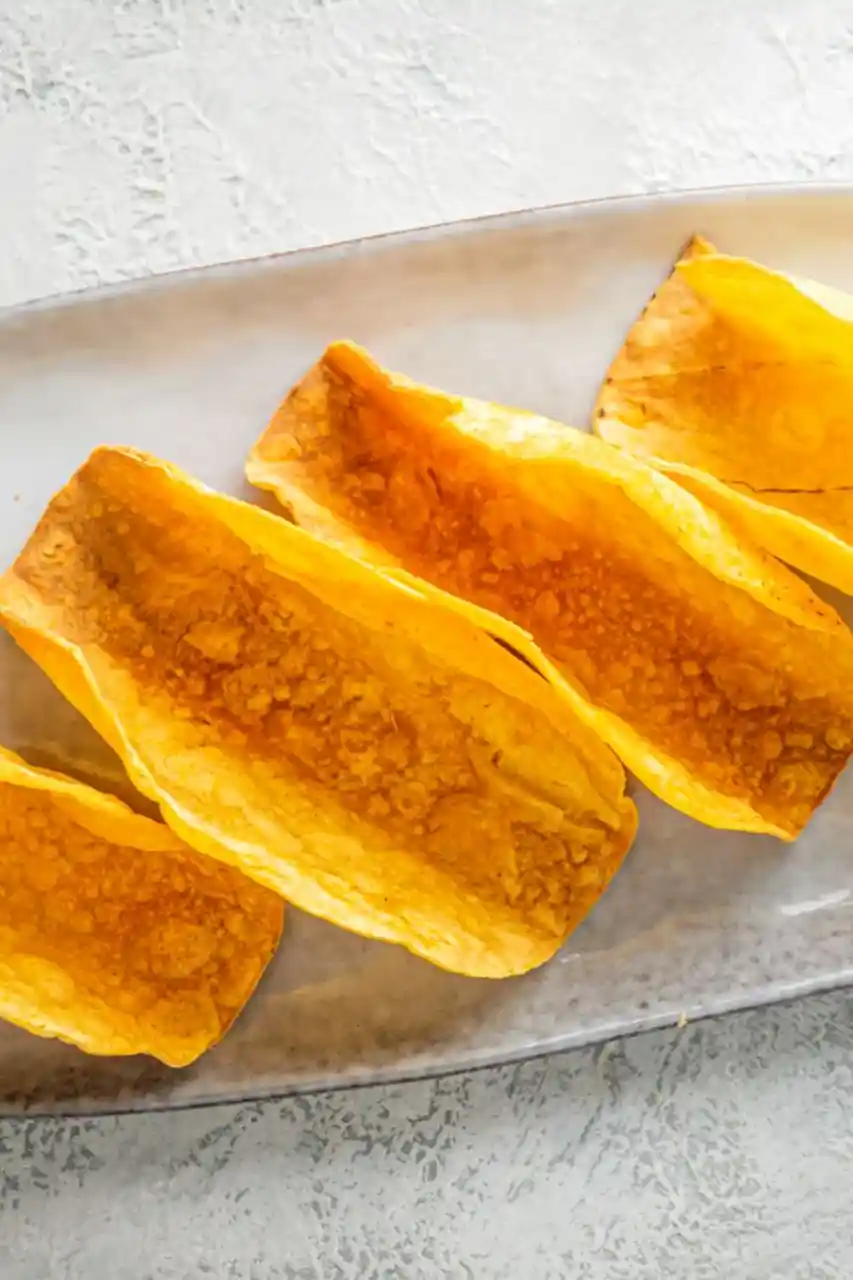
Create perfectly crunchy homemade taco shells using a simple oven-baking method. This approach provides a fresh alternative to store-bought shells without the need for deep frying.
List of ingredients
- 8 corn tortillas – ensure they are high quality for better flexibility.
- 2 tsp lime juice (optional) – adds a bright, citrusy flavor to the shell.
- Salt to taste – enhances the natural corn taste.
- Cooking spray – used to ensure a golden brown crisp.
step-by-step instructions
- Preheat and Soften: Set your oven to 425 degrees. Spread the corn tortillas on a plate and microwave them for 1-3 minutes until they are very soft and pliable.
- Maintain Warmth: Wrap the hot tortillas in a moist paper towel or place them immediately into a Ziploc bag. This keeps them warm and prevents them from cracking when you fold them.
- Season and Shape: Lightly spray both sides of each tortilla with cooking spray. Sprinkle with lime juice and salt if desired. Carefully drape each tortilla over two oven rack bars, pressing down slightly to create a wide, sturdy shape.
- Bake to Crisp: Bake the shells for 8-10 minutes until they are brown and crispy. Watch them closely during the final minutes as they can burn very quickly.
Optimizing Your Baking Process
Using Aluminum Foil for Easy Cleanup
Place a large sheet of aluminum foil across the bottom rack of your oven before baking. This catches any drips from the cooking spray or seasoning. It eliminates the need to scrub the oven floor after your taco night.
Selecting the Right Tortilla Size
Opt for larger corn tortillas to create more stable shells. Larger tortillas are easier to handle during the draping process and provide more room for fillings. This reduces the likelihood of the shell breaking when you fill it.
Ensuring Even Heat Distribution
Avoid overcrowding the oven racks when draping the tortillas. Leave enough space between each shell so that hot air can circulate freely. This ensures that every shell crisps evenly and reaches the same golden color.
Flavor Customization and Seasonings
Incorporating Smoked Paprika for Depth
Sprinkle a small amount of smoked paprika on the tortillas before baking. This adds a subtle smokiness that complements grilled meats. It also gives the shells a deeper, more vibrant orange hue.
Using Cumin for Earthy Notes
A dash of ground cumin added with the salt provides a traditional southwestern flavor profile. This spice pairs exceptionally well with corn and lime juice. It enhances the overall aroma of the baked shells.
Adding Garlic Powder for Savory Taste
For a more savory shell, apply a light dusting of garlic powder. This creates a seasoned base that works well with both meat and vegetarian fillings. Be careful not to use too much, as garlic powder can burn at high temperatures.
Balancing Salt and Acid
The combination of salt and lime juice creates a balanced flavor profile. The salt enhances the corn flavor while the acid from the lime cuts through the richness of the oil. This makes the shells taste lighter and fresher.
Alternative Shaping Methods
Creating Taco Bowls with Muffin Pans
To make taco bowls, press the warmed tortillas into the cups of a flipped-over muffin pan. Bake them until they are golden and rigid. This creates a bowl shape that is ideal for taco salads or heavy fillings.
Using a Dedicated Taco Rack
If you frequently make these shells, consider investing in a dedicated taco baking rack. This ensures perfectly uniform shapes and allows you to bake more shells at once. It provides more stability than oven grates.
Hand-Folding for Rustic Shells
For a more rustic look, you can fold the tortillas and hold them in place with oven-safe clips. While less uniform than the rack method, this can work in a pinch. Ensure the fold is tight to maintain the shape during baking.
Serving and Filling Strategies
Pairing with Shredded Chicken
Fill these shells with slow-cooked shredded chicken or Chicken Tinga. The crunch of the corn shell provides a great contrast to the tender meat. Top with fresh cilantro and diced onions for a classic taste.
Utilizing Lean Beef Fillings
Seasoned ground beef or steak strips are excellent choices for these crispy shells. Ensure the meat is well-browned and seasoned with chili powder. The sturdy nature of the baked shell supports heavier beef fillings.
Incorporating Plant-Based Proteins
Black beans or seasoned lentils offer a hearty vegetarian alternative. Mash some of the beans to create a base layer that helps hold other toppings in place. Add diced avocado for creaminess.
Layering Fresh Toppings
Start with the protein at the bottom, then add shredded lettuce and diced tomatoes. Finish with a dollop of sour cream or a sprinkle of microbial-rennet cheese. Layering helps keep the shell crunchy for longer.
Maintaining Shell Texture
Preventing Soggy Shells
Avoid adding wet ingredients directly against the shell wall. Place a layer of cheese or lettuce at the bottom to act as a moisture barrier. This prevents the juices from the meat from soaking into the corn.
Proper Cooling Techniques
Let the shells cool completely on the oven rack before moving them. Moving them while hot can cause them to crack. Cooling them allows the structure to set, ensuring maximum crispiness.
Managing Moisture in Fillings
Drain your meat fillings thoroughly using a colander before stuffing the shells. Excess grease or water will quickly soften the corn. Using a thick sauce instead of a thin one also helps maintain the crunch.
Storage and Refreshing Tips
Airtight Container Storage
Once completely cool, store the shells in an airtight plastic or glass container. Keep them at room temperature to maintain their texture. They will typically stay fresh and crispy for up to three days.
Reheating in the Oven
If the shells lose their crunch, warm them in a 350 degree oven for 3 to 5 minutes. This removes any absorbed humidity and restores the crisp texture. Avoid using a microwave for reheating as it will make them chewy.
Why You Should Avoid Refrigeration
Do not store these shells in the refrigerator or freezer. The humidity in these environments will penetrate the corn and make the shells soggy. Always prioritize a dry, room-temperature environment.
Common Troubleshooting Guides
Fixing Cracked Tortillas
If your tortillas crack while draping, they were likely not soft enough. Increase the microwave time or use a damp paper towel to add more moisture. The tortilla must be extremely flexible before shaping.
Preventing Burnt Edges
Because the edges are thinner, they can burn before the center is crisp. Start checking the shells at the 6-minute mark. If the edges are browning too fast, lower the oven temperature by 25 degrees.
Solving Lack of Crunch
If the shells are soft after baking, you may not have used enough cooking spray. The oil is what creates the frying effect in the oven. Ensure both sides are lightly coated for the best result.
Frequently Asked Questions
Can I use flour tortillas instead?
Flour tortillas are generally too soft and flexible to hold a rigid shape when baked. They tend to slump or become chewy rather than crispy. Corn tortillas are recommended for their sturdy structure.
Can I toast my tortillas on the stove first?
Yes, you can toast them on a skillet for a minute per side to enhance the flavor. However, make sure they remain pliable. Microwaving is the fastest way to ensure they don’t crack during shaping.
How do I stop my tacos from getting soggy?
Assemble your tacos immediately before serving. Prepare all fillings and toppings in separate bowls and only fill the shell at the last moment. This ensures the maximum crunch for every bite.
Why did my taco shells burn?
Oven temperatures can vary significantly between different models. If your shells burnt, your oven may run hot. Try reducing the bake time by two minutes or checking them more frequently.
Print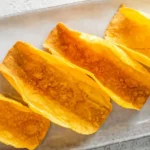
Crispy Oven Baked Taco Shells
- Total Time: 15 minutes
- Yield: 4 servings 1x
- Diet: Vegan, Vegetarian, Gluten Free
Description
Oven Baked Taco Shells made from soft corn tortillas and crisped in the oven for the perfect crunch. Just 4 ingredients, 15 minutes, and no frying!
Ingredients
- 8 corn tortilla
- 2 tsp. lime juice (optional)
- Salt to taste
- Cooking spray
Instructions
- Step 1: Preheat the oven to 425 degrees. Spread out the tortillas and microwave until extremely soft and pliable. Depending on your microwave this can take between 1-3 minutes. They should be hot and really pliable when you take them out.
- Step 2: You can wrap them in a moist paper towel to make them even softer. Immediately wrap in a towel or place in a ziploc bag to keep them warm. Keeping them soft is the key to not having them break in the oven.
- Step 3: Then carefully spray each tortilla with cooking spray on both sides. Sprinkle with lime juice and seasoning if using. Gently drape over the oven grates, pressing down ever so lightly.
- Step 4: Repeat with remaining shells and then bake for 8-10 minutes until brown and crispy. These can go from perfect to burnt quickly so be sure to keep an eye on them.
Notes
Place a sheet of aluminum foil across the bottom rack of the oven to catch any drips. For a variation, shape heated tortillas into bowls using a flipped cupcake pan before baking.
- Prep Time: 5 minutes
- Cook Time: 10 minutes
- Category: Dinner
- Method: Baking
- Cuisine: Mexican, Southwestern
Nutrition
- Serving Size: 2 shells
- Calories: 106 kcal
- Sugar: 1 g
- Sodium: 22 mg
- Fat: 1 g
- Saturated Fat: 0 g
- Unsaturated Fat: 1 g
- Trans Fat: 0 g
- Carbohydrates: 22 g
- Fiber: 3 g
- Protein: 3 g
- Cholesterol: 0 mg
Keywords: Oven Baked Taco Shells, Crunchy Taco Shells, Mexican, Southwestern, Quick and Easy, Vegetarian