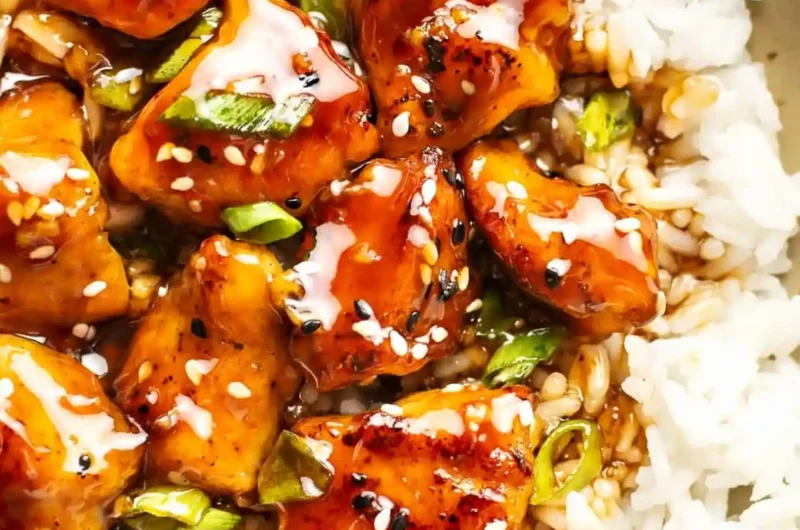
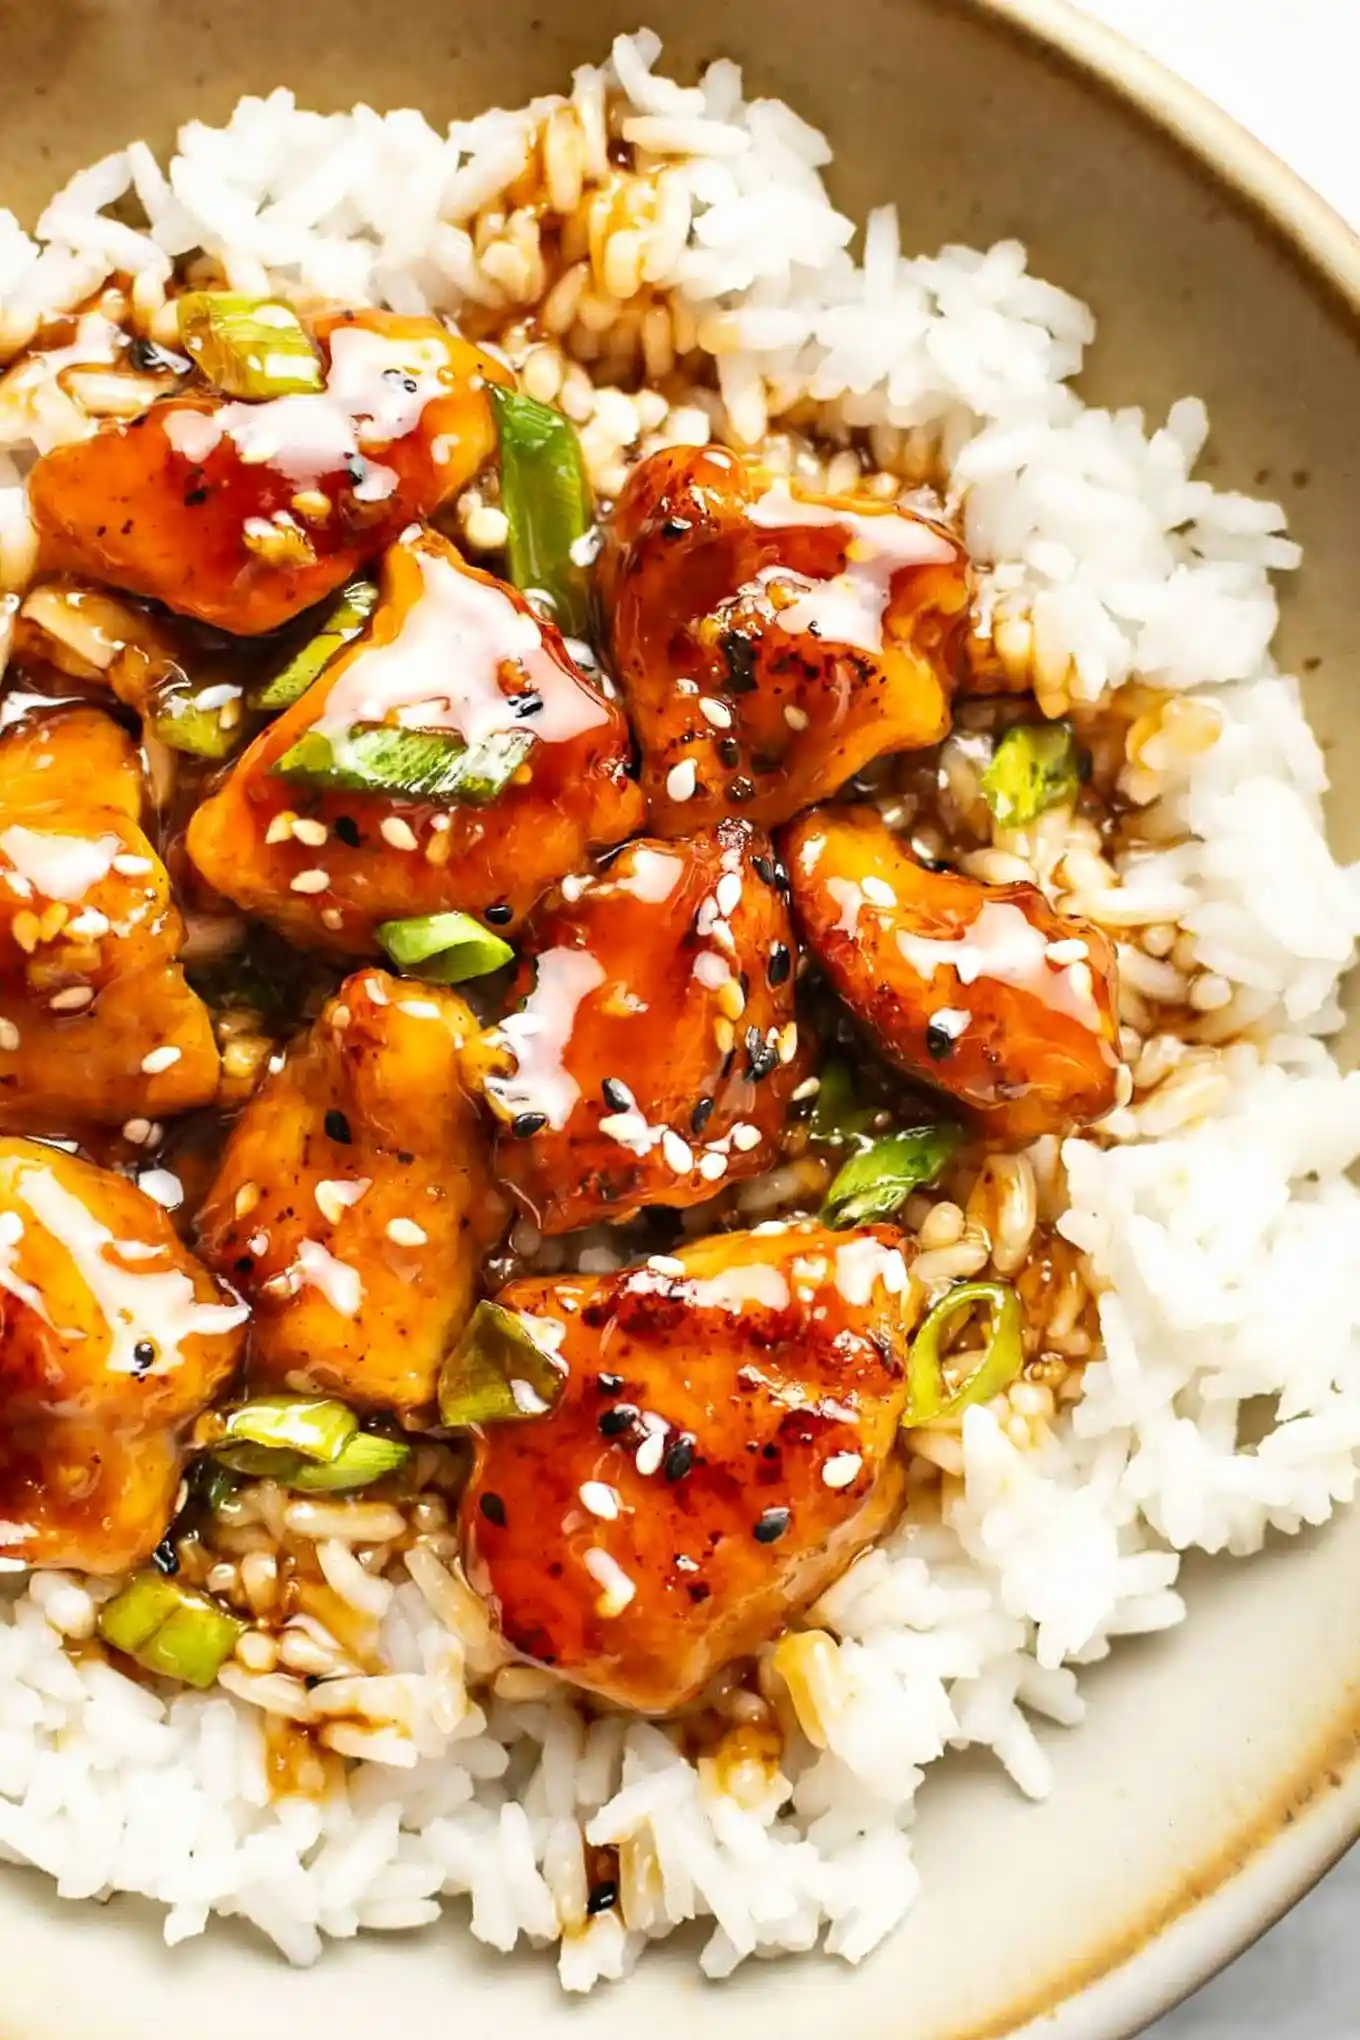
Prepare a delicious, restaurant-style meal in just 30 minutes with this tender teriyaki chicken. This recipe features a homemade sweet and savory glaze that coats crispy chicken bites perfectly. It is an ideal choice for a fast weeknight dinner that the whole family will enjoy.
List of ingredients
- 2 chicken breasts (cut into 1″ pieces) – use boneless, skinless breasts for quick cooking.
- 1/2 teaspoon garlic powder – adds a concentrated savory layer to the meat.
- Pepper (to taste) – provides a mild heat and depth.
- 3 tablespoons cornstarch – used to create a crispy outer crust on the chicken.
- 3 tablespoons olive oil (divided) – essential for searing the meat at high temperatures.
- Garnish (optional): chopped scallions & sesame seeds (to taste) – for color and a nutty finish.
- 1/4 cup brown sugar (packed) – provides the primary sweetness and rich color.
- 1 teaspoon grated fresh ginger – adds a sharp, aromatic zing.
- 2 cloves garlic (minced) – adds pungent, fresh flavor to the sauce.
- 3 tablespoons honey – used as a sweet, alcohol-free alternative to mirin.
- 2 tablespoons soy sauce – provides the salty, umami base of the glaze.
- 1 teaspoon rice vinegar (or apple cider vinegar) – balances the sweetness with acidity.
- 1/2 cup water – thins the sauce for initial simmering.
- 1 tablespoon cornstarch – acts as the thickening agent for the final glaze.
step-by-step instructions
- Prepare the Sauce: Add the brown sugar, grated ginger, minced garlic, honey, soy sauce, rice vinegar, water, and 1 tablespoon of cornstarch to a small bowl. Whisk the mixture thoroughly until the sugar is dissolved and the cornstarch is fully integrated.
- Coat the Chicken: Cut the chicken breasts into approximately 1″ pieces and place them in a mixing bowl. Stir in the garlic powder and pepper until evenly distributed, then sprinkle the 3 tablespoons of cornstarch over the meat and stir again to ensure every piece is coated.
- Sear the Meat: Add 2 tablespoons of olive oil to a skillet over medium-high heat and let it shimmer. Cook the chicken in two separate batches to avoid overcrowding the pan, which prevents the meat from steaming. Cook for 4 minutes, flip using tongs, and cook for another 3-4 minutes until the internal temperature reaches 165°F. Transfer the first batch to a plate and add the final tablespoon of oil for the second batch.
- Glaze and Serve: Once the second batch is cooked, return the first batch of chicken to the skillet. Pour the whisked sauce over the chicken and stir constantly. Let the mixture bubble for about one minute until the sauce thickens and coats the chicken in a glossy glaze. Serve immediately over a bed of steamed rice and garnish with scallions and sesame seeds.
Expert Searing and Cooking Tips
Use a Cast Iron Skillet for Better Heat Retention
Cast iron pans distribute heat more evenly and retain it longer than stainless steel or non-stick pans. This allows the chicken to sear quickly and develop a deep golden-brown crust without the temperature dropping. Ensure the pan is preheated for at least 3 minutes before adding the oil.
Avoid Crowding the Pan to Prevent Steaming
When too much meat is added to the skillet at once, the temperature drops and moisture is trapped. This causes the chicken to steam in its own juices rather than fry, resulting in a pale and soggy exterior. Cooking in two batches ensures there is enough space for the moisture to evaporate quickly.
Maintain a Steady Medium-High Heat
Keep the burner at a medium-high setting to ensure the cornstarch coating crisps up immediately upon contact with the oil. If the heat is too low, the chicken will absorb the oil and become greasy. If it is too high, the garlic powder in the coating may burn and turn bitter.
Ensure Even Cornstarch Distribution
Toss the chicken pieces thoroughly so that every side is lightly dusted with cornstarch. This thin barrier protects the meat from overcooking and provides the surface area needed for the sauce to cling to. Avoid adding too much cornstarch, as it can create a thick, doughy layer.
Ingredient Substitutions
Swap Chicken Breasts for Chicken Thighs
Boneless, skinless chicken thighs are a great alternative to breasts for a juicier result. Thighs have a higher fat content, making them more resistant to overcooking. If using thighs, you may need to increase the cooking time by 1-2 minutes per side.
Use Coconut Aminos for a Soy-Free Option
For those avoiding soy, coconut aminos provide a similar salty and sweet profile. Since coconut aminos are slightly less salty than soy sauce, you may want to add a pinch of extra salt to the chicken coating. The consistency remains almost identical, ensuring the glaze thickens properly.
Replace Brown Sugar with Honey or Maple Syrup
If you do not have brown sugar, honey or pure maple syrup can be used as a sweetener. These liquid sweeteners will make the sauce slightly more viscous and glossy. Adjust the water amount slightly if the sauce becomes too thick too quickly during the bubbling phase.
Substitute Fresh Ginger with Ground Ginger
When fresh ginger is unavailable, ground ginger powder is a suitable replacement. Use 1/4 teaspoon of ground ginger for every teaspoon of fresh grated ginger. Note that the flavor will be more concentrated and less bright than the fresh version.
Recipe Variations
Incorporate Stir-Fry Vegetables
Add sliced bell peppers, snap peas, or carrots to the pan after the chicken is seared. Sauté the vegetables for 3-4 minutes until tender-crisp before adding the sauce. This transforms the dish into a complete one-pan meal with added nutrients and color.
Add a Spicy Kick with Red Pepper Flakes
For those who prefer a spicy profile, stir in 1/2 teaspoon of red pepper flakes or a tablespoon of Sriracha into the sauce mixture. The heat cuts through the sweetness of the brown sugar and honey. This variation pairs exceptionally well with steamed broccoli.
Create a Citrus-Infused Teriyaki
Substitute the rice vinegar with fresh lime or lemon juice for a brighter, more acidic flavor. The citrus notes complement the ginger and garlic perfectly. This variation is particularly refreshing when served with a side of shredded cabbage salad.
Use Firm Tofu for a Plant-Based Alternative
Press extra-firm tofu to remove excess water, then cut into 1″ cubes. Follow the same coating and frying process as the chicken. The cornstarch ensures the tofu stays crispy under the thick teriyaki glaze.
Serving Suggestions
Pair with Fluffy Jasmine Rice
Jasmine rice is the traditional choice due to its aromatic scent and ability to absorb the extra sauce. For a nuttier flavor, try brown rice or wild rice. Ensure the rice is steamed fresh to provide a soft contrast to the crispy chicken.
Serve Alongside Steamed Bok Choy
Steamed bok choy or baby spinach adds a fresh, slightly bitter element that balances the sweet glaze. Lightly season the greens with a drop of sesame oil and salt. The vibrant green color also makes the plate more visually appealing.
Use Cauliflower Rice for Lower Carbs
For a low-carbohydrate option, serve the teriyaki chicken over sautéed cauliflower rice. Sauté the cauliflower with a small amount of garlic and onion powder. This maintains the volume of a rice dish without the added starch.
Add Toasted Sesame Seeds and Fresh Scallions
Do not skip the garnish, as it provides essential texture and flavor. Toasted sesame seeds add a subtle crunch, while sliced scallions offer a fresh, sharp bite. These additions elevate the dish from a simple meal to a restaurant-quality presentation.
Storage and Reheating Advice
Store in Airtight Glass Containers
Place leftover chicken and sauce in a glass airtight container to maintain the quality of the glaze. Refrigerate immediately after the food has cooled to room temperature. The chicken will remain safe and tasty for 3 to 4 days in the refrigerator.
Reheat on the Stovetop for Best Texture
To maintain some of the crispiness, reheat the chicken in a skillet over low heat with a splash of water. This gently thins the sauce and warms the meat without overcooking it. Avoid high heat during reheating to prevent the sugar in the sauce from burning.
Avoid Freezing the Finished Dish
Freezing is not recommended for this recipe because the cornstarch-based sauce can separate upon thawing. Additionally, the chicken coating will lose its structural integrity and become mushy. It is best to enjoy this dish fresh or within a few days of cooking.
Troubleshooting Common Issues
Fixing a Sauce That Is Too Thin
If the sauce has not thickened after bubbling for a minute, mix an additional teaspoon of cornstarch with a tablespoon of cold water. Stir this slurry into the simmering sauce and cook for another 30 seconds. This will quickly increase the viscosity of the glaze.
Preventing the Sauce from Burning
Because of the high sugar content in brown sugar and honey, the sauce can burn quickly if the heat is too high. Once you add the sauce to the pan, keep the chicken moving constantly. If the sauce begins to thicken too rapidly or darken, remove the pan from the heat immediately.
Ensuring Chicken Is Not Overcooked
Chicken breasts can dry out quickly if cooked past 165°F. Use a digital meat thermometer to check the thickest part of the largest piece of chicken. Remove the meat from the pan the moment it reaches the safe temperature to ensure it remains juicy.
Managing Excessive Oil in the Pan
If you notice too much oil pooling in the skillet after frying the chicken, carefully wipe the pan with a paper towel before adding the sauce. This prevents the glaze from separating and becoming oily. This step ensures the sauce clings tightly to the meat.
Frequently Asked Questions
How do I grate ginger easily?
The easiest way to grate fresh ginger is to keep it frozen in your freezer. Frozen ginger is firmer, which allows a Microplane or fine grater to shred it without the root slipping. Simply grate it while frozen and let it soften in the bowl.
Can I use all-purpose flour instead of cornstarch?
While flour can be used, it will not provide the same level of crispiness as cornstarch. Cornstarch creates a lighter, crunchier shell and a glossier sauce. If you use flour, the sauce may appear more matte and the chicken slightly softer.
What is the best oil for high-heat frying?
Olive oil works well, but avocado oil or grapeseed oil are even better due to their higher smoke points. This prevents the oil from smoking or breaking down at medium-high temperatures. Any neutral oil with a high smoke point is a suitable choice.
Can I make the sauce in a blender?
Yes, you can combine all sauce ingredients in a blender for a perfectly smooth consistency. This is especially helpful if you prefer the ginger and garlic to be completely integrated rather than having small minced pieces. Blend on low for 10-15 seconds.
Print
Easy Teriyaki Chicken
- Total Time: 30 minutes
- Yield: 4 servings 1x
- Diet: General
Description
This easy teriyaki chicken recipe has the most tender, delicious chicken bites coated in a sweet teriyaki sauce from scratch. It’s a 30-minute dish that’s better than takeout!
Ingredients
- 2 chicken breasts (cut into 1″ pieces)
- 1/2 teaspoon garlic powder
- Pepper (to taste)
- 3 tablespoons cornstarch
- 3 tablespoons olive oil (divided)
- chopped scallions & sesame seeds (to taste)
- 1/4 cup brown sugar (packed)
- 1 teaspoon grated fresh ginger
- 2 cloves garlic (minced)
- 3 tablespoons alcohol-free mirin seasoning
- 2 tablespoons soy sauce
- 1 teaspoon rice vinegar (or apple cider vinegar)
- 1/2 cup water
- 1 tablespoon cornstarch
Instructions
- Step: Add the sauce ingredients to a small bowl and whisk together.
- Step: Cut the chicken into about 1″ pieces and add it to another bowl. Add the garlic powder and pepper and stir until coated, then add the cornstarch and stir again to coat.
- Step: Add 2 tablespoons of oil to a skillet. Let it heat for a few minutes over medium-high heat. Cook the chicken in 2 batches (don’t crowd the pan). Cook the chicken for 4 minutes and then flip and cook for another 3-4 minutes or so. Chicken should be browned and cooked through (165F). Transfer chicken to plate. For the second batch, add another tablespoon of olive oil to the pan.
- Step: Once the second batch of chicken is done, add the chicken that’s on the plate back to the pan. Stir in the sauce and let it bubble for a minute or so, until thickened. Serve immediately over rice with scallions & sesame seeds sprinkled on top.
Notes
Mirin is typically a sweet rice wine; for this recipe, use an alcohol-free mirin seasoning or a mixture of rice vinegar and sugar. Fresh ginger is easier to grate if kept frozen.
- Prep Time: 10 minutes
- Cook Time: 20 minutes
- Category: Main Course
- Method: Stir Fry
- Cuisine: Asian American
Nutrition
- Serving Size: 1 serving
- Calories: 333 kcal
- Sugar: 17 g
- Sodium: 738 mg
- Fat: 13 g
- Saturated Fat: 2 g
- Unsaturated Fat: 11 g
- Trans Fat: 0 g
- Carbohydrates: 27 g
- Fiber: 1 g
- Protein: 25 g
- Cholesterol: 72 mg
Keywords: teriyaki chicken, easy dinner, 30-minute meal, Asian American, chicken breast