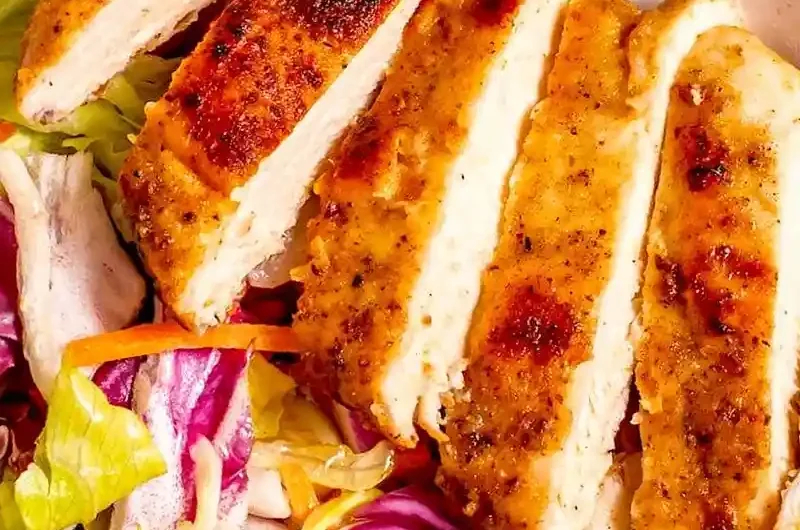
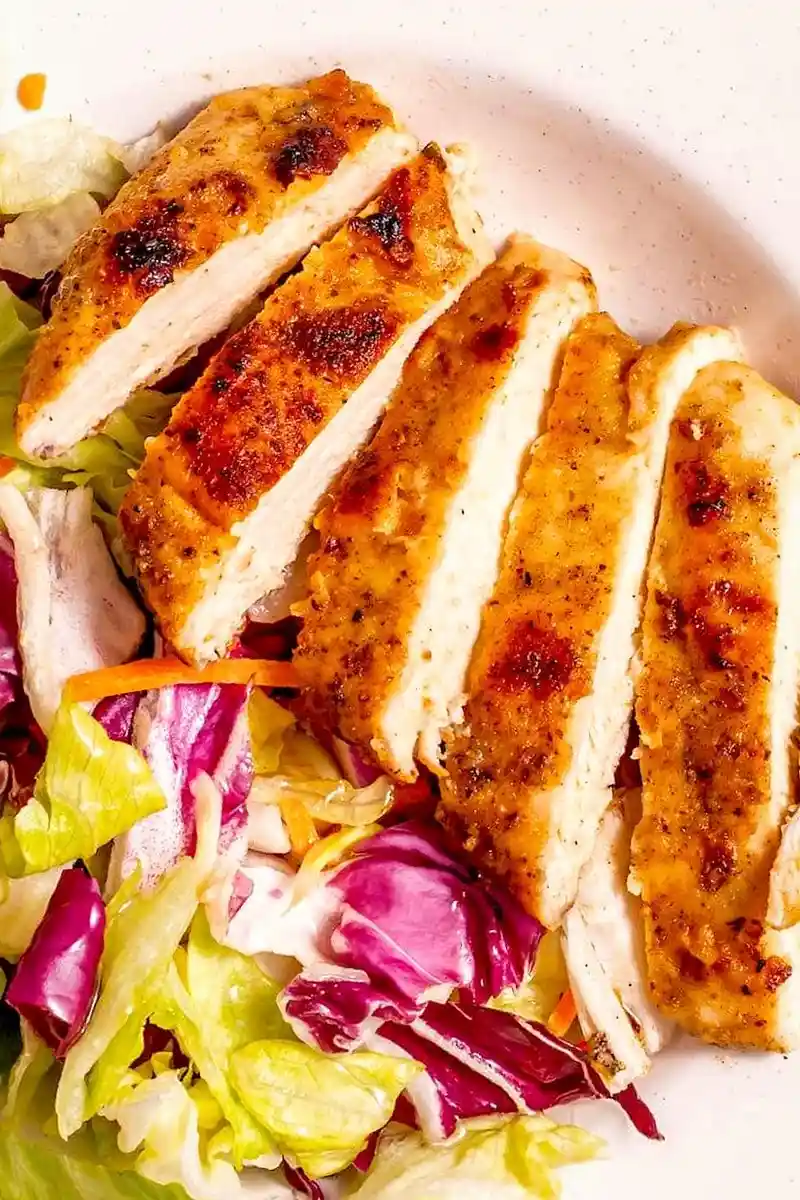
Achieving perfectly tender, golden-brown chicken breast in minutes is entirely possible with this straightforward pan-searing method. By focusing on even thickness and precise heat control, you can consistently serve juicy, flavorful poultry that avoids the common pitfall of drying out. This technique relies on a light flour coating and a flavorful spice blend to create a satisfying crust while keeping the interior moist and succulent.
List of ingredients
- 4 chicken breasts
- 1 teaspoon salt
- 1/2 teaspoon black pepper
- 1 teaspoon garlic powder
- 1/2 teaspoon onion powder
- 1/2 teaspoon paprika
- 1/2 teaspoon red pepper flakes
- 1/2 teaspoon parsley (dried)
- 1/2 teaspoon oregano (dried)
- 1/2 teaspoon basil (dried)
- 1/2 teaspoon thyme (dried)
- 1/4 cup all-purpose flour
- 4 tablespoons butter
step-by-step instructions
- Step: Lightly pound the chicken breasts with a meat mallet so you get even thickness.
- Step: Combine the salt, pepper, garlic powder, onion powder, paprika, red pepper flakes, parsley, oregano, thyme, and flour in a small bowl and rub the meat with your hands on both sides to make sure it is evenly coated.
- Step: Heat butter in the pan over medium-high heat in a large skillet. Add chicken to the skillet and cook for 4 minutes per side.
- Step: Once the chicken is golden brown or reaches an internal temperature of 160F/70C, remove the chicken from the pan and let it rest for a couple of minutes, covered.
Refining Your Searing Technique
Achieving Even Browning
When cooking chicken breasts, moisture on the surface of the meat is the enemy of a good crust. Always pat your chicken dry with paper towels before seasoning, as excess liquid will create steam instead of the desired sear. Ensuring your skillet is preheated properly before adding the butter also helps jumpstart the browning process.
Selecting the Right Pan
A heavy stainless steel or cast-iron skillet is ideal for this recipe because they retain heat exceptionally well. Avoid non-stick pans if you want a deeper, more pronounced crust, but be sure to use enough butter to maintain a slick surface. If your chicken seems to adhere to the pan, resist the urge to pull; it will release naturally once the crust is fully formed and browned.
Managing Heat Levels
Medium-high heat is the sweet spot for pan-frying, as it provides enough intensity to crisp the exterior without burning the herbs and spices in the flour coating. If you notice the butter turning dark brown too quickly, adjust the heat down slightly to prevent bitter notes. Keeping a watchful eye during the final two minutes of cooking helps you avoid the dreaded dry, rubbery texture of overcooked breast meat.
Flavor Enhancements and Substitutions
Exploring Spice Profiles
While the provided herb blend offers a classic savory flavor, you can easily pivot by experimenting with different dry spice profiles. Consider adding ground cumin and coriander for an earthy, global twist, or reach for lemon pepper for a bright, citrusy finish. If you prefer a smokier flavor, swap standard paprika for smoked paprika, which brings a campfire-like depth to the chicken.
Alternative Cooking Fats
While butter provides a delicious richness, you can mix it with a neutral-flavored high-heat oil like grapeseed or avocado oil to prevent burning. This combination allows you to maintain the flavor profile of the butter while extending the smoke point of the cooking fat. This is especially helpful if you are cooking multiple batches of chicken and need the fat to remain stable for a longer duration.
Practical Serving Suggestions
Pairing With Starch and Vegetables
Because the chicken is seasoned with robust herbs, it pairs beautifully with neutral side dishes that can soak up any remaining pan juices. Steamed grains like quinoa or rice, or roasted starchy vegetables like potatoes, balance the protein perfectly. For a fresher meal, consider a crisp green salad tossed in a sharp vinaigrette to cut through the richness of the butter-seared crust.
Creating Pan Sauces
Once you remove the chicken to rest, you can use the same skillet to build a quick pan sauce by deglazing the bottom with a splash of chicken broth or lemon juice. Scrape up the browned bits, known as fond, which are concentrated flavor bombs. Simmer until the liquid reduces by half, then finish with a tiny knob of cold butter to emulsify the sauce before pouring it over the plated chicken.
Managing Storage and Reheating
Proper Refrigeration Methods
Allow the cooked chicken to reach room temperature before storing it in a shallow, airtight container. Keeping the chicken slices whole rather than pre-cut helps prevent them from drying out in the refrigerator. When stored correctly, the leftovers maintain their quality for up to four days, making them an excellent choice for meal prep.
Optimizing Reheating Results
The microwave can quickly turn cooked chicken into a tough, dry product if not used carefully. For the best texture, reheat individual breasts in an oven set to 325F with a tablespoon of broth in the bottom of the dish, covering tightly with foil to create steam. If you must use a microwave, use a 30-second interval setting on low power and include a small cup of water in the microwave to maintain humidity levels.
Common Kitchen Queries
How can I tell if the chicken has reached the correct temperature without a thermometer?
While a meat thermometer is the gold standard for food safety and quality, you can check for doneness by pressing the center of the breast with your finger. The meat should feel firm yet springy to the touch, similar to the feel of the palm of your hand just below the thumb. If the meat feels soft or indentations remain, it needs more cooking time.
Can I omit the flour coating for a lower-carb option?
You can certainly skip the flour if you prefer, though the crust will be less pronounced and the butter will brown more rapidly. If you choose this route, ensure the chicken is very dry before adding the spices and consider increasing the cooking heat slightly to compensate for the lack of a protective breading. Ensure you watch the pan closely, as herbs can scorch more easily on bare meat.
Why does the chicken often stick to the pan even when using butter?
Sticking usually occurs if the pan is not hot enough or if the chicken is moved too soon after hitting the surface. The protein bonds with the pan initially, but as the surface proteins denature and the crust forms, the chicken will naturally pull away. Patience is your best tool; if the chicken does not release with a gentle nudge of a spatula, it simply needs another 30 to 60 seconds of cooking time.
Print
Foolproof Ten-Minute Golden Pan-Fried Chicken
- Total Time: PT10M
- Yield: 4 servings 1x
- Diet: High Protein
Description
Learn how to make my foolproof pan-fried chicken breast recipe, and NEVER settle for dried-out chicken again! Ready in 10 minutes, it’s delicately seasoned, golden brown, and juicy in the center.
Ingredients
- 4 chicken breasts
- 1 teaspoon salt
- 1/2 teaspoon black pepper
- 1 teaspoon garlic powder
- 1/2 teaspoon onion powder
- 1/2 teaspoon paprika
- 1/2 teaspoon red pepper flakes
- 1/2 teaspoon parsley (dried)
- 1/2 teaspoon oregano (dried)
- 1/2 teaspoon basil (dried)
- 1/2 teaspoon thyme (dried)
- 1/4 cup all-purpose flour
- 4 tablespoons butter
Instructions
- Step: Lightly pound the chicken breasts with a meat mallet so you get even thickness.
- Step: Combine the salt, pepper, garlic powder, onion powder, paprika, red pepper flakes, parsley, oregano, thyme, and flour in a small bowl and rub the meat with your hands on both sides to make sure it is evenly coated.
- Step: Heat butter in the pan over medium-high heat in a large skillet. Add chicken to the skillet and cook for 4 minutes per side.
- Step: Once the chicken is golden brown or reaches an internal temperature of 160F/70C, remove the chicken from the pan and let it rest for a couple of minutes, covered.
Notes
To store: Once cool, transfer the cooked chicken to an airtight container. Store it in the fridge for 3 to 4 days. To freeze: Wrap the chicken breasts in aluminum foil, place them in a freezer-safe bag, and freeze for up to three months. To reheat: Reheat the chicken in a preheated oven or microwave in 30-second intervals until warm.
- Prep Time: PT2M
- Cook Time: PT8M
- Category: Main Course
- Method: Pan Frying
- Cuisine: American
Nutrition
- Serving Size: 1 serving
- Calories: 220 kcal
- Sugar: 0.1 g
- Sodium: 1970 mg
- Fat: 12 g
- Saturated Fat: 7 g
- Unsaturated Fat: 5 g
- Trans Fat: 0 g
- Carbohydrates: 5 g
- Fiber: 1 g
- Protein: 25 g
- Cholesterol: 85 mg
Keywords: pan fried chicken, chicken breast recipe, quick dinner, 10 minute chicken