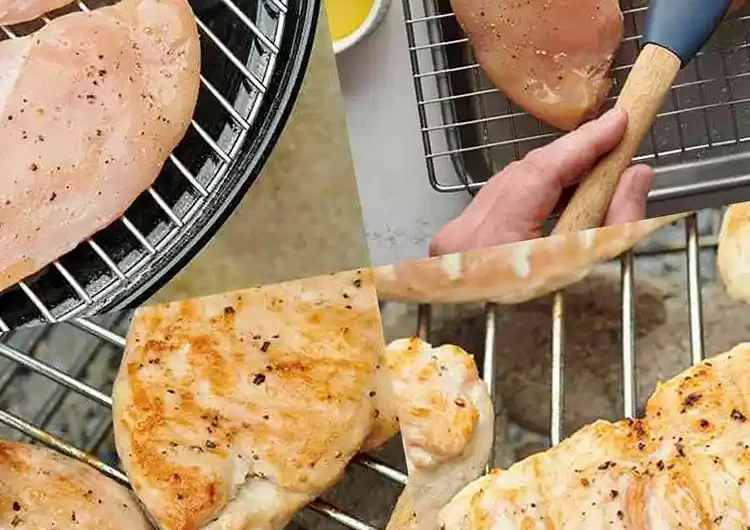
Achieving perfectly tender, juicy chicken breasts on the grill requires balancing heat management with proper preparation. By focusing on even thickness and moisture retention, you can transform a simple cut of meat into a flavorful, high-quality main course. This method ensures you avoid the common pitfalls of dry, rubbery chicken while delivering consistent, delicious results every time you fire up your grill.
List of ingredients
- 4 boneless, skinless chicken breast halves (6 to 8 ounces each), tender removed
- Kosher salt
- 1/4 cup (55g) sugar (for wet brine)
- Freshly ground black pepper
- 2 tablespoons (30ml) extra-virgin olive oil
step-by-step instructions
- Step: Place 1 chicken breast in a resealable plastic bag or between two pieces of plastic wrap. Using a meat pounder, rolling pin, or small skillet, pound chicken breast into an even thickness, about 3/4 inch in height. Repeat with remaining 3 breasts.
- Step: If making a wet brine, dissolve 1/3 cup (80g) kosher salt and 1/4 cup (55g) sugar in 2 quarts (1.9L) water. Place chicken breasts in brine and refrigerate for at least 30 minutes and up to overnight. If making a dry brine, set a wire rack over a rimmed baking sheet and arrange chicken breasts on it. Sprinkle generously all over with salt on both sides, then refrigerate, uncovered, for at least 30 minutes and up to overnight.
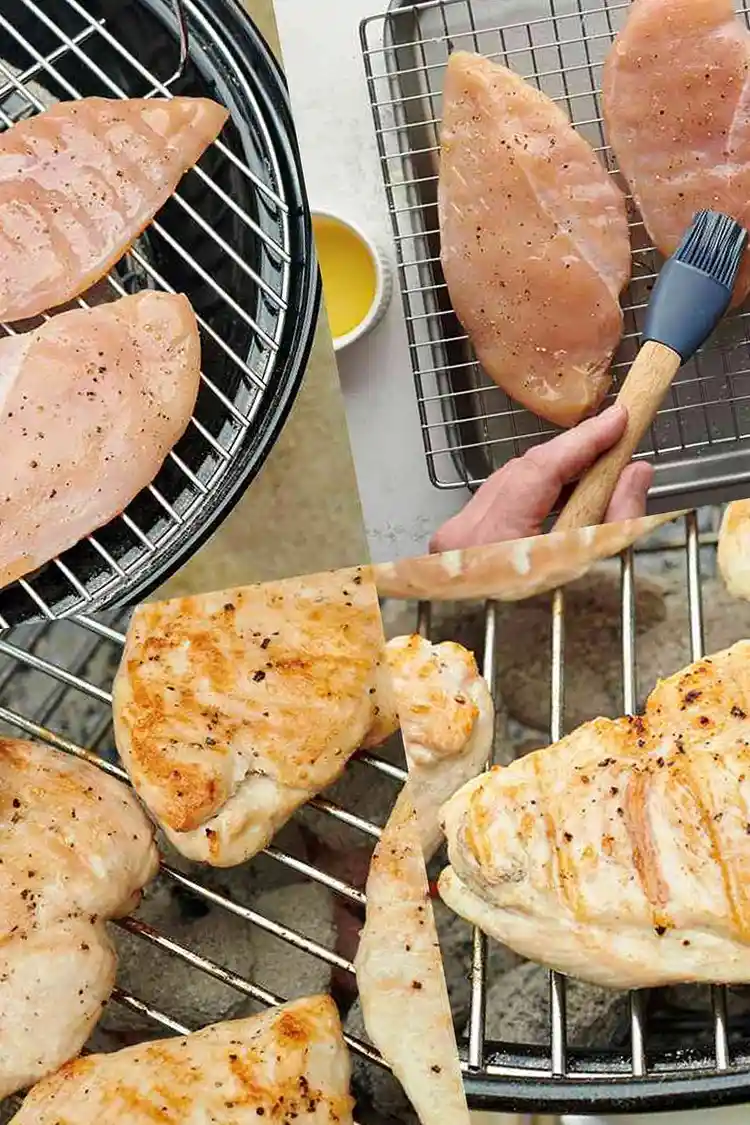
- Step: Light 1 chimney full of charcoal. When all charcoal is lit and covered with gray ash, pour out and arrange coals on one side of charcoal grate. Set cooking grate in place, cover grill, and allow to preheat for 5 minutes. Clean and oil grilling grate.
- Step: If using a wet brine, remove chicken breasts from brine, pat dry with paper towels, season to taste with salt and pepper, and brush lightly with olive oil. If using a dry brine, simply season with pepper and brush lightly with olive oil. Place chicken over hot side of grill and cook until well browned, 3 to 5 minutes.
- Step: Flip and continue to cook until second side is browned and chicken is just cooked through, or until the center registers 150°F/66°C on an instant-read thermometer.
- Step: If second side browns before chicken is done, move to cool side of grill, cover, and let cook until chicken is ready. Remove chicken from grill, let rest 5 minutes, then serve immediately.
Refining Your Grilling Approach
Ensuring Surface Dryness for Better Searing
Regardless of which brining method you choose, always pat the chicken surface completely dry with paper towels before placing it on the hot grate. Moisture on the surface creates steam, which prevents the Maillard reaction needed to create a delicious, golden-brown crust. Dry meat ensures that the olive oil adheres properly and the grill marks are clean and distinct.
Selecting the Right Pounding Tool
If you do not have a specialized meat mallet, a heavy cast-iron skillet or a sturdy rolling pin serves the purpose perfectly. When pounding, start from the center of the chicken breast and work outward with steady, even pressure to avoid tearing the muscle fibers. Maintaining the integrity of the meat keeps it from falling apart during the high-heat grilling process.
Understanding Brine Variations
Comparing Wet and Dry Moisture Techniques
Wet brining introduces extra liquid into the muscle tissues, which creates a very plump and juicy final product. However, the added surface moisture can make achieving a crispy, deep-brown sear slightly more challenging compared to the dry-brining method. Dry brining pulls natural moisture to the surface and allows it to reabsorb, resulting in a slightly more concentrated chicken flavor and a faster, more effective browning process.
Adjusting Brine Times for Consistent Quality
While 30 minutes is the minimum time required for salt to penetrate the chicken effectively, leaving it in a brine for up to six hours can deepen the seasoning profile. Avoid exceeding 12 hours, especially with a wet brine, as the texture of the meat may begin to break down and become excessively soft. Always keep the chicken well-chilled in the refrigerator during the brining window to maintain food safety.
Practical Serving and Flavor Strategies
Balancing Intensity with Fresh Toppings
Since the chicken is seasoned primarily with salt and pepper, it acts as a neutral base that pairs well with a variety of fresh finishing sauces. Consider adding a dollop of herb-forward sauces like chimichurri or a bright lemon-basil gremolata immediately after the meat has finished resting. These additions provide a sharp, acidic contrast to the savory charred exterior of the grilled breast.
Incorporating Complementary Side Dishes
To keep your meal cohesive, pair this chicken with sides that don’t require the same high-heat grilling time, such as a cold cucumber salad or a bowl of roasted root vegetables. Serving the chicken sliced thin over a bed of mixed greens allows the juices from the meat to act as a natural dressing for the salad. Ensure your sides are plated and ready before you take the chicken off the grill to capitalize on the optimal serving temperature.
FAQs
How can I tell if my chicken is done without a thermometer?
If you do not have an instant-read thermometer, use a sharp paring knife to make a small incision in the thickest part of the breast. The juices should run clear, and the internal meat should look opaque rather than translucent or pink. Because you have pounded the chicken to an even 3/4-inch thickness, the cooking time will be quite predictable, usually requiring just about 3 to 5 minutes per side over direct heat.
Why is my chicken sticking to the grill grates?
Sticking usually happens when the grill grate has not been sufficiently cleaned or oiled before adding the protein. Use a stiff wire brush to remove any residual debris from previous cooking sessions, then use a folded paper towel dipped in high-smoke-point oil to wipe the hot grates down. Placing the chicken down and letting it cook undisturbed for the full recommended time allows the proteins to release naturally from the metal once a crust forms.
Can I grill these breasts from frozen?
For the best texture and safety, always thaw the chicken breasts completely in the refrigerator before brining or cooking. Grilling frozen or partially frozen chicken will result in an unevenly cooked piece of meat that is either burnt on the outside or raw in the center. Proper thawing allows the salt in your brine to penetrate evenly throughout the entire piece of meat.
What should I do if the chicken browns before the center is cooked?
This is precisely why the two-zone setup is essential for this recipe. If the exterior develops a beautiful color before the internal temperature hits 150°F, quickly move the breasts to the cooler, indirect side of the grill and close the lid. This traps the ambient heat to finish the cooking process gently without subjecting the surface to the intense, direct heat that causes charring or burning.
Print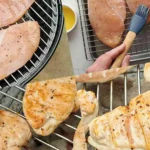
Grilled Boneless Chicken Breasts Recipe
- Total Time: 50 minutes
- Yield: 4 servings 1x
- Diet: High Protein
Description
A comprehensive guide to preparing and grilling boneless, skinless chicken breasts using either wet or dry brining techniques for optimal moisture and flavor.
Ingredients
- 4 boneless, skinless chicken breast halves (6 to 8 ounces each), tender removed
- Kosher salt
- 1/4 cup (55g) sugar (for wet brine)
- Freshly ground black pepper
- 2 tablespoons (30ml) extra-virgin olive oil
Instructions
- Step: Place 1 chicken breast in a resealable plastic bag or between two pieces of plastic wrap. Using a meat pounder, rolling pin, or small skillet, pound chicken breast into an even thickness, about 3/4 inch in height. Repeat with remaining 3 breasts.
- Step: If making a wet brine, dissolve 1/3 cup (80g) kosher salt and 1/4 cup (55g) sugar in 2 quarts (1.9L) water. Place chicken breasts in brine and refrigerate for at least 30 minutes and up to overnight. If making a dry brine, set a wire rack over a rimmed baking sheet and arrange chicken breasts on it. Sprinkle generously all over with salt on both sides, then refrigerate, uncovered, for at least 30 minutes and up to overnight.
- Step: Light 1 chimney full of charcoal. When all charcoal is lit and covered with gray ash, pour out and arrange coals on one side of charcoal grate. Set cooking grate in place, cover grill, and allow to preheat for 5 minutes. Clean and oil grilling grate.
- Step: If using a wet brine, remove chicken breasts from brine, pat dry with paper towels, season to taste with salt and pepper, and brush lightly with olive oil. If using a dry brine, simply season with pepper and brush lightly with olive oil. Place chicken over hot side of grill and cook until well browned, 3 to 5 minutes.
- Step: Flip and continue to cook until second side is browned and chicken is just cooked through, or until the center registers 150°F/66°C on an instant-read thermometer.
- Step: If second side browns before chicken is done, move to cool side of grill, cover, and let cook until chicken is ready. Remove chicken from grill, let rest 5 minutes, then serve immediately.
Notes
A wet brine creates the plumpest, juiciest breast, but it will not brown as deeply and quickly as a dry-brined breast. A dry-brined breast will be juicy with a deeper chicken flavor.
- Prep Time: 5 minutes
- Cook Time: 15 minutes
- Category: Entree
- Method: Grilling
- Cuisine: American
Nutrition
- Serving Size: 1 breast
- Calories: 341 kcal
- Sugar: 0g
- Sodium: 598mg
- Fat: 13g
- Saturated Fat: 3g
- Unsaturated Fat: 9g
- Trans Fat: 0g
- Carbohydrates: 0g
- Fiber: 0g
- Protein: 53g
- Cholesterol: 145mg
Keywords: grilled chicken, chicken breast, grilling, barbecue, simple dinner