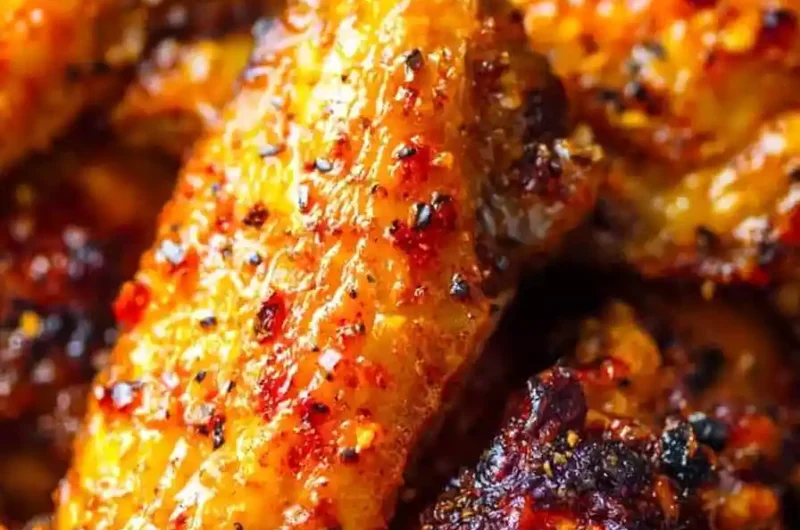
Achieving restaurant-quality crispy wings at home does not require a deep fryer or liters of oil. By using the right combination of high heat and a simple dry coating technique, you can produce wings with exceptionally crunchy skin and succulent meat in your own oven. This straightforward method transforms simple pantry staples into a delicious meal that is perfect for game days, family gatherings, or a quick weekend dinner.

List of ingredients
- 2 pounds chicken wings
- 1 tbsp baking powder
- 1 tsp salt
- 1/2 tsp black pepper
- 1/2 tsp garlic powder
- 1/2 tsp paprika
- 1 tbsp olive oil (optional)
step-by-step instructions
- Step: Preheat oven to 425°F and line a baking sheet with foil. Place a wire rack on top.
- Step: Pat wings completely dry with paper towels.
- Step: Toss wings with baking powder, salt, black pepper, garlic powder, and paprika in a large bowl until evenly coated.
- Step: Arrange wings in a single layer on the wire rack, ensuring they do not overlap.
- Step: Bake for 40–45 minutes, flipping the wings halfway through, until they are golden brown and crispy.
- Step: Serve immediately plain or tossed with your favorite sauce.
Essential methods for achieving maximum crunch
Understanding the role of surface dryness
The most important factor in achieving a crispy skin in the oven is removing as much moisture as possible from the chicken before it enters the heat. When you pat the wings with paper towels, you are removing surface water that would otherwise turn into steam. Steam softens the skin, making it rubbery rather than crunchy. Taking an extra minute to ensure the wings are bone-dry before seasoning makes a massive difference in the final texture.
Why baking powder is the secret ingredient
Baking powder is not just for leavening baked goods; it is a powerful tool for kitchen crisping. When applied to chicken skin, the baking powder reacts with the proteins and fat to create tiny bubbles on the surface during the baking process. These bubbles expand and solidify, creating a highly textured, crunchy surface that mimics the effect of a deep fryer. It is essential to use baking powder specifically, not baking soda, to avoid an unpleasant metallic or bitter aftertaste.
Optimizing airflow with wire racks
When chicken wings bake directly on a solid baking sheet, the bottom side sits in rendered fat and moisture, which prevents it from becoming crisp. Placing the wings on a wire rack lifts them off the surface, allowing convection currents of hot air to circulate 360 degrees around every wing. This constant movement of heat ensures that the underside cooks just as thoroughly as the top, creating a uniform, crispy exterior without needing to manually fry the chicken.
Customizing flavor profiles
Developing signature dry rubs
If you prefer a lighter, mess-free experience, stick to dry seasonings instead of wet sauces. You can easily modify the provided seasoning blend by adding smoked paprika for a barbecue flavor or cayenne pepper for a genuine kick of heat. Consider adding dried herbs like oregano or thyme to the mix to provide an aromatic dimension. Always incorporate the spices into the baking powder mixture before coating the wings to ensure the flavor is evenly distributed across the surface.
Creating balanced sauce pairings
For those who love saucy wings, it is best to apply the sauce immediately after removing the wings from the oven. Because the baked skin is already crisp, adding sauce right before serving allows the skin to remain crunchy for longer. You can experiment with mixing melted butter with various hot sauces, or combine honey with citrus zest for a sweet and tangy glaze. Using melted butter helps the sauce adhere better to the crispy coating, providing a professional finish.
Utilizing high-heat finishes
If you find that your wings are cooked through but not quite as dark as you would like, use your oven’s broiler feature. After the initial 45 minutes of baking, move the oven rack to the top position and broil the wings for 2 to 3 minutes. Keep a very close eye on them during this time, as the high direct heat can burn the skin very quickly. This quick burst of heat caramelizes the surface and delivers that final, satisfying crunch.
Troubleshooting common wing issues
Handling stuck skin
Occasionally, chicken skin may stick to the wire rack, which can be frustrating when you try to flip or remove the wings. To prevent this, lightly spray the wire rack with a neutral vegetable oil spray before placing the wings down. If you do not have spray, you can carefully brush the rack with a small amount of oil using a pastry brush or a folded paper towel. This small layer of protection ensures that the crispy skin stays intact on the wing rather than on the rack.
Fixing under-browned wings
If your wings are cooked through but look pale, ensure your oven temperature is accurate by using an oven thermometer. Many home ovens have hot or cold spots, or may run cooler than the dial suggests. If the wings seem under-browned at the 45-minute mark, simply extend the baking time by 5 to 10 minutes. Alternatively, turn up the oven temperature to 450°F for the final few minutes of cooking to force the skin to color faster.
Preventing greasy outcomes
If the wings feel overly greasy, it is likely that the fat was not rendered properly or the oven temperature was too low. Ensure you are spacing the wings out properly so the oven heat can properly evaporate excess surface oils. If your wings are tightly crowded, they will steam in their own rendered fat, resulting in a soggy, greasy texture. Always use two baking sheets if necessary to ensure that the wings remain in a single, well-spaced layer.
FAQ for perfect oven wings
Can I prepare these wings in an air fryer?
Yes, the method is very similar, but you should adjust the temperature and time to accommodate the smaller, more powerful fan in the air fryer. Typically, you should set the air fryer to 400°F and cook the wings for 25 to 30 minutes, flipping them halfway through the process. The air circulation in an air fryer is even more aggressive than a standard oven, which often results in an even crispier skin in a shorter amount of time.
Is it necessary to use oil?
While the recipe lists olive oil as optional, it is not strictly required for the wings to get crispy because chicken wings are naturally high in fat. The fat within the skin will render out during the baking process, essentially frying the skin in its own natural juices. Adding a light coating of oil can help the seasoning adhere more effectively and can result in a deeper, more even golden-brown color, but it is entirely up to your personal preference.
How do I store and reheat leftovers?
Store any leftover wings in an airtight container in the refrigerator for up to 3 days. To reheat them without losing their crispness, avoid the microwave at all costs, as it will turn the skin soft and rubbery. Instead, spread the cold wings out on a wire rack set over a baking sheet and heat them in a preheated 400°F oven for about 8 to 10 minutes. This process re-renders the fat in the skin and returns the wing to its original crispy state.
What is the benefit of splitting the wings?
Splitting the wings into drumettes and flats is recommended because it makes them easier to eat and allows them to cook much more evenly. A whole wing has varying thicknesses, which can lead to the wing tip burning before the meat near the joint is fully cooked. By separating them, you create uniform pieces that have a similar mass, ensuring that every piece finishes cooking at the exact same time without any parts becoming dry or overcooked.
Print
Homemade Crispy Chicken Wings in the Oven
- Total Time: 55 minutes
- Yield: 4 servings 1x
- Diet: Gluten-Free
Description
Crispy, golden-brown chicken wings made in the oven without the need for deep frying. This simple, reliable method uses baking powder to ensure a crunchy texture while keeping the meat juicy and tender.
Ingredients
- 2 pounds chicken wings
- 1 tbsp baking powder
- 1 tsp salt
- 1/2 tsp black pepper
- 1/2 tsp garlic powder
- 1/2 tsp paprika
- 1 tbsp olive oil (optional)
Instructions
- Step: Preheat oven to 425°F and line a baking sheet with foil. Place a wire rack on top.
- Step: Pat wings completely dry with paper towels.
- Step: Toss wings with baking powder, salt, black pepper, garlic powder, and paprika in a large bowl until evenly coated.
- Step: Arrange wings in a single layer on the wire rack, ensuring they do not overlap.
- Step: Bake for 40–45 minutes, flipping the wings halfway through, until they are golden brown and crispy.
- Step: Serve immediately plain or tossed with your favorite sauce.
Notes
For the best results, ensure the wings are very dry before applying the seasoning. Avoid using baking soda as a substitute, as it will affect the flavor. If using a convection oven, adjust the temperature to 400°F and reduce time to 35-40 minutes.
- Prep Time: 10 minutes
- Cook Time: 45 minutes
- Category: Appetizer
- Method: Baking
- Cuisine: American
Nutrition
- Serving Size: 8 ounces
- Calories: 320 kcal
- Sugar: 0 g
- Sodium: 780 mg
- Fat: 22 g
- Saturated Fat: 6 g
- Unsaturated Fat: 14 g
- Trans Fat: 0 g
- Carbohydrates: 2 g
- Fiber: 0 g
- Protein: 28 g
- Cholesterol: 110 mg
Keywords: chicken wings, baked wings, crispy wings, oven baked, easy appetizer, party food