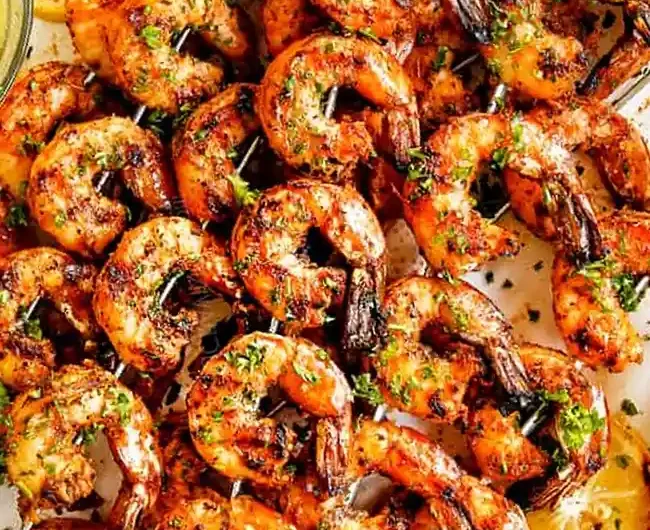
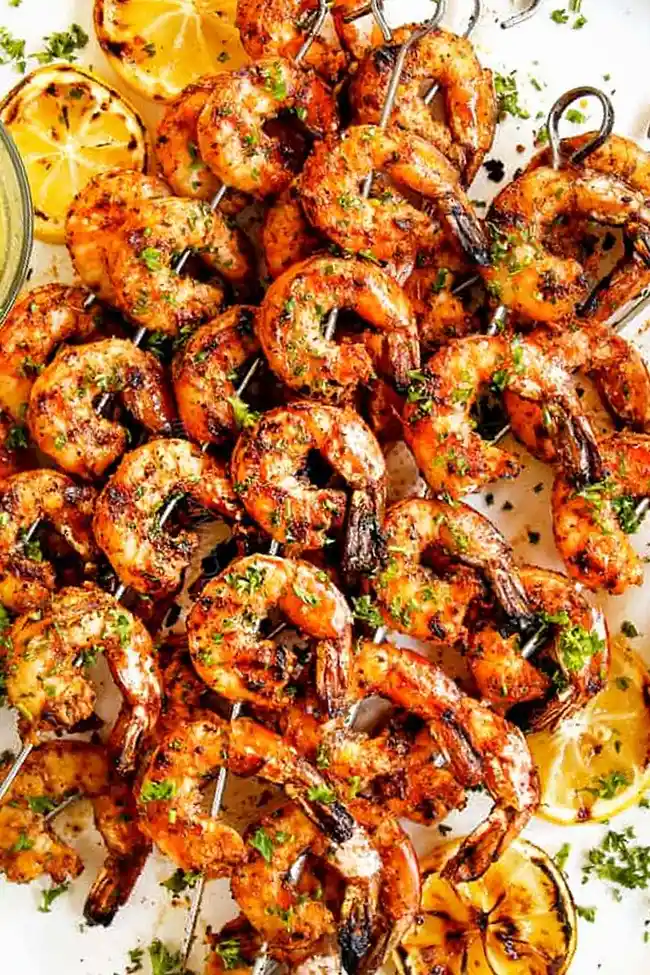
This vibrant grilled shrimp recipe is a perfect solution for a quick, restaurant-style dinner that comes together in mere minutes. By utilizing a simple pantry-friendly marinade and a refreshing finish of lemon parsley butter, you can achieve a charred, succulent result every time you light up the grill. It is an incredibly versatile dish that works just as well for busy weeknights as it does for celebratory backyard gatherings.
List of ingredients
- 2 pounds large shrimp (21-25 ct), peeled, deveined and patted dry
- 1/4 cup extra virgin olive oil
- 2 tablespoons lemon juice
- 2 teaspoons smoked paprika
- 1 1/2 tsp onion powder
- 1 1/2 tsp garlic powder
- 1 1/2 tsp dried oregano
- 1 1/2 tsp dried basil
- 1 tsp salt
- 1 tsp black pepper
- 1/4-1/2 teaspoon cayenne pepper
- 4 tablespoons melted unsalted butter
- 1 1/2 tablespoons finely chopped parsley
- 1 1/2 tablespoon lemon juice
step-by-step instructions
- Step: If using wooden skewers, soak them for at least 30 minutes.
- Step: Meanwhile, make the Lemon Parsley Butter by melting butter in a small bowl, then mixing in lemon juice and parsley. Reheat briefly in the microwave before serving if needed.
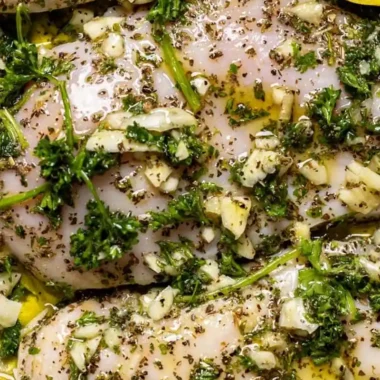
- Step: Whisk the marinade ingredients together in a large bowl. Add the shrimp and stir until evenly coated. Marinate for 15-30 minutes at room temperature.
- Step: Heat the grill to medium-high heat (400 degrees F), clean the grates, and grease with vegetable oil.
- Step: Thread the shrimp onto skewers, piercing through the tail and the head section for stability.
- Step: Grill for 2 minutes per side or until the shrimp are golden and opaque.
- Step: Remove from grill and serve with the prepared Lemon Parsley Butter and fresh lemon wedges.
Refining Your Grilling Technique
Ensuring Even Cooking with Proper Skewering
When you skewer the shrimp, pinning them through both the tail and the thicker head section is vital. This technique prevents the shrimp from spinning around on the metal or wood, which makes it much easier to flip the entire skewer at once. When all shrimp on the skewer are anchored firmly, they maintain consistent contact with the heat source, ensuring no individual piece is left raw while others overcook.
Achieving the Perfect Sear on Grill Grates
A successful sear depends on a clean, hot surface. Before adding the shrimp, brush your grill grates thoroughly to remove any carbon buildup from previous meals. A clean surface allows for the development of those appetizing grill marks and prevents the delicate shrimp meat from tearing when it is time to turn them. Applying a thin layer of high-smoke-point oil like canola or vegetable oil directly to the grates further minimizes sticking.
Adapting for Indoor Cooking
Transitioning to the Kitchen Stove
If you prefer to cook this dish inside, a heavy-duty cast iron skillet is your best tool. Heat one tablespoon of olive oil over medium-high heat until it shimmers. Cook the shrimp in a single layer to avoid overcrowding, which helps them sear rather than steam. Aim for about 3 minutes per side, or just until the flesh transitions from translucent to opaque, which usually indicates the interior is perfectly juicy.
Utilizing the Oven for Hands-Off Prep
Roasting the shrimp in the oven is another effective method, especially when you are preparing a large quantity at once. Preheat your oven to 400 degrees Fahrenheit and arrange the shrimp in a single layer on a parchment-lined or foil-lined baking sheet. Roast for 6 to 8 minutes, keeping a close eye on the color to ensure they are removed the moment they turn opaque, preserving their delicate moisture.
Ingredient Substitutions and Enhancements
Customizing the Heat Level
The heat level in this recipe is largely driven by the cayenne pepper. If you want a more complex spice profile, consider swapping the cayenne for a touch of chipotle chili powder, which adds a deep, earthy heat that complements the smoked paprika. Conversely, if you prefer a milder version, you can reduce or entirely omit the cayenne without significantly compromising the savory depth provided by the garlic and onion powders.
Adding Complementary Ingredients to Skewers
To turn this dish into a full meal, you can thread vegetables onto the skewers between the shrimp pieces. Starchy items like pre-steamed baby red potato chunks, thick slices of zucchini, or colorful bell pepper squares work exceptionally well. Because these vegetables have different cooking times, ensure you cut them into 1.5-inch pieces so they tenderize at a rate similar to the fast-cooking shrimp.
Serving and Presentation Strategies
Creative Ways to Serve Grilled Shrimp
While these skewers are excellent on their own, they shine when paired with various bases. Serving the shrimp over a bed of creamy risotto or alongside a bowl of buttered angel hair pasta creates a luxurious meal. For a lighter approach, combine the grilled shrimp with a crisp garden salad or a refreshing cucumber-tomato mix, using the lemon-parsley butter as a de facto dressing for the greens.
Pairing with Hearty Sides
This dish balances perfectly with traditional comfort sides that can absorb the extra lemon-parsley butter. Sweet cornbread, toasted garlic bread, or even a side of roasted root vegetables provides a nice textural contrast to the soft, succulent shrimp. If you are hosting a larger group, simple sides like grilled pineapple or a cold pasta salad can turn a modest seafood dish into a comprehensive buffet feast.
Common Questions About Shrimp Prep
How can I tell if my shrimp are fully cooked?
The visual shift from translucent gray to opaque pink is the primary indicator of doneness. Furthermore, if you look closely at the crevice along the back of the shrimp where the vein was removed, the base of that crevice should look opaque and white rather than raw or translucent. If the shrimp have curled into a tight ‘O’ shape, they are typically overcooked; aim for a ‘C’ shape for the most tender results.
Why should I avoid long marination times?
While marinating is useful for flavor infusion, the presence of acidic lemon juice in the marinade can negatively impact the meat if left for too long. If the shrimp sits in the acidic environment for more than 30 minutes, the lemon juice begins to chemically denature the proteins, resulting in a mushy or mealy texture rather than a firm, snappy bite. Adhering to the 15 to 30-minute window ensures the best balance of flavor and structural integrity.
What is the benefit of purchasing pre-peeled shrimp?
Purchasing shrimp that is already peeled and deveined is a significant time-saver, particularly when cooking for a large group. Because the prep work is already handled by the supplier, you can move directly to the seasoning phase after a quick thaw. This ensures you can get from pantry to grill in under 25 minutes, making this an ideal recipe for when you are short on time but still want a high-quality, professional result.
Can this recipe be prepared ahead of time?
It is best to serve the shrimp immediately after grilling. If you must prepare elements in advance, you can measure out your dry spice rub and mix the lemon-parsley butter well ahead of time. Keep the shrimp chilled and separate until you are ready to cook, as the actual marinating should happen right before the heat is applied to ensure the shrimp maintains its ideal texture and does not release too much moisture during the searing process.
Print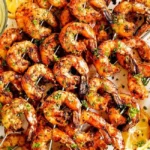
Easy Grilled Shrimp with Lemon Parsley Butter
- Total Time: PT25M
- Yield: 4 servings 1x
- Diet: Pescatarian
Description
This Grilled Shrimp recipe is a back-pocket ace that utilizes pantry-friendly ingredients to create restaurant-quality shrimp in minutes with Lemon Parsley Butter! This simple grilled shrimp recipe can also be cooked on the stove or in the oven and it can be served with practically anything.
Ingredients
- 2 pounds large shrimp (21–25 ct), peeled, deveined and patted dry
- 1/4 cup extra virgin olive oil
- 2 tablespoons lemon juice
- 2 teaspoons smoked paprika
- 1 1/2 tsp onion powder
- 1 1/2 tsp garlic powder
- 1 1/2 tsp dried oregano
- 1 1/2 tsp dried basil
- 1 tsp salt
- 1 tsp black pepper
- 1/4–1/2 teaspoon cayenne pepper
- 4 tablespoons melted unsalted butter
- 1 1/2 tablespoons finely chopped parsley
- 1 1/2 tablespoon lemon juice
Instructions
- Step: If using wooden skewers, soak them for at least 30 minutes.
- Step: Meanwhile, make the Lemon Parsley Butter by melting butter in a small bowl, then mixing in lemon juice and parsley. Reheat briefly in the microwave before serving if needed.
- Step: Whisk the marinade ingredients together in a large bowl. Add the shrimp and stir until evenly coated. Marinate for 15-30 minutes at room temperature.
- Step: Heat the grill to medium-high heat (400 degrees F), clean the grates, and grease with vegetable oil.
- Step: Thread the shrimp onto skewers, piercing through the tail and the head section for stability.
- Step: Grill for 2 minutes per side or until the shrimp are golden and opaque.
- Step: Remove from grill and serve with the prepared Lemon Parsley Butter and fresh lemon wedges.
Notes
Shrimp should be stored in an airtight container in the refrigerator for up to three days. To reheat, warm gently in the microwave or on the stove, being careful not to cook them further to keep them tender.
- Prep Time: PT20M
- Cook Time: PT5M
- Category: Appetizer
- Method: Grilling
- Cuisine: American
Nutrition
- Serving Size: 1/4 of recipe
- Calories: 285 kcal
- Sugar: 1 g
- Sodium: 650 mg
- Fat: 18 g
- Saturated Fat: 6 g
- Unsaturated Fat: 11 g
- Trans Fat: 0 g
- Carbohydrates: 3 g
- Fiber: 1 g
- Protein: 26 g
- Cholesterol: 190 mg
Keywords: grilled shrimp, shrimp skewers, lemon parsley butter, quick shrimp recipe, seafood